
Beautiful Plants For Your Interior
Beautiful Plants For Your Interior
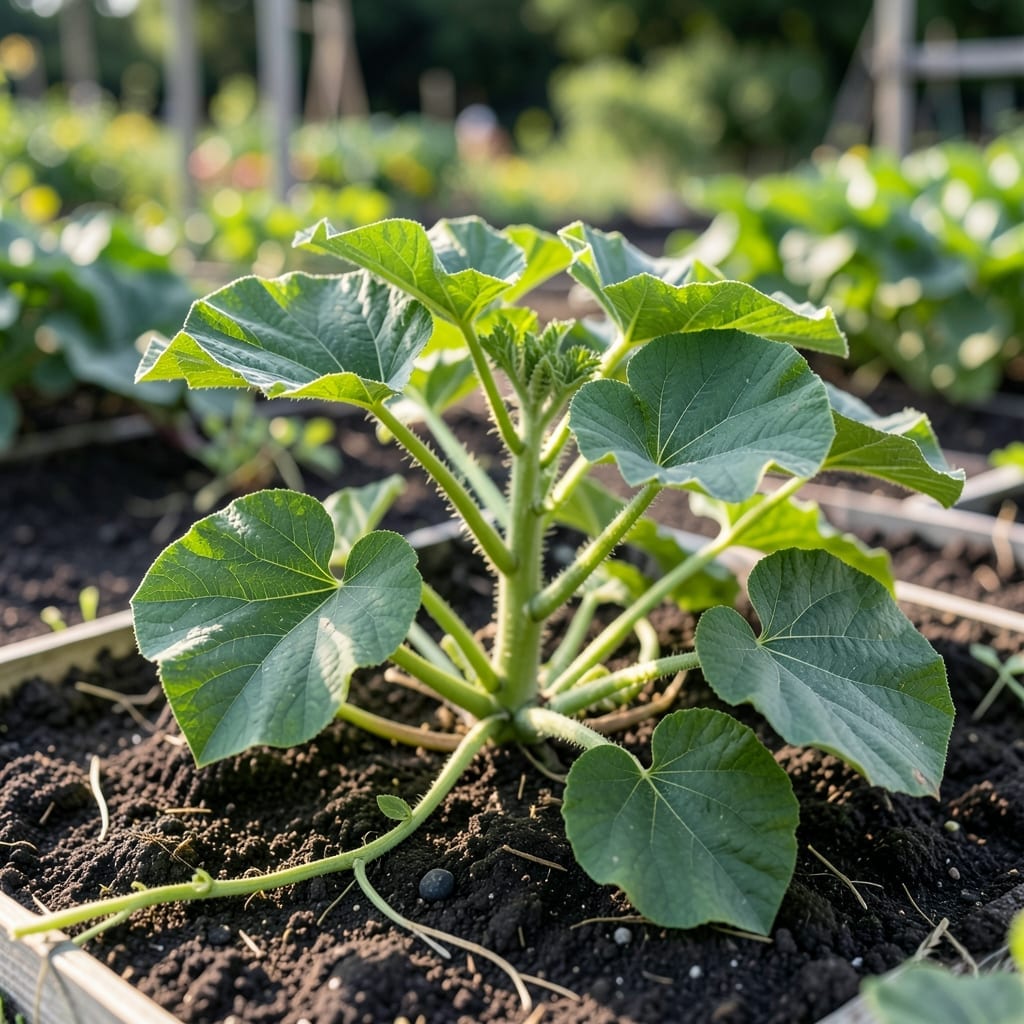
Those first true leaves on pumpkin seedlings tell you everything. I’ve learned that healthy ones are deep green, firm, and slightly fuzzy—anything less means trouble.
Catching issues early saves your plants. Too much water turns leaves yellow, while pale spots often signal pests. Get this stage right, and you’re set for strong vines and a bountiful harvest.
📚 In This Guide
Here’s how I spot early signs of strong growth and keep seedlings thriving.
The first leaves to appear are cotyledons—round, smooth, and often slightly fuzzy. These aren’t true leaves but they reveal a lot. I look for bright green color and firm texture. Yellowing or wilting here means the seed didn’t have enough energy to sprout properly.
If cotyledons show brown edges, it usually signals too much water or poor drainage. I check soil moisture by sticking my finger 1 inch deep—if it feels soggy, I hold off watering for 2-3 days while the seedling recovers.
After cotyledons, true leaves emerge with jagged edges and deeper green color. These should appear within 7-10 days of germination. I watch for symmetrical growth—uneven development often means uneven light exposure.
Healthy true leaves feel slightly rough to the touch, not smooth or sticky. If leaves appear pale or translucent, the seedling likely needs more light. I move plants to full sun or under grow lights for 14-16 hours daily to correct this.
Pumpkin seedlings show water stress quickly. Drooping leaves in the heat of the day often recover by evening, but persistent wilting means the roots need moisture. I water at soil level with 1 cup per seedling, ensuring the stream doesn’t splash the leaves to prevent disease.
Overwatering shows up as yellowing between leaf veins or blackened stems. I let the top ½ inch of soil dry between waterings. The seedling will tell you—leaves should spring back when gently pressed.
Leaves curling upward or turning purple along edges signal nutrient issues. I use a balanced, water-soluble fertilizer at half strength every 10-14 days once true leaves appear. Yellowing between veins often indicates nitrogen deficiency, which I address immediately.
Leggy seedlings with widely spaced leaves scream for more light. I position lights 2-4 inches above the plants and adjust as they grow. Strong seedlings have thick stems and compact leaf clusters.
Powdery mildew appears as white spots on leaves. I increase air circulation and avoid wetting foliage when watering. For severe cases, I remove affected leaves immediately and treat with neem oil.
Pests like aphids cluster on leaf undersides. I blast them off with water first, then apply insecticidal soap if they return. Healthy seedlings bounce back quickly when caught early—just keep an eye on new growth for signs of recovery.
Small adjustments in your approach can mean the difference between struggling seedlings and thriving plants.
The Moisture Check: In Step 1, when assessing cotyledons, inserting your finger 1 inch deep into the soil is non-negotiable. If it feels soggy, resist the urge to water for 2-3 days—this recovery period is critical for preventing root rot while allowing the seedling to stabilize.
Light Exposure Precision: Step 2 emphasizes that true leaves should appear within 7-10 days. If they’re pale or translucent, move them to full sun or under grow lights for 14-16 hours daily. Positioning lights 2-4 inches above the plants, as mentioned in Step 4, ensures compact growth and thick stems.
Watering Technique: Step 3’s method of watering at soil level with 1 cup per seedling prevents disease by avoiding leaf contact. If you notice overwatering signs like yellowing between veins, let the top ½ inch of soil dry between sessions—this small pause helps roots breathe.
Yellowing leaves often signal overwatering, nutrient deficiency, or poor drainage. Check soil moisture—let it dry slightly between waterings—and ensure your seedlings get balanced fertilizer. If the issue persists, test soil pH (6.0–6.8 is ideal).
Healthy pumpkin seedlings typically sprout their first true leaves (not cotyledons) within 7–10 days after germination. If growth is slow, verify warm soil (70–90°F) and consistent moisture.
Yes! Young pumpkin leaves are edible and nutritious, often used in salads or cooked like spinach. Harvest sparingly to avoid stunting seedling growth. Older leaves may taste bitter.
Wilting often means underwatering or heat stress. Water deeply at the base (not leaves) and provide afternoon shade in extreme heat. If wilting persists, check for pests or root rot.