
Beautiful Plants For Your Interior
Beautiful Plants For Your Interior
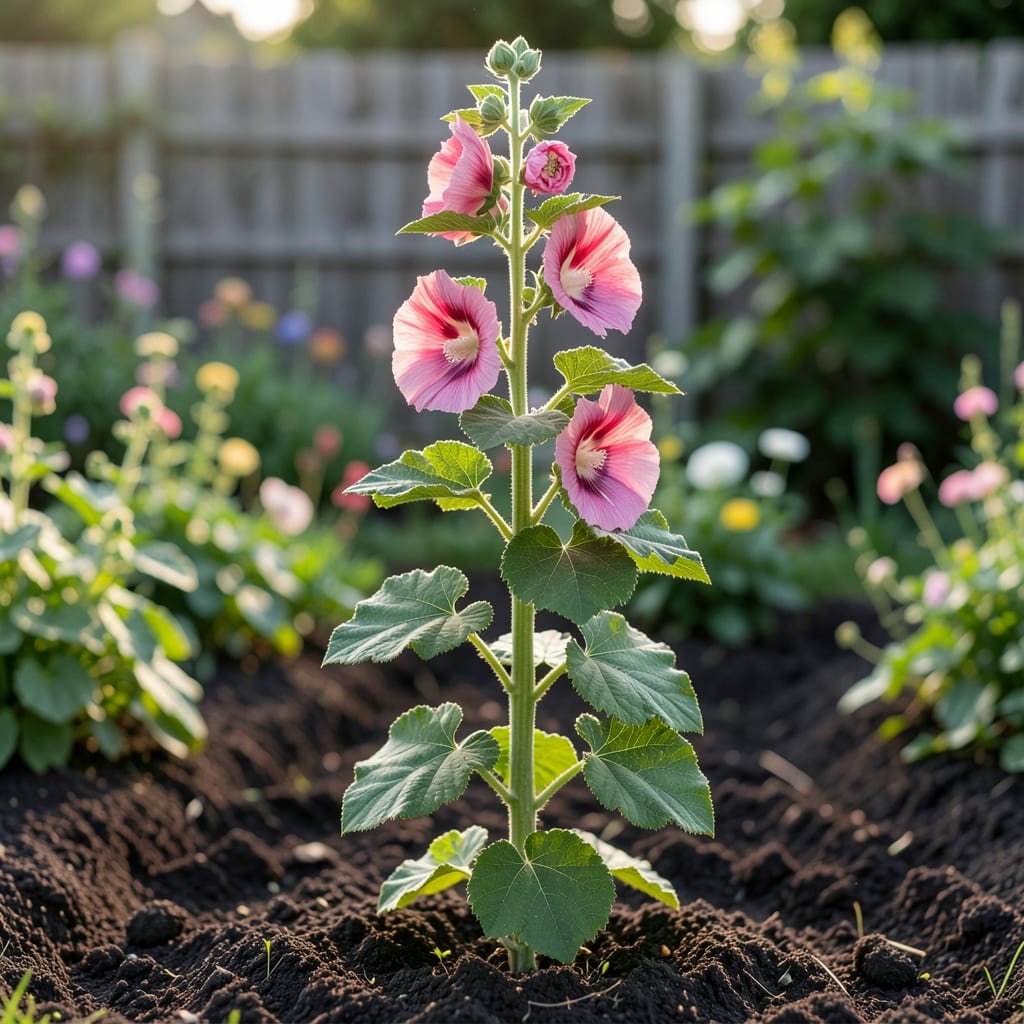
Hollyhock leaves tell you exactly what’s wrong before the blooms even appear. I learned this the hard way after losing a whole row to rust one season.
Spotted, yellowed, or crispy leaves each point to a different issue—fungus, pests, or just thirsty roots. The good news is organic fixes work fast once you know what you’re dealing with.
📚 In This Guide
Mastering hollyhock leaf identification and care is straightforward once you know what to look for.
Healthy hollyhock leaves are large, rounded, and deeply lobed with a slightly rough texture. They typically grow 6-10 inches wide on mature plants, with prominent veins radiating from the center. The edges often show shallow, wavy indentations rather than sharp teeth.
Color should be a vibrant medium green with no yellowing or spotting. The undersides appear slightly paler but still uniform. I always check the stem attachment first—hollyhock leaves have a distinct heart-shaped base where they meet the stalk, which is a key identifier.
Hollyhock rust appears as orange-brown pustules on the undersides of leaves, often causing yellow spots on top. Sawfly larvae leave skeletonized patterns by consuming tissue between veins. Japanese beetles create irregular, lace-like holes in the leaf surface.
Powdery mildew coats leaves in a white, powdery film, typically in humid conditions. For accurate diagnosis, examine both leaf surfaces with a hand lens. I’ve found that rust often starts on lower leaves first, while beetle damage appears randomly throughout the plant.
For rust and mildew, remove and destroy infected leaves immediately to prevent spread. Apply neem oil or a baking soda solution (1 teaspoon baking soda per quart of water) every 7-10 days during active growth. Always spray in the evening to avoid leaf burn from sun exposure.
Handpick sawfly larvae and Japanese beetles early in the morning when they’re sluggish. For severe infestations, use spinosad spray, being sure to cover both leaf surfaces thoroughly. I maintain a 3-foot buffer between hollyhocks and other susceptible plants to limit disease transmission.
Space plants 2-3 feet apart to ensure good air circulation, which reduces humidity-related diseases. Water at the base of the plant rather than overhead to keep foliage dry. A 2-inch layer of mulch helps prevent soil-borne spores from splashing onto leaves during rain.
Rotate planting locations yearly to avoid buildup of pathogens in the soil. I’ve had best results with hollyhocks planted in full sun positions, as shaded plants develop weaker stems and more disease-prone foliage. Regularly remove fallen leaves and plant debris from the garden bed.
These subtle details make all the difference when identifying and caring for hollyhock foliage.
Visual Identification Tip: In Step 1, focus on the heart-shaped base where leaves meet the stalk—that’s the most reliable identifier. The 6-10 inch width is a good guideline, but I’ve found that mature plants in full sun often produce leaves at the upper end of that range, while shaded specimens may stay closer to 6 inches.
Diagnostic Shortcut: For Step 2, always check the undersides of leaves first. Rust pustules appear there before you’ll see yellow spots on top, and powdery mildew is more visible against the paler underside. This saves time when inspecting multiple plants.
Timing Matters: When applying the baking soda solution in Step 3, the 7-10 day interval is crucial. Shorter intervals won’t give the treatment time to work, while longer gaps allow problems to spread. Evening application prevents leaf burn, as the solution can magnify sunlight.
Prevention Focus: The 3-foot buffer mentioned in Step 3 isn’t just for disease control—it also improves air circulation. Combined with the 2-3 foot spacing in Step 4, this creates an environment where hollyhocks can thrive with minimal intervention.
Look for yellow or brown spots, rust-colored pustules, or powdery mildew on the leaves. Healthy hollyhock leaves are broad, lobed, and deep green.
Act early! Treat at the first sign of discoloration or spots, ideally in dry weather. Morning applications allow foliage to dry quickly, reducing fungal spread.
Yes! Use neem oil, baking soda sprays (1 tsp per quart of water), or copper fungicides. Remove and destroy heavily infected leaves to prevent spread.
Rust thrives in wet, humid conditions. Improve air circulation, avoid overhead watering, and clean up fallen leaves to break the fungus’s life cycle.
They often bounce back if the roots remain healthy. Prune affected leaves, apply organic treatments, and ensure good cultural practices for recovery.