
Beautiful Plants For Your Interior
Beautiful Plants For Your Interior
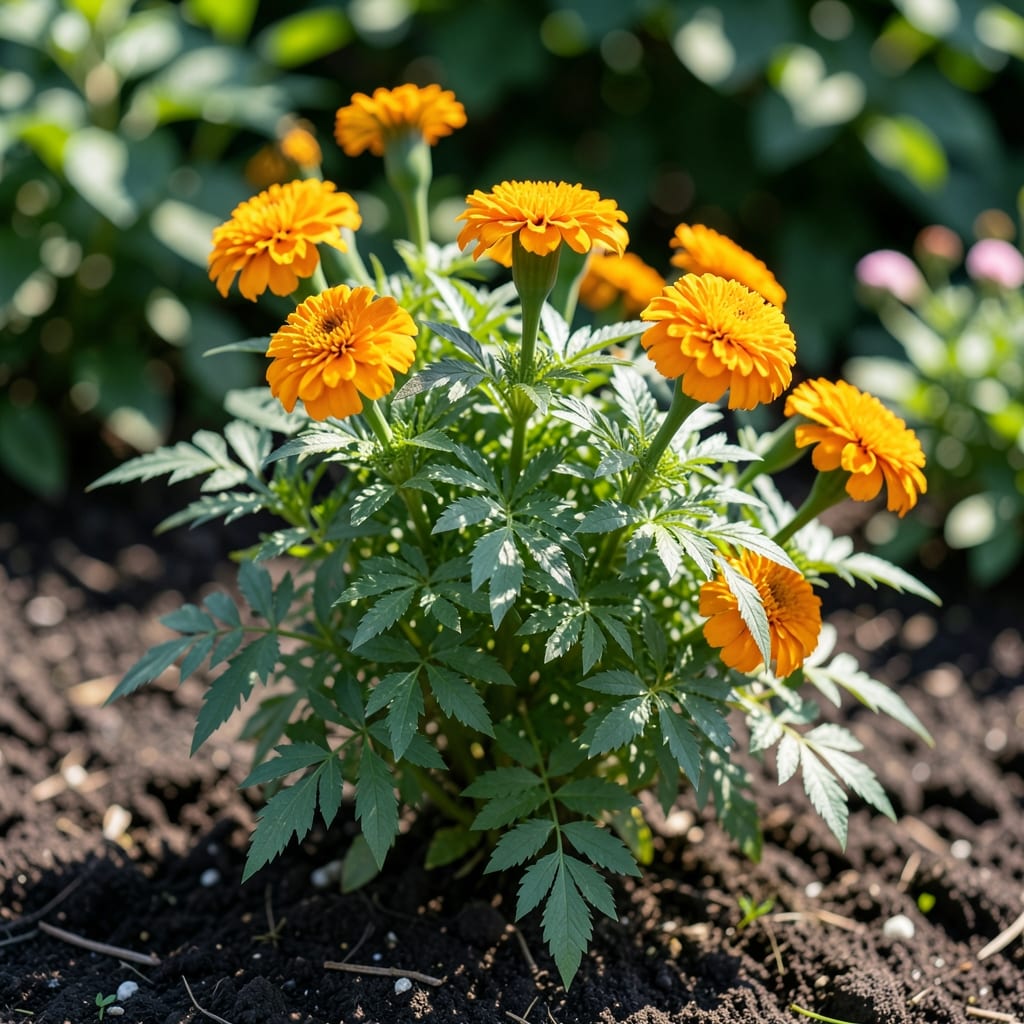
Marigold leaves reveal more about plant health than you’d think. Their deep green, feathery appearance signals a thriving plant, while discoloration or spots often point to trouble.
I check mine weekly—healthy foliage means stronger pest resistance and more vibrant blooms. The leaves even release a scent that repels some garden invaders naturally.
📚 In This Guide
Here’s how I distinguish thriving marigold foliage from struggling plants with precision.
Healthy marigold leaves display a deep, vibrant green that looks almost velvety to the eye. I start by assessing the color from a slight distance—6-12 inches away—to catch any subtle variations. The green should be consistent across all foliage, with no yellowing, browning, or pale spots.
Watch for mottling or streaking, which often signals nutrient deficiencies or viral issues. Real talk: even in ideal conditions, the oldest bottom leaves may yellow slightly as the plant matures, but fresh growth should always look rich and uniform.
Marigold leaves should have a firm, slightly rough texture when you run your fingers across the surface. The edges should appear crisp and well-defined, not wilted or curled. I check both the upper and lower surfaces for signs of pests or disease—healthy leaves feel dry and show no sticky residue.
Pay attention to the leaf arrangement, too. Marigolds produce opposite or alternate leaves depending on the variety, but in all cases, they should emerge at regular intervals along the stem. Any distortion in this pattern often indicates stress or damage.
Mature marigold leaves typically measure 1-3 inches long with a lance-shaped or slightly serrated appearance. The shape should be consistent across the plant, with newer leaves at the top matching the form of older ones below. I compare leaves from different parts of the plant to confirm uniformity.
Smaller than average leaves might suggest insufficient light or nutrients, while oversized leaves can indicate excessive nitrogen. Here’s the thing—marigolds are forgiving, but these size variations are your first clue that growing conditions need adjustment.
Healthy marigolds produce new leaves at a steady pace, with visible growth every 3-5 days during active growing seasons. I examine the stem tips for fresh, unfurling foliage—this is where the most vibrant green should be. The presence of multiple new leaves confirms the plant is thriving.
Also check the leaf attachment points. Strong stems hold leaves at a 45-degree angle or slightly upward, not drooping. If lower leaves begin to drop prematurely while upper growth looks healthy, it’s often just natural maturation rather than a problem.
The undersides tell a story most gardeners miss. Healthy marigold leaves have a slightly lighter green underside but no spots, webbing, or unusual markings. I gently lift leaves to check for pest activity—spider mites often leave fine silken threads, while aphids appear as tiny green or black dots.
Don’t skip this (I learned the hard way): early pest detection here prevents infestations from spreading to the entire plant. The underside should feel smooth and dry, with visible veins that match the pattern you see on the upper surface.
These insights will help you identify healthy foliage with confidence and precision.
The Distance Factor: In Step 1, assessing color from exactly 6-12 inches away is critical. This range allows you to spot subtle variations that might indicate early stress while still seeing the overall pattern. Any closer and you risk missing the forest for the trees; any farther and you might overlook critical details.
Texture Tell: Step 2 emphasizes that healthy leaves should feel firm and slightly rough. Confession: I skipped this tactile check for years and wondered why my pest problems kept spreading. The texture is your first warning system—sticky residue or softness often precedes visible damage by days.
Growth Pattern Clues: The 3-5 day growth cycle mentioned in Step 4 is your timeline for assessment. If you’re not seeing new leaf development within this window during active seasons, it’s time to evaluate your light, water, or nutrient conditions. This regularity is marigolds’ way of communicating their well-being.
Underside Investigation: Step 5’s emphasis on checking leaf undersides isn’t just about pests. The 45-degree angle where leaves attach to stems (from Step 4) combined with clean undersides gives you a complete picture of plant health. I learned the hard way that skipping this step means missing early warning signs.
Yes, marigold leaves (especially Tagetes minuta or T. patula) are edible and used in salads or teas. Ensure they’re pesticide-free and consumed in moderation, as excessive intake may cause digestive discomfort.
Yellow leaves often signal overwatering, poor drainage, or nutrient deficiencies. Check soil moisture and ensure proper drainage. If persistent, test soil pH (6.0–7.0 is ideal) or add balanced fertilizer.
Harvest leaves in the morning when oils are most concentrated. Choose young, tender leaves for culinary use. For medicinal purposes, pick mature leaves just before flowering for maximum potency.
Try neem oil, garlic spray, or companion planting with basil and mint. These repel pests like aphids and whiteflies similarly to marigold’s natural thrips-deterring properties.
Remove infected leaves immediately. Improve airflow, avoid overhead watering, and apply a baking soda solution (1 tsp baking soda + 1 quart water + a drop of dish soap). Severe cases may require fungicide.