
Beautiful Plants For Your Interior
Beautiful Plants For Your Interior
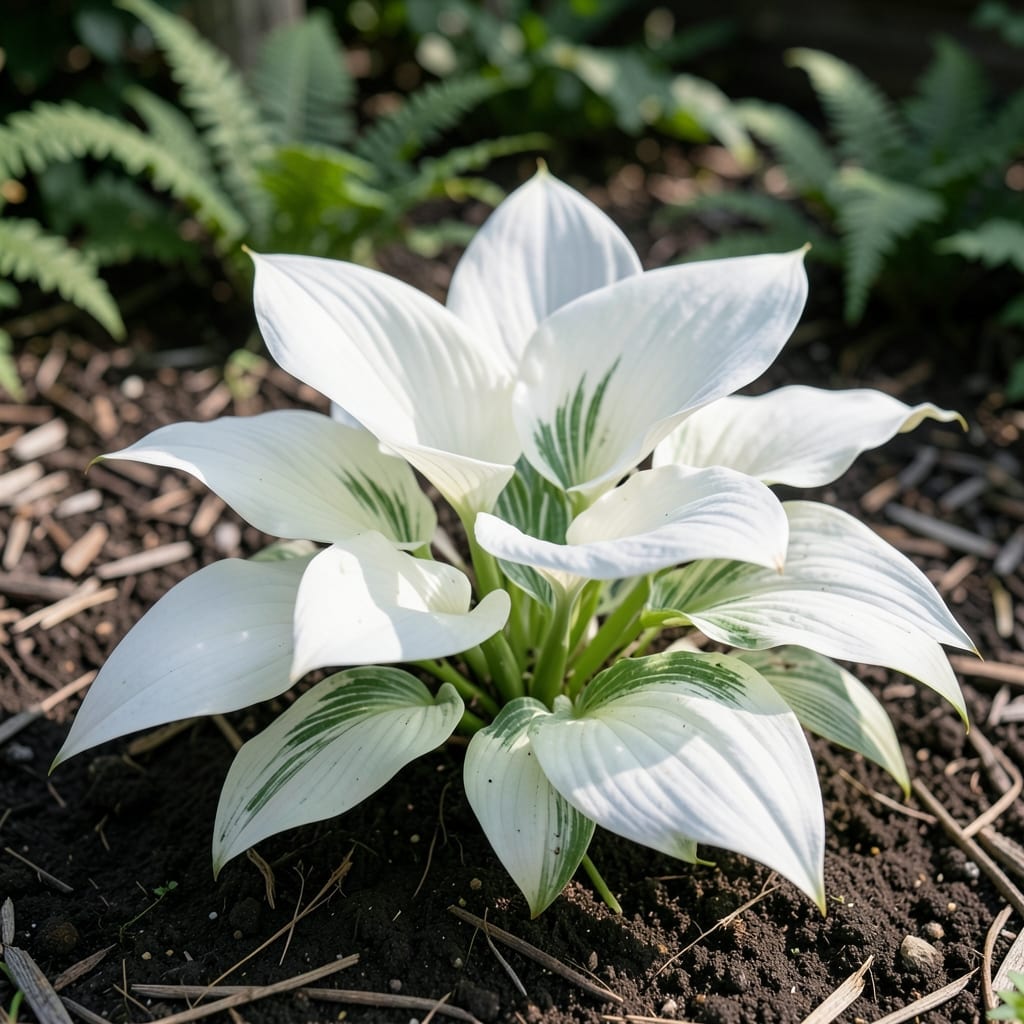
White feather hostas bring shocking elegance to shady spots where other plants struggle. I planted my first clump under a maple tree three years ago, and now it’s the centerpiece of that corner.
These perennials thrive in low light with minimal care, rewarding you with striking variegation. They spread slowly but fill in beautifully over 2-3 seasons, and deer usually leave them alone.
📚 In This Guide
This method ensures vibrant foliage and healthy growth for years to come.
Select a site with partial to full shade, as direct sunlight can scorch the delicate white leaves. I’ve found that morning sun with afternoon shade produces the best color contrast in the foliage. Avoid areas with strong winds, which can tear the broad leaves.
The soil should be well-draining yet rich in organic matter. Test your soil by digging a 12-inch hole and filling it with water—if it drains within 1-2 hours, you’re in good shape. Heavy clay or sandy soil will need amending with compost before planting.
Loosen the soil to a depth of 18 inches and mix in a generous amount of compost or well-rotted manure. White Feather hostas thrive in slightly acidic to neutral soil with a pH between 6.0 and 7.0. A soil test kit can confirm this, but most garden soils fall within this range naturally.
If your soil is particularly poor, consider adding a slow-release fertilizer at this stage. This ensures the plants have access to nutrients as they establish. I always water the prepared bed thoroughly and let it settle overnight before planting the next day.
Dig a hole twice as wide as the root ball but only as deep as the container it came in. Place the hosta in the hole so the crown (where the roots meet the foliage) sits 1-2 inches above the soil level. This prevents rot, as hostas are prone to crown rot if buried too deeply.
Backfill the hole with the amended soil, pressing lightly to remove air pockets. Water deeply immediately after planting to settle the soil around the roots. You’ll know it’s done right when the plant stands upright without leaning.
Apply a 2-3 inch layer of organic mulch around the base of the plant, keeping it a few inches away from the crown to prevent rot. Mulch helps retain moisture and suppresses weeds, which compete with hostas for nutrients. I use shredded bark or leaf mold for a natural look.
Keep the soil consistently moist but not waterlogged during the first growing season. Water deeply once or twice a week, depending on rainfall, and check the soil by inserting your finger 1-2 inches deep—if it feels dry, it’s time to water again.
White Feather hostas are particularly susceptible to slugs and snails, which are drawn to their tender leaves. I set up beer traps or use iron phosphate baits around the planting area to deter these pests. Check under leaves regularly for signs of damage, especially after rain.
Deer also love hostas, so if they’re a problem in your area, consider installing a low fence or using deer repellent sprays. Early detection and action are key—once pests establish themselves, they’re harder to control.
Master these details to ensure your hostas thrive with minimal effort.
The Shade Factor: White Feather hostas need partial to full shade to prevent leaf scorch. Morning sun with afternoon shade, as mentioned in Step 1, creates the best color contrast. Avoid windy spots, which can damage their broad foliage.
Soil Testing: The drainage test in Step 1—digging a 12-inch hole and checking if water drains within 1-2 hours—is critical. If your soil doesn’t pass this test, amend it with compost before planting to prevent root rot.
Crown Placement: In Step 3, ensure the crown sits 1-2 inches above soil level. Burying it too deeply leads to crown rot, which is a common issue with hostas. This small detail makes a huge difference in plant health.
Pest Prevention: Slugs and snails love White Feather hostas. As noted in Step 5, beer traps or iron phosphate baits work well. For deer, a low fence or repellent sprays are essential—start these measures early to avoid infestations.
Keep the soil consistently moist but well-drained, and plant in partial to full shade. Mulch helps retain moisture and suppress weeds. Fertilize lightly in spring with a balanced, slow-release fertilizer.
Early spring or fall is ideal, as cooler temperatures help the plants establish roots before extreme heat or cold. Avoid planting in peak summer to reduce stress.
This is normal! White feather hostas often emerge white or pale and gradually develop green streaks or edges as they mature. Full sun exposure can also speed up this color change.
Pair them with other shade-loving perennials like ferns, astilbes, or heucheras for texture contrast. Low-growing ground covers like ajuga or creeping thyme also complement their elegant foliage.
Use organic slug baits, copper tape barriers, or handpick pests at dusk. Keeping the garden clean and reducing hiding spots (like debris) can also deter them.