
Beautiful Plants For Your Interior
Beautiful Plants For Your Interior
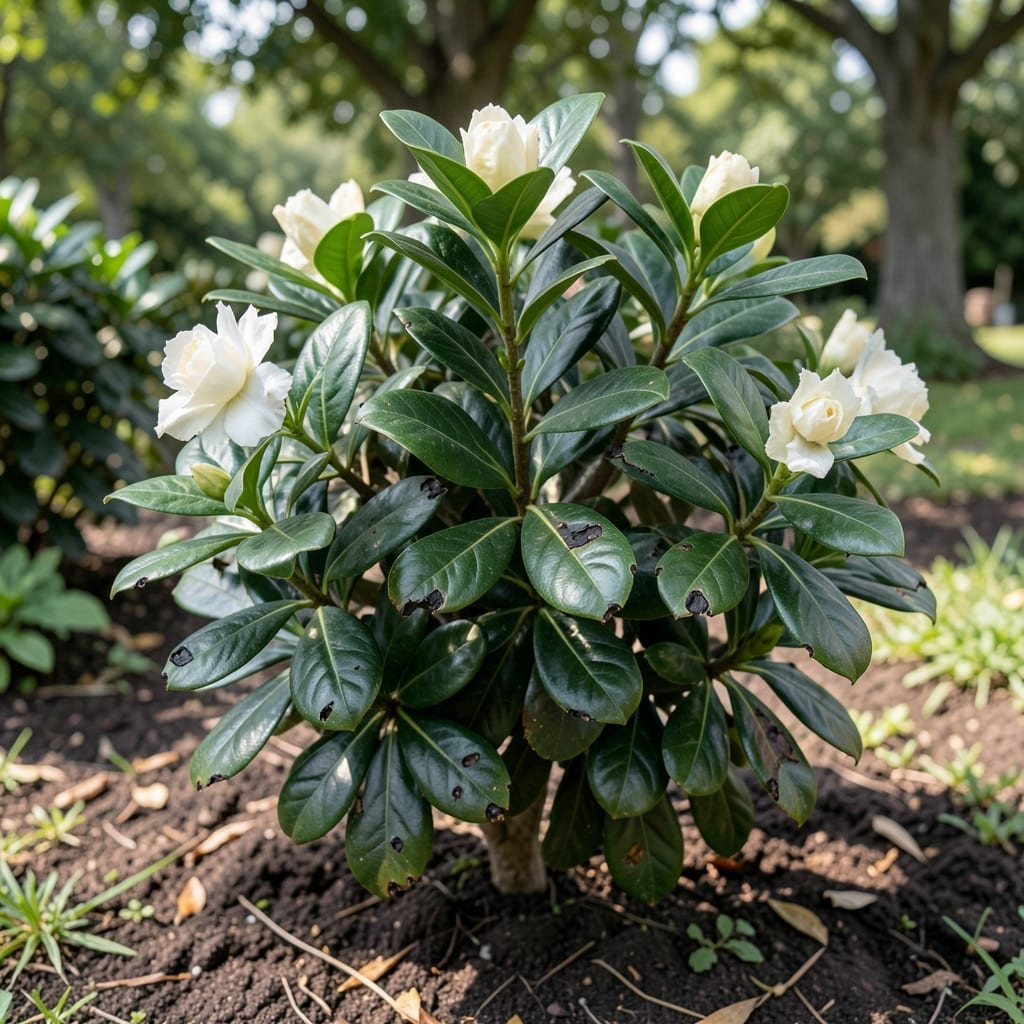
Black leaves on your gardenia are a distress signal, not a death sentence. I’ve seen this exact issue turn around with the right adjustments to watering, drainage, and air circulation.
Most cases come down to overwatering, poor soil, or fungal problems. Fix the root cause—literally—and you’ll see new healthy green growth within 2-3 weeks.
📚 In This Guide
Here’s the method I use to diagnose and treat black leaves on gardenias effectively.
Begin by examining the pattern of blackening. If the discoloration starts at the leaf edges and spreads inward, you’re likely dealing with overwatering or poor drainage. Check the soil—if it feels soggy or has a foul odor, root rot is probably the culprit.
For black spots that appear suddenly and spread rapidly, suspect a fungal infection like sooty mold or leaf spot. Look for additional signs such as white or gray fungal growth on the leaf surface. I always use a magnifying glass to confirm the presence of spores.
If the blackening is accompanied by yellowing leaves or leaf drop, consider environmental stress factors like temperature fluctuations or low humidity. Gardenias thrive in 65-75°F with 50-60% humidity.
If overwatering is the issue, stop watering immediately and let the soil dry out until the top 2 inches feel dry to the touch. Ensure your container has proper drainage holes—gardenias cannot tolerate waterlogged roots.
For gardenias in the ground, improve drainage by amending the soil with organic matter like compost or pine bark fines. I create small channels around the plant base to direct excess water away from the root zone.
Water only when the soil meets the dryness checkpoint, and always water at the base rather than overhead to prevent fungal spores from spreading. Use room temperature water to avoid shocking the roots.
For confirmed fungal issues, remove all affected leaves and dispose of them in the trash (not compost). Prune any crossing branches to improve air circulation, which is critical for preventing fungal growth.
Apply a copper-based fungicide according to the package instructions, ensuring complete coverage of both leaf surfaces. I repeat the application every 7-10 days until the problem resolves, especially during humid weather.
If sooty mold is present (black, dusty coating), it’s often a sign of pest infestations like aphids or whiteflies. Treat the pests first with insecticidal soap, then the mold will disappear as the honeydew source is eliminated.
Maintain consistent 65-75°F temperatures and protect your gardenia from cold drafts or sudden temperature drops. Move potted gardenias indoors if nighttime temperatures fall below 55°F.
Increase humidity around the plant by placing the container on a tray filled with pebbles and water. The water evaporates around the plant, creating a humid microclimate. I also group my gardenias with other humidity-loving plants for added effect.
Ensure your gardenia receives bright, indirect light for at least 6-8 hours daily. Too much direct sun can scorch leaves, while insufficient light weakens the plant, making it more susceptible to diseases.
Feed your gardenia with an acid-forming fertilizer formulated for acid-loving plants, following the recommended monthly schedule during the growing season. This maintains the pH between 5.0 and 6.0, which gardenias prefer.
Regularly inspect leaves for early signs of pests or disease. Catching issues early prevents the spread of blackening. I keep a garden journal to track watering, feeding, and any changes in leaf appearance.
Finally, avoid overhead watering and keep the area around your gardenia clean and free of debris. Mulch with 2-3 inches of pine bark or needles to maintain soil moisture and acidity while preventing soil-borne fungi from splashing onto leaves.
Small adjustments in how you care for gardenias make the difference between blackened leaves and thriving plants.
Diagnosis Precision: In Step 1, use a magnifying glass to distinguish between fungal spores and simple discoloration. Sooty mold appears as a dusty black coating, while leaf spot shows as distinct dark patches with defined edges. Confusion here leads to wrong treatment approaches.
Watering Discipline: The top 2 inches dryness checkpoint in Step 2 isn’t arbitrary. Gardenia roots need oxygen as much as water, and that soil depth allows for both. Stick your finger in the soil – if the top 2 inches feel dry, it’s time to water. Room temperature water prevents root shock that can manifest as black leaf tips.
Environmental Consistency: Step 4’s temperature range of 65-75°F is critical. Gardenias react dramatically to temperature swings, often developing black edges on leaves when exposed to cold drafts. Move potted plants indoors when nighttime temps approach 55°F, and keep them away from air conditioning vents or heaters.
Prevention Strategy: The monthly fertilizer schedule in Step 5 maintains that perfect 5.0-6.0 pH balance gardenias crave. Skipping applications or using non-acid forming fertilizers leads to nutrient deficiencies that often first appear as blackening on older leaves. Always water at the base to prevent fungal spores from splashing onto foliage.
Black leaves on gardenias often indicate root rot from overwatering, fungal infections, or cold damage. Poor drainage or soggy soil can suffocate roots, leading to blackened foliage. Check soil moisture and ensure proper airflow to prevent further damage.
Unfortunately, blackened leaves usually won’t recover, as the damage is often irreversible. Focus on improving plant health by adjusting watering, pruning affected areas, and treating underlying issues like fungal infections or nutrient deficiencies.
Start by removing black leaves to prevent spread. Repot in fresh, well-draining soil if root rot is suspected. Apply a fungicide for infections and ensure proper sunlight and humidity. Avoid overwatering to help the plant recover.
Yes! Overwatering is a common cause of black leaves, as it leads to root rot and poor oxygen flow. Let the top inch of soil dry between waterings, and ensure pots have drainage holes to keep roots healthy.