
Beautiful Plants For Your Interior
Beautiful Plants For Your Interior
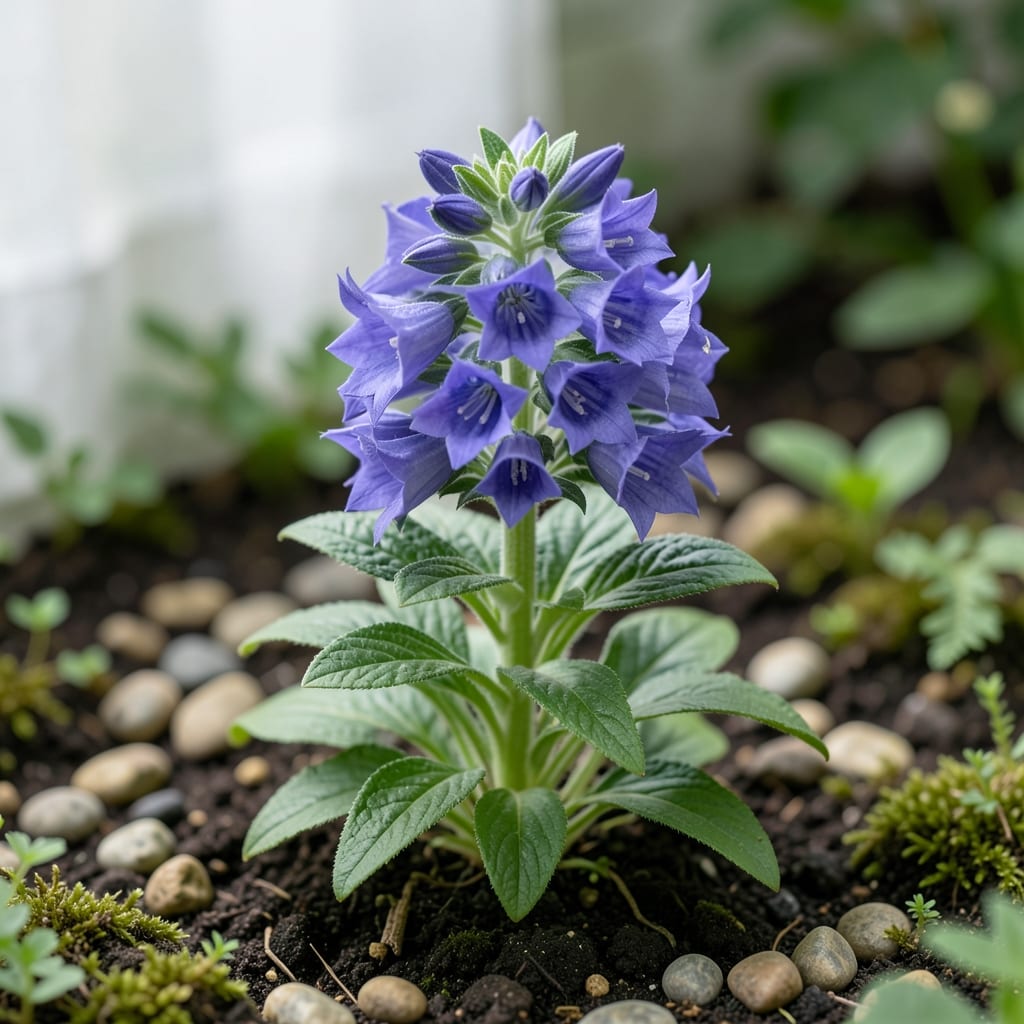
Clustered bellflower leaves caught my eye the first time I saw their heart-shaped base and jagged edges. These deep green leaves grow in tight clusters, making identification straightforward once you know what to look for.
This plant thrives in partial shade with consistent moisture, but it spreads aggressively without proper care. I learned to manage it by dividing clumps every 2-3 years to keep it from taking over.
📚 In This Guide
Here’s how I safely distinguish and manage this plant without harming the ecosystem or myself.
Begin by observing the leaf configuration. Clustered bellflower (Campanula glomerata) produces basal rosettes with ovate to lance-shaped leaves that are 1-3 inches long and ½ to 1 inch wide. The edges are serrated, and the texture is slightly rough to the touch.
Note the arrangement: leaves grow in a dense cluster at the base, with smaller, alternating leaves appearing along the flowering stems. This dense basal formation is a key identifier, especially before the plant blooms. Compare this to similar species—true bellflowers often have smoother, more evenly spaced leaves.
Flip a leaf over to inspect the venation. Clustered bellflower leaves exhibit pinnate venation, with a central midrib and smaller veins branching outward. The underside often has a paler green hue and may show faint pubescence—fine, short hairs along the veins.
Run your fingers lightly over the surface. The upper side feels slightly coarse due to tiny hairs, while the underside may feel softer. This tactile difference helps confirm identification, as some lookalikes have smooth leaves on both sides.
Look at the stem connecting the leaves. Clustered bellflower stems are erect, square-shaped, and often tinged with purple, especially near the base. They can grow 1-3 feet tall and may appear slightly hairy, matching the leaf texture.
The plant’s growth habit is clump-forming, with multiple stems emerging from a single crown. Unlike creeping bellflowers, this species doesn’t spread aggressively via runners, though it can self-seed prolifically if left unchecked. This clumping nature is another reliable clue.
Wear gloves when handling clustered bellflower, as the fine hairs on leaves and stems can cause mild skin irritation in sensitive individuals. I always use nitrile-coated gloves to prevent contact with the plant’s sap, which, while not toxic, may provoke a reaction in some people.
If you must touch the plant bare-handed, wash your hands immediately afterward with soap and cool water. Avoid touching your face or eyes during handling, as the sap can be particularly irritating to mucous membranes. This precaution ensures you stay comfortable while working.
If you’re removing clustered bellflower from your garden, do not compost it. The plant can regrow from stem fragments, and its seeds remain viable for years. Instead, bag the material and dispose of it with household waste to prevent reinfestation.
Inspect the area afterward for any missed root fragments or seed heads. Even small pieces left in the soil can sprout, so thorough removal is key. I’ve found that a second check a week later often reveals overlooked growth, saving future headaches.
These practical insights will help you confidently identify and manage this plant safely.
Leaf Inspection Technique: In Step 1, focus on the basal rosette where leaves are most densely clustered. The 1-3 inch length and ½ to 1 inch width are critical identifiers—measure a few leaves to confirm. The serrated edges are subtle but visible when you examine them against the light.
Veination Verification: For Step 2, use a magnifying glass if available to clearly see the pinnate venation pattern. The fine hairs on the underside are often easier to spot when you angle the leaf toward light. This tactile and visual combination is the most reliable confirmation method.
Safety Protocol: Step 4’s glove recommendation isn’t just for sensitive skin—nitrile-coated gloves also provide better grip when handling the slightly hairy stems. Keep a dedicated pair in your gardening kit to avoid cross-contamination with other plants.
Removal Thoroughness: After Step 5’s initial disposal, mark your calendar for that follow-up inspection. I’ve found that a second check exactly 7 days later catches nearly all missed growth, as new sprouts become visible by then.
Yellowing leaves often signal overwatering, poor drainage, or nutrient deficiencies. Check soil moisture and ensure the plant isn’t sitting in water. Adjust care or test soil for deficiencies.
Prune in early spring or after flowering to remove dead or damaged foliage. This encourages healthy growth and prevents disease spread. Avoid pruning in late fall or winter.
Yes, clustered bellflower (Campanula glomerata) leaves are mildly toxic if ingested. Keep pets away and wear gloves when handling to avoid skin irritation. Contact a vet if ingestion occurs.
Improve air circulation, avoid overhead watering, and remove infected leaves. Apply a fungicide or a baking soda solution (1 tsp baking soda + 1 quart water + a drop of soap) as a natural remedy.
Try Canterbury bells (Campanula medium) or peach-leaved bellflower (Campanula persicifolia) for similar bell-shaped flowers and foliage. Both are non-toxic and low-maintenance.