
Beautiful Plants For Your Interior
Beautiful Plants For Your Interior
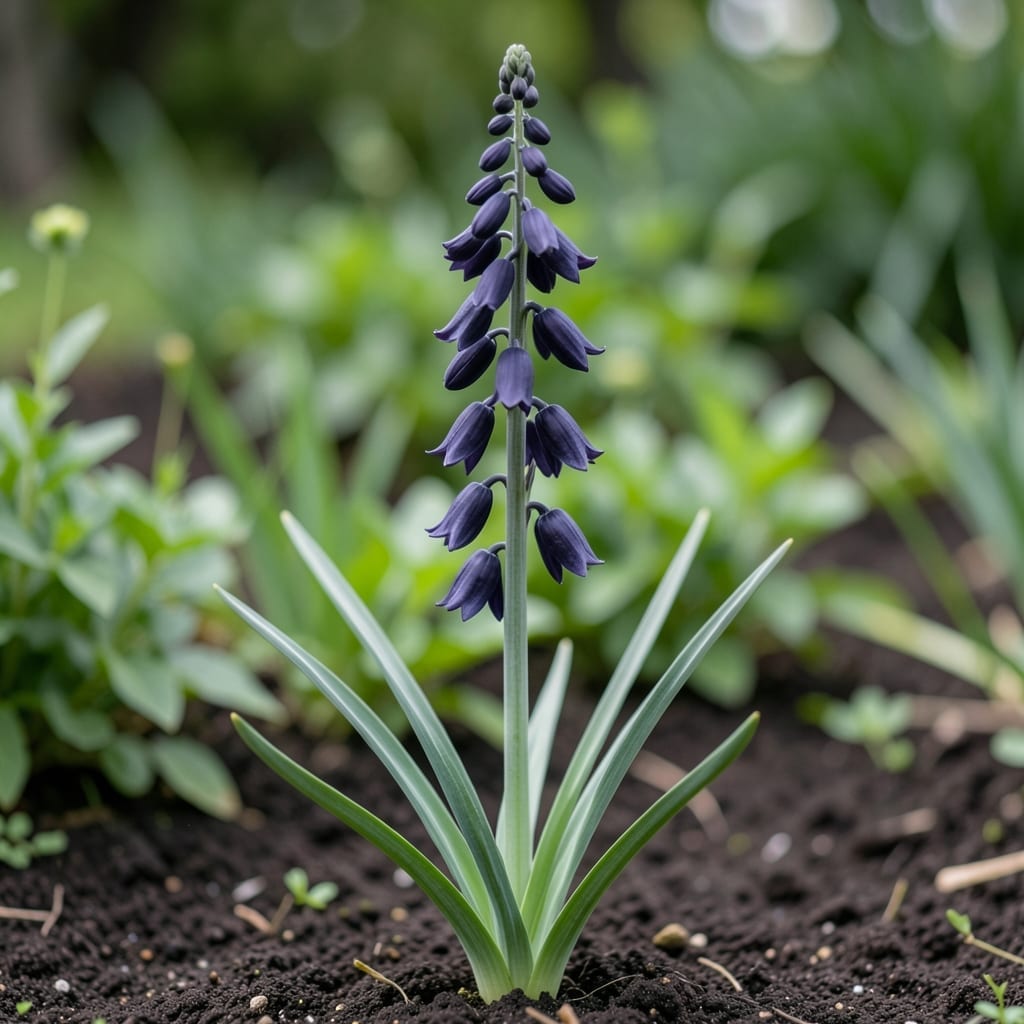
This plant stopped me in my tracks at the nursery last summer. The black fire lily’s deep maroon blooms look like something from another world, not your average garden bed.
It’s easier to grow than it appears—just give it well-draining soil, partial shade, and consistent moisture. You’ll get dramatic 3-foot stems with flowers that demand attention all season long.
📚 In This Guide
This elegant process yields stunning blooms with minimal effort and maximum visual impact.
Choose a spot with partial shade to full sun, as black fire lilies thrive in areas with dappled sunlight or morning light. The soil should be well-draining to prevent bulb rot, which is a common issue in heavier soils. I always test drainage by digging a small hole, filling it with water, and checking if it disappears within 1-2 hours.
Avoid low-lying areas where water pools after rain. If your garden has clay soil, amend it with compost or sand to improve drainage. The right location ensures your lilies establish quickly and produce those dramatic, dark blooms you’re aiming for.
Plant bulbs in early spring or fall at a depth of 4-6 inches, spacing them 8-12 inches apart. This spacing gives each plant enough room to spread without competing for nutrients. Place the bulb with the pointed end facing upward—this seems obvious, but it’s easy to second-guess when the bulb is irregularly shaped.
Backfill the hole with soil and press down lightly to remove air pockets. Water thoroughly after planting to settle the soil around the bulb. You’ll know it’s working when the soil surface looks evenly moist but not waterlogged.
Water the bulbs once a week during the growing season, ensuring the soil stays evenly moist but not soggy. Overwatering is a bigger risk than underwatering, so check the soil before adding more. Stick your finger 1 inch into the soil—if it feels dry, it’s time to water.
Apply a balanced, slow-release fertilizer every 4-6 weeks during the growing season. I’ve found that a 10-10-10 formula works well, but any general-purpose fertilizer will do. Stop fertilizing once the leaves begin to yellow and die back, as this signals the plant is entering dormancy.
Keep an eye out for common pests like aphids and slugs, which can damage the foliage and flowers. If you notice chewed leaves or sticky residue (a sign of aphids), treat the plants with neem oil or an insecticidal soap. I spray in the early morning or late evening to avoid harming beneficial insects like bees.
Fungal diseases, such as bulb rot, often appear as black or brown spots on the leaves or as a foul odor from the soil. If you see these signs, reduce watering immediately and remove any affected foliage. Preventative measures, like ensuring good air circulation and avoiding overhead watering, go a long way in keeping your lilies healthy.
Black fire lilies can grow 3-4 feet tall, and their stems may need support to prevent them from flopping over, especially in windy conditions. Install stakes or a small trellis when the stems reach about 2 feet in height. Tie the stems loosely to the support with soft garden twine or strips of cloth.
As the flowers begin to bloom, you’ll notice their dramatic, dark color deepening in full sun. Deadhead spent blooms to encourage the plant to redirect its energy into producing more flowers rather than seeds. This simple step can extend your bloom time by 2-3 weeks.
These practical insights will help you avoid common pitfalls when growing this stunning plant.
Soil Selection: For Step 1, I always test my soil drainage before planting by digging a hole and filling it with water. If it doesn’t drain within an hour, amending with compost is essential. The 12 inches wide and deep hole size mentioned ensures proper root development without crowding.
Planting Depth Precision: In Step 2, that 4-6 inches deep range is critical. I learned the hard way that bulbs planted shallower than 4 inches often heave during winter, while those deeper than 6 inches may not emerge at all. Use a ruler to measure if you’re unsure.
Watering Wisdom: After planting, the instruction about the top 2-3 inches of soil feeling moist is your best guide. I check by inserting my finger into the soil – if it comes out with damp soil clinging to it, you’ve watered enough. Overwatering is the most common mistake I see with this plant.
Dormancy Care: During Step 5’s dormancy period, resist the urge to tidy up. Those yellowing leaves are still working hard to feed the bulb for next year’s blooms. I use bright garden flags to mark planting spots so I remember where they are when the foliage dies back completely.
The black fire lily typically blooms once a year, usually in late summer or early fall. Its dramatic, dark blooms last about 1-2 weeks, making the timing perfect for a bold garden statement.
This plant thrives in well-draining soil with partial to full shade. Keep the soil moist but not waterlogged, and protect it from harsh direct sunlight to ensure healthy growth.
Yes! Consider Queen of Night tulips, Black Baccara roses, or Onyx Odyssey petunias for a similarly dramatic, dark aesthetic in your garden.
Lack of blooms can stem from insufficient light, poor soil drainage, or inadequate nutrients. Ensure it’s planted in a shady spot with rich, moist soil and fertilize lightly in spring.
Yes, like many lilies, the black fire lily is toxic to cats and dogs if ingested. Keep it out of reach of pets and contact a vet immediately if exposure occurs.