
Beautiful Plants For Your Interior
Beautiful Plants For Your Interior
Clay soil doesn’t have to be the enemy of your azalea dreams. I’ve planted dozens in heavy clay, and with the right prep, they outperform anything in “perfect” garden soil. The secret isn’t fighting the clay—it’s working with it to create a root-friendly environment that holds moisture without drowning plants. Here’s the thing—azaleas need acidic, […]
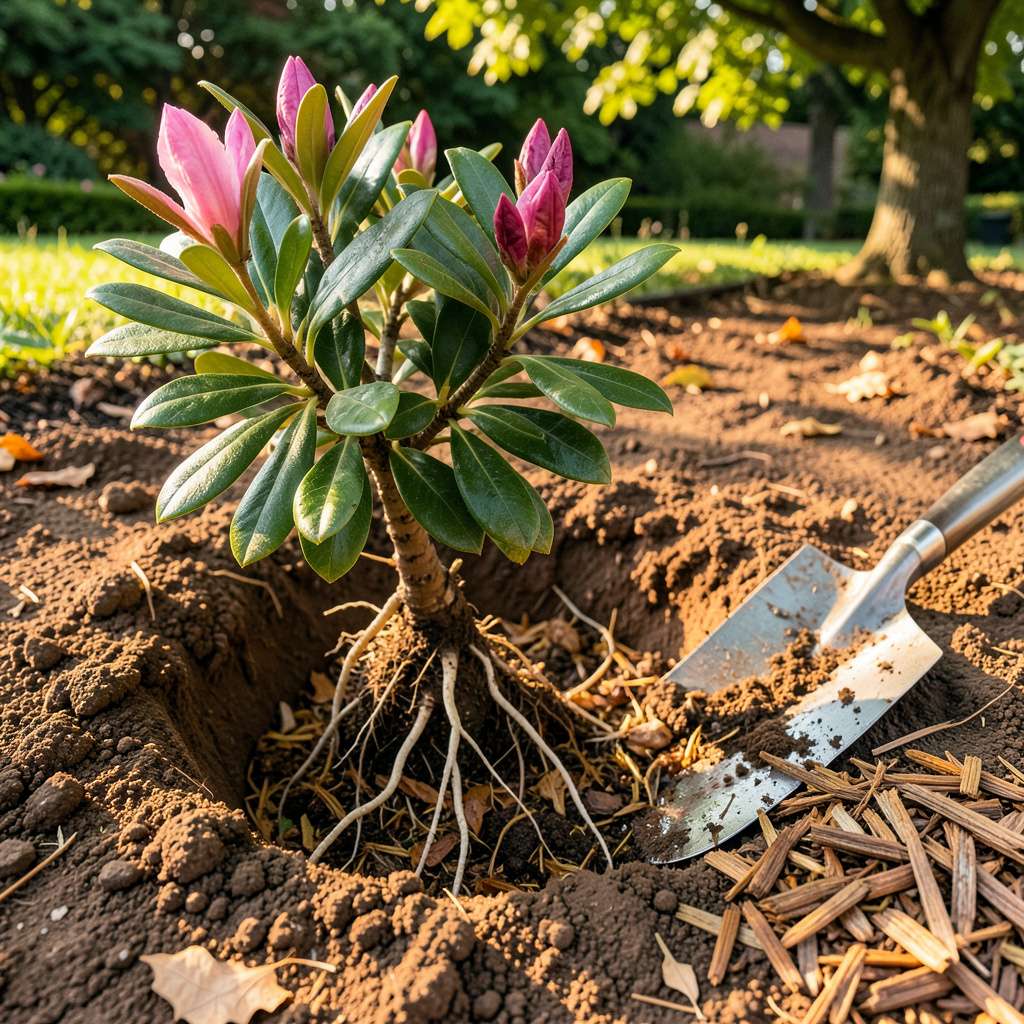
Clay soil doesn’t have to be the enemy of your azalea dreams. I’ve planted dozens in heavy clay, and with the right prep, they outperform anything in “perfect” garden soil. The secret isn’t fighting the clay—it’s working with it to create a root-friendly environment that holds moisture without drowning plants.
Here’s the thing—azaleas need acidic, well-draining soil, but clay compacts and suffocates roots. My solution? A modified planting hole that acts like a raised bed within the ground. We’re talking 18 inches wide and 12 inches deep, filled with a custom mix that loosens clay while keeping its moisture benefits. The plants establish faster than you’d expect.
You’ll see the difference in the first season: deeper green leaves, more flower buds, and roots that push outward instead of circling. My clay-planted azaleas now bloom so heavily that neighbors ask for cuttings. They’ve handled droughts better than my sand-grown plants ever did, thanks to clay’s hidden water reserves.
This method works whether you’re planting a single shrub or a whole hedge. The key is the initial setup—get that right, and your azaleas will thrive with minimal fuss for years. No more watching leaves yellow from poor drainage or stunted growth from compacted roots.
📚 In This Guide
Here’s how I’ve successfully planted azaleas in heavy clay—your blooms will thank you for these adjustments.
First, dig a test hole about 12 inches deep to see what you’re working with. Clay soil feels slick when wet and cracks when dry. Don’t try to fight it—work with it by amending the planting hole, not the entire bed. Mix the removed clay with equal parts pine bark fines or composted oak leaves to improve drainage while keeping the soil’s natural structure.
I avoid sand—it creates concrete-like conditions when mixed with clay. Instead, I use organic matter that breaks down slowly. The goal isn’t to eliminate clay but to create a transition zone where roots can establish. You’ll know it’s right when the amended soil crumbles slightly but still holds shape when squeezed.
Dig the hole twice as wide as the root ball but only as deep. Azaleas have shallow roots that spread horizontally, so width matters more than depth. In clay, a deep hole becomes a water trap. I make the sides slightly sloped to prevent “bathtub” effect where water pools around the roots.
Rough up the sides and bottom of the hole with your shovel—this helps roots penetrate the clay. Don’t glaze the sides by pressing too hard. You’ll see the difference: roughened clay looks porous, while glazed clay appears shiny and smooth, which actually repels water and roots.
Place the azalea in the hole so the top of the root ball sits 1-2 inches above the surrounding soil. This seems counterintuitive, but clay settles over time. I’ve lost plants by setting them too deep—they literally drowned as the soil compacted. Build a 3-inch high berm of amended soil around the perimeter to direct water toward the roots.
Backfill with your clay-compost mix, gently firming as you go. Water thoroughly to settle the soil, then add more mix if needed to maintain that slight mound. You’ll notice water now drains away from the stem but stays available to the root zone—exactly what azaleas need in clay.
Apply 2-3 inches of pine straw or shredded bark mulch, keeping it 2 inches away from the stem. In clay soil, mulch isn’t just about weeds—it’s about temperature and moisture regulation. I’ve found pine straw works best because it allows water to penetrate while preventing the soil surface from crusting over.
The mulch should extend 12 inches beyond the plant’s dripline (where water would drip from the outer leaves). This encourages roots to grow outward. Check the mulch depth annually—it compacts in clay and may need refreshing. You’ll know it’s time when rainwater starts pooling on top instead of soaking in.
After planting, water deeply until the soil is moist 8-10 inches down. Stick your finger in to check—clay holds moisture well, so you’re aiming for damp, not soggy. I water newly planted azaleas every 3-4 days for the first month, then taper to weekly unless we’re in drought.
The key with clay is watching the plant, not the calendar. Drooping leaves in afternoon heat is normal, but if they’re still wilted in morning, you’ve waited too long. I set up a simple drip irrigation on a timer for consistency—clay doesn’t forgive inconsistent watering. Your azalea will tell you it’s happy with glossy green leaves and new growth within 4-6 weeks.
After years of wrestling with heavy clay, here’s what I’ve learned makes all the difference for thriving azaleas.
Soil Preparation Insight: When amending your clay soil in Step 1, don’t be tempted to add sand—it actually creates a concrete-like texture when mixed with clay. I’ve found pine bark fines work far better than generic compost because they break down slowly, creating lasting drainage channels. The key is achieving soil that crumbles slightly but still holds shape when squeezed, exactly as described in the instructions.
Planting Depth Secret: The 1-2 inches above ground recommendation in Step 3 isn’t arbitrary—I’ve lost plants by setting them flush with soil level. Clay settles significantly over time, and that slight elevation prevents the “drowning” effect I experienced with my first few azalea plantings. Trust me on this: that small mound makes all the difference in clay’s heavy, compacting nature.
Mulching Technique: For the 2-3 inches of mulch in Step 4, pine straw outperforms wood chips in clay soil. It allows water to penetrate while preventing that frustrating crust that forms on clay surfaces after rain. I extend the mulch circle to 12 inches beyond the dripline as mentioned, but I also create a slight slope away from the stem—this prevents water from pooling at the base during heavy rains.
Watering Wisdom: The 8-10 inch moisture check in Step 5 is critical with clay. I use a simple soil probe (or even a long screwdriver) to test depth—if it pushes in easily to 10 inches, you’ve watered sufficiently. Clay holds moisture deceptively well, so I’ve learned to water less frequently than I initially thought necessary. The finger test mentioned really works: damp but not soggy is perfect.
Azaleas can survive in clay soil, but they’ll struggle to thrive. Heavy clay compacts easily, suffocating roots and trapping water, which leads to root rot. For best results, amend the soil with organic matter (like pine bark fines or compost) to improve drainage and aeration. If amending isn’t an option, plant azaleas in raised beds to avoid waterlogged roots.
Aim for early spring (after the last frost) or early fall (4-6 weeks before the first frost). These seasons give roots time to establish before extreme heat or cold. Avoid planting in summer—clay soil dries out quickly, stressing new plants. A cool, moist period helps azaleas adapt to denser soil conditions.
Mix 50% native clay with 50% organic matter (pine bark fines, leaf mold, or peat moss) into the planting hole. For long-term improvement, add 2-3 inches of mulch (like pine straw) annually to break down and loosen soil. Avoid sand—it creates a cement-like texture when mixed with clay!
Yellow leaves often signal poor drainage (root suffocation) or iron chlorosis (high pH locking out nutrients). Test soil pH—azaleas need 4.5–6.0. Amend with sulfur or cottonseed meal to lower pH. If drainage is the issue, redirect water or plant on a slope. Prune affected branches to encourage new growth.
Yes! Opt for native azaleas like Rhododendron austrinum (Florida Flame) or R. canescens (Piedmont Azalea), which adapt better to clay. Evergreen varieties like ‘Gump’s Pink’ or ‘Delaware Valley White’ also handle heavier soils if amended properly. Always check labels for “clay-tolerant” notes!
Planting azaleas in clay soil doesn’t have to be a challenge—with the right prep and care, your garden can burst with colorful, thriving blooms! 🌸 By amending the soil, choosing the right varieties, and following proper planting techniques, you’ll set your azaleas up for long-term success. Remember, patience and consistency are key as they establish roots.
Ready to get started? Grab your gardening gloves and pick a sunny spot—your azaleas will thank you with stunning flowers for years to come! For extra confidence, test your soil’s pH before planting or consult a local nursery for clay-friendly azalea varieties. Happy planting! 🌱
