
Beautiful Plants For Your Interior
Beautiful Plants For Your Interior
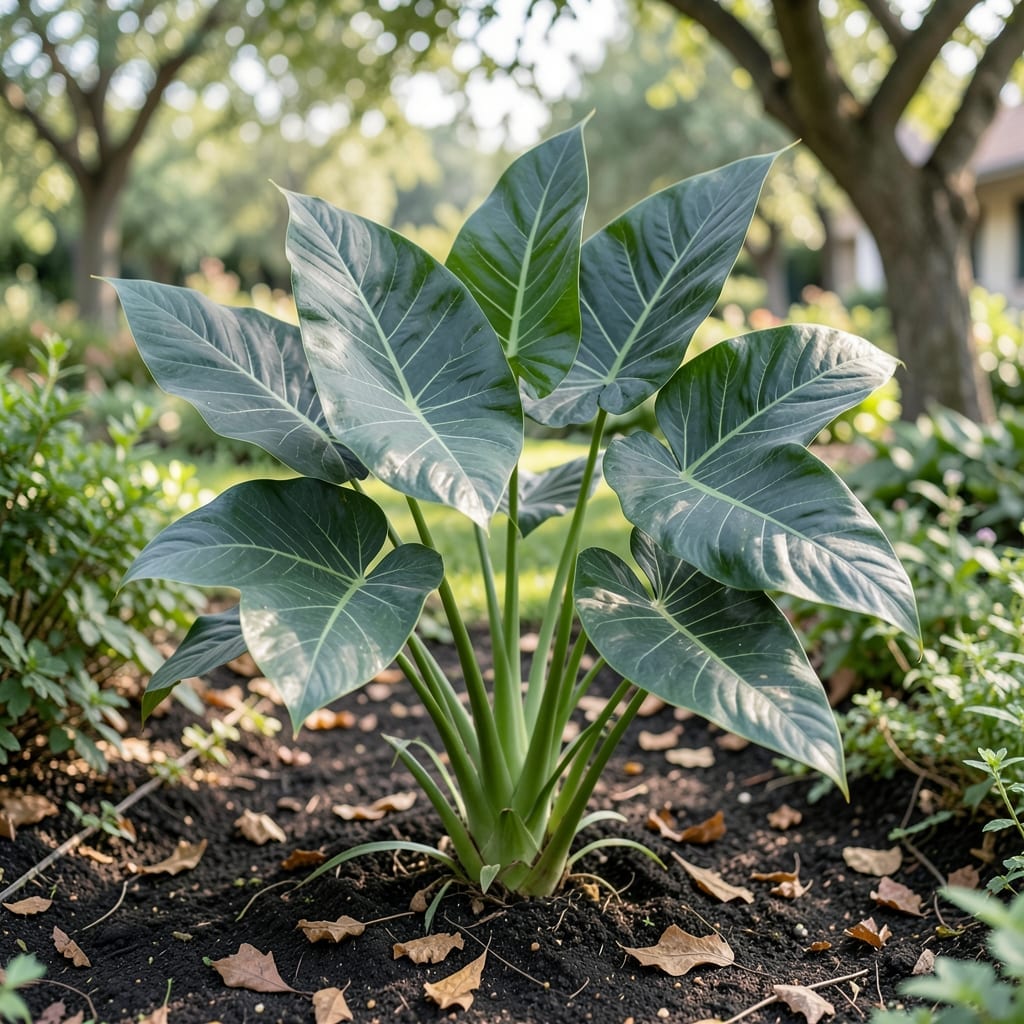
Italian arum leaves bring arrowhead elegance to shady spots. 🌿 I’ve grown this plant for years, and its glossy, dark green foliage with white veining never fails to impress.
The key is rich, moist soil and partial shade. With minimal care, you’ll get healthy, vibrant leaves that thrive even in tough corners of the garden.
📚 In This Guide
To grow healthy Italian Arum leaves, you’ll need the right materials and setup. Here’s what you’ll require: Zantedeschia aethiopica tubers (1 per pot or 3-5 for garden beds), well-draining potting mix (50% peat-free compost, 30% perlite, 20% sand), and a container with drainage holes (12-16 inches in diameter for single plants).
Tools: Gardening gloves, a trowel, watering can with a fine rose attachment, and pruning shears for maintenance. For optimal growth, ensure access to partial shade to full sun (4-6 hours of sunlight daily) and a consistent water source. A soil pH test kit (ideal range: 6.0-7.0) and balanced liquid fertilizer (10-10-10 NPK ratio) are also recommended for vibrant foliage.
Here’s the method I swear by for lush, vibrant foliage every time.
Italian arum thrives in partial to full shade, making it perfect for those tricky spots under trees or along north-facing walls. I always look for areas where dappled sunlight filters through for 2-4 hours daily at most. Direct afternoon sun will scorch the leaves, leaving you with crispy edges.
Soil matters just as much as light. These plants prefer moist, well-draining soil rich in organic matter. Test your spot by digging a small hole after rain—if water pools and sits for hours, find a new location or amend the soil with compost to improve drainage.
Whether you’re starting with tubers or nursery plants, dig holes about 2-3 inches deep—just deep enough to cover the tuber completely. Space them 8-12 inches apart to give the clumps room to spread. Italian arum grows from rhizomes that multiply underground, and crowding leads to weak foliage.
Place the tuber horizontally in the hole with the rounded side facing down. Backfill gently and press the soil lightly to remove air pockets. Water immediately after planting to help settle the soil around the roots. You’ll see the first shoots poking through in 3-4 weeks.
Keep the soil evenly moist but never waterlogged during the growing season. I check mine every 2-3 days by sticking my finger 1 inch into the soil—if it feels dry at that depth, it’s time to water. Morning is ideal because it gives the plants time to absorb moisture before the heat of the day.
Real talk: this plant tells you when it’s thirsty. Drooping leaves in the afternoon usually mean it needs water, but they should perk up by morning. If they stay wilted overnight, you’ve waited too long. A 2-inch layer of mulch around the plants helps retain moisture and keeps roots cool.
Italian arum isn’t a heavy feeder, but a light application of balanced, slow-release fertilizer in early spring gives it a boost. I sprinkle a handful around each plant and lightly work it into the top inch of soil. Avoid high-nitrogen fertilizers—they produce lots of leaves but weak stems that flop over.
You’ll notice the leaves start small and grow larger as the season progresses. If the new growth looks pale or stunted, it might need a second feeding in early summer. Always water after fertilizing to help nutrients reach the roots and prevent burning the foliage.
Remove yellow or damaged leaves as soon as you spot them—they won’t recover and can attract pests. Use clean, sharp shears and cut at the base of the stem. This keeps the plant looking tidy and redirects energy to healthy growth.
Here’s the thing—Italian arum goes dormant in summer. When the leaves start yellowing in late spring or early summer, don’t panic. It’s natural. Cut back the foliage to the ground once it’s completely brown. The plant will rest underground and return with fresh growth in fall.
These practical tips will help you grow vibrant foliage without the guesswork.
Light Exposure: Stick to the 2-4 hours daily of dappled sunlight mentioned in Step 1. I learned the hard way that even an extra hour of afternoon sun can turn those beautiful leaves crispy. Partial shade under trees works perfectly for this plant.
Planting Depth: In Step 2, don’t plant tubers deeper than 2-3 inches—any deeper and they may struggle to sprout. I use a ruler to measure the first few times until I get the hang of it. The rounded side should always face down for best results.
Moisture Check: The 1-inch finger test from Step 3 is your best tool. If the soil feels dry at that depth, water immediately. I set a reminder to check every 2-3 days in the morning, which keeps me consistent.
Dormancy Timing: When you see yellowing in late spring or early summer as mentioned in Step 5, resist the urge to fertilize. The plant is entering its natural dormancy period, and extra nutrients won’t help—just let the foliage die back completely before cutting it down.
Yes, Italian arum leaves contain calcium oxalate crystals, which are toxic to cats and dogs. Ingestion can cause mouth irritation, drooling, or digestive upset. Keep pets away and wear gloves when handling.
Yellowing leaves often signal overwatering, poor drainage, or nutrient deficiencies. Check soil moisture and ensure pots have drainage holes. Adjust watering and fertilize lightly if needed.
Plant Italian arum in early spring or fall in warm climates (USDA zones 6-9). This timing allows roots to establish before extreme heat or cold. Avoid planting in summer’s peak heat.
Yes! Use a well-draining potting mix and a container with drainage holes. Italian arum thrives in containers, making it ideal for patios or shaded balconies. Repot every 2-3 years.
Brown spots may indicate fungal infections or sunburn. Remove affected leaves, improve air circulation, and avoid overhead watering. For sunburn, move the plant to a shadier spot.