
Beautiful Plants For Your Interior
Beautiful Plants For Your Interior
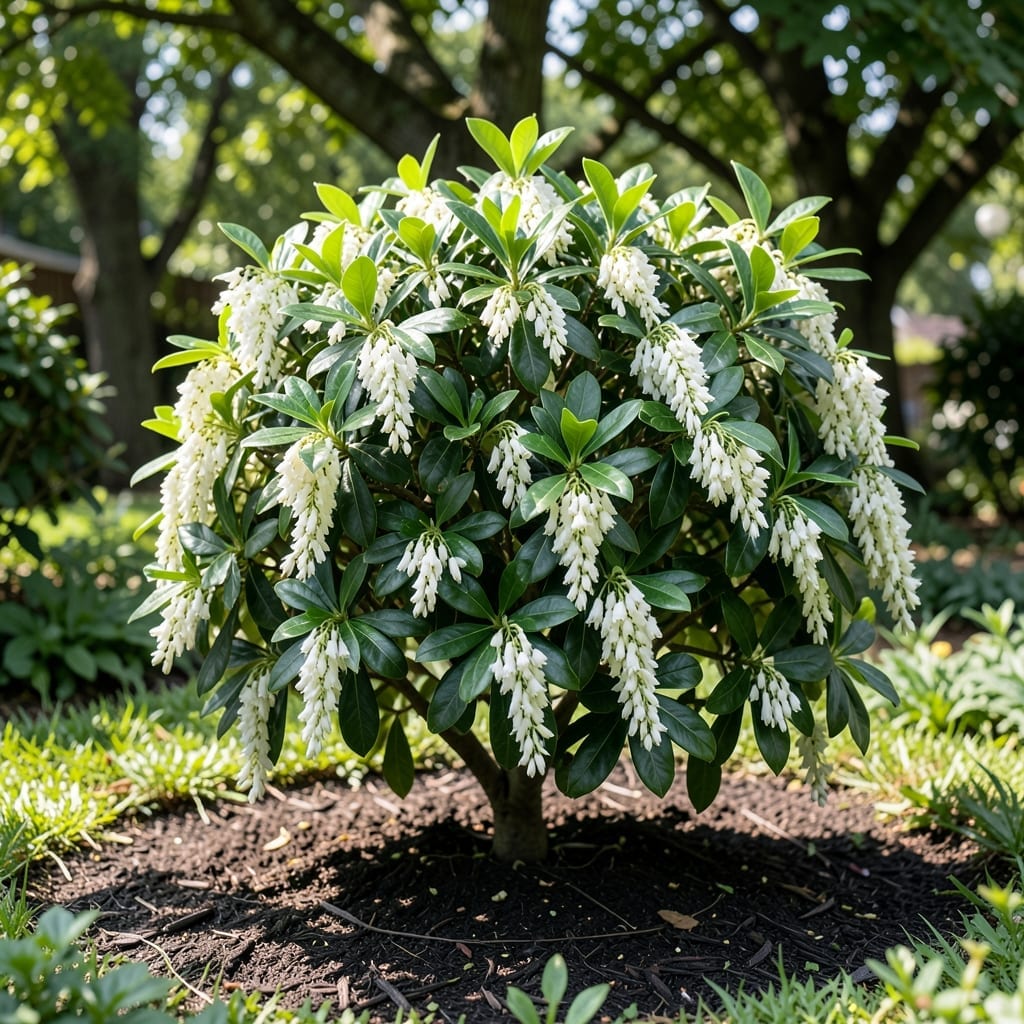
My garden’s showstopper in every season is this evergreen shrub. Its cascading white blooms in early spring transform bare winter branches into something magical, and the dark green leaves keep the display going all year.
It thrives in partial shade with moist, acidic soil—exactly what my shady border needed. The 4-8 foot height creates perfect privacy without overwhelming the space, and deer leave it completely alone.
📚 In This Guide
This method ensures your shrubs establish quickly and thrive for decades with minimal care.
Choose a site with partial shade to full sun, though morning sun with afternoon shade produces the most vibrant foliage. Pieris japonica white tolerates USDA zones 5-8 but struggles in extreme heat or cold drafts. Avoid low-lying areas where cold air settles—frost damage often starts at the base.
Test your soil pH; these plants prefer acidic conditions (pH 5.0-6.0). You’ll see yellowing leaves if the pH climbs too high. A simple at-home test kit gives accurate results. I always test multiple spots in the planting area—pH can vary dramatically within just a few feet.
Dig a hole twice as wide as the root ball but no deeper. Loosen the soil at the sides and bottom to encourage root outward growth. If your soil is heavy clay, amend the backfill with 50% organic matter like compost or peat moss to improve drainage.
For each plant, mix a handful of sulfur into the backfill if your soil pH exceeds 6.5. This gradually lowers pH over months. Real talk: Skipping this step often leads to chlorotic leaves within a year. Water the empty hole thoroughly before planting to settle the soil and eliminate air pockets.
Gently remove the shrub from its container and loosen any circling roots with your fingers. Position it so the top of the root ball sits 1-2 inches above the surrounding soil level—pieris hates being planted too deep. Backfill with your amended soil, tamping lightly as you go to remove air spaces.
Create a 3-inch-high water ring around the perimeter of the hole to help direct moisture to the roots. Water deeply immediately after planting until the soil settles. Here’s the thing—most transplant failures happen because the soil wasn’t sufficiently moistened at planting time, leaving air gaps around roots.
Spread a 2-3 inch layer of organic mulch (pine bark or needles work excellently) around the base, keeping it 3 inches away from the trunk to prevent rot. This maintains soil moisture and temperature while slowly acidifying the soil as it breaks down.
Water 2-3 times weekly for the first month, then taper to once weekly unless rainfall provides 1 inch per week. The first sign of stress is leaf wilting in the afternoon. I know it seems weird, but these plants actually prefer slightly moist roots over dry conditions during establishment.
Fertilize in early spring with a product formulated for acid-loving plants, following package instructions. Prune only after flowering—these shrubs set next year’s buds immediately after blooming. Remove dead or diseased branches anytime, but avoid heavy pruning that sacrifices next season’s white flower clusters.
Monitor for lace bugs, which cause stippled foliage. A strong blast of water often dislodges them, but persistent infestations may require horticultural oil. This is the moment that matters: Catching pests early prevents defoliation that weakens the plant for years. Year-round elegance comes from consistent, attentive care.
Small details make the difference between a shrub that survives and one that thrives.
Site Selection Insight: In Step 1, prioritize morning sun with afternoon shade—this combination produces the most vibrant foliage while protecting against heat stress. I learned this the hard way after planting in full afternoon sun, which led to scorched leaves despite the plant’s USDA zones 5-8 tolerance.
Soil Preparation Tip: When digging your hole in Step 2, don’t just dig twice as wide—loosen the soil at the sides and bottom aggressively. This encourages roots to spread outward rather than circling. For heavy clay soils, amending with 50% organic matter like compost or peat moss is non-negotiable for proper drainage.
Planting Depth Warning: In Step 3, resist the urge to plant at soil level. Position the root ball 1-2 inches above surrounding soil—pieris absolutely despises being planted too deep. I’ve seen established shrubs decline rapidly when planted even slightly below grade, as it leads to stem rot.
Watering Strategy: The 2-3 times weekly watering schedule in Step 4 isn’t arbitrary. These plants prefer consistently moist roots during establishment. Create that 3-inch-high water ring—it’s your best defense against the air pockets that cause most transplant failures.
Water regularly in spring/summer, ensuring moist but well-drained soil. Mulch in fall to protect roots from frost. Prune after flowering to shape the shrub and remove dead branches.
Yellow leaves often indicate overwatering or poor drainage. Check soil moisture and improve drainage if needed. Nutrient deficiencies or iron chlorosis in alkaline soil can also cause this issue.
Early spring or fall is ideal. This allows the plant to establish roots before extreme heat or cold. Avoid planting in peak summer or winter to reduce stress on the shrub.
It thrives in partial shade but can tolerate full shade. However, flowering may be less abundant. For best results, provide dappled sunlight or morning sun with afternoon shade.
Watch for lace bugs, scale insects, and root rot from poor drainage. Leaf spot and powdery mildew can occur in humid conditions. Regular inspection and proper care help prevent these issues.