
Beautiful Plants For Your Interior
Beautiful Plants For Your Interior
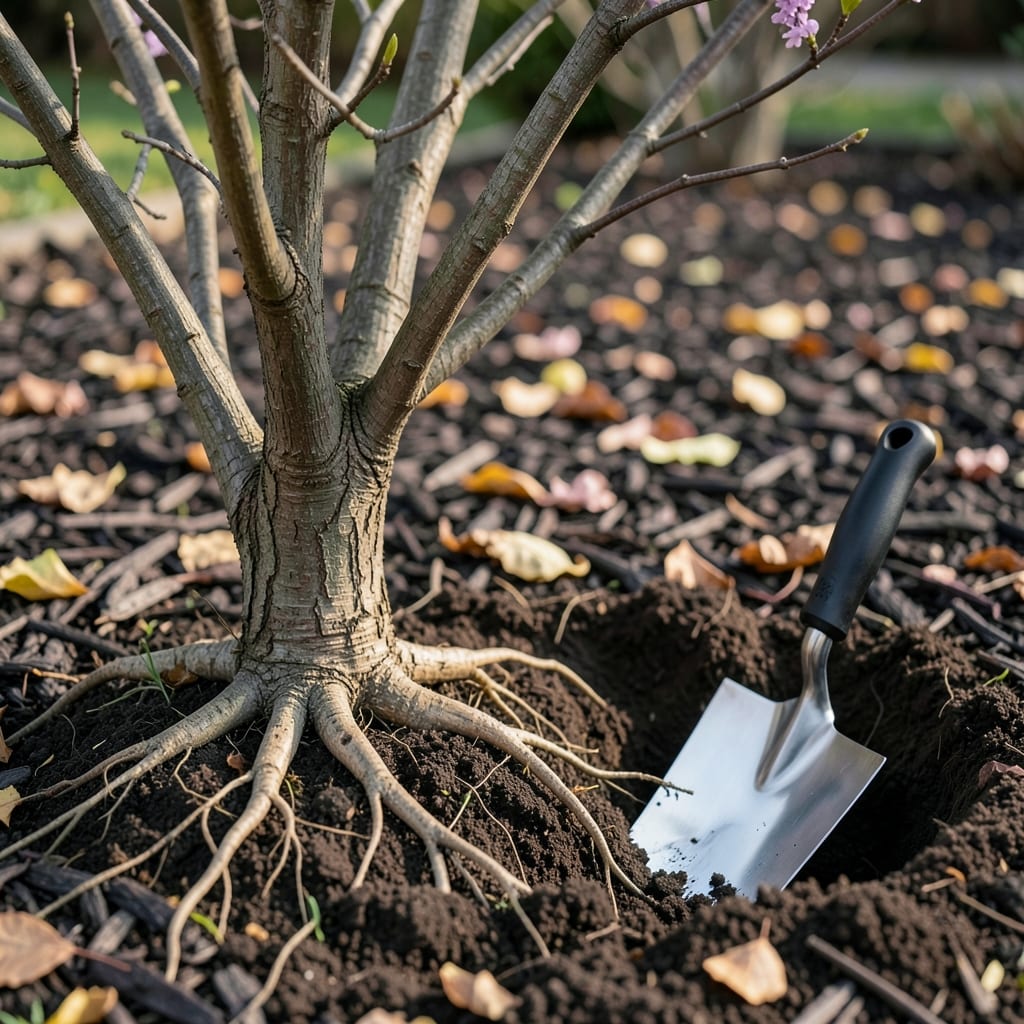
Planting bare root lilacs transforms your yard with fragrant purple blooms next spring. I’ve learned the hard way that timing and technique matter—plant too late or too deep, and you’ll wait years for flowers.
Get the roots soaking while you dig a hole twice as wide as the spread. A little prep now means stronger growth and fewer problems later. Here’s how to do it right the first time.
📚 In This Guide
Here’s the method I rely on for getting bare root lilacs off to a strong start.
Begin by soaking the bare roots in lukewarm water for 2-3 hours to rehydrate them. This step is crucial because dry roots struggle to absorb moisture from the soil initially. I use a clean bucket and ensure the entire root system is submerged.
You’ll notice the roots plump up as they absorb water, which means they’re ready for planting. Don’t skip this step—it prevents transplant shock and gives your lilac the best chance to establish quickly. If the roots are particularly dry, I extend the soak to 4 hours.
Dig a hole that’s twice as wide and just as deep as the root system. Lilacs need room to spread, so don’t crowd them. I loosen the soil at the bottom and sides of the hole to encourage root growth outward.
If your soil is heavy clay, mix in some compost or well-rotted manure to improve drainage. The hole should be deep enough that the crown (where the roots meet the stem) sits 1-2 inches above the soil line—this prevents rot and allows for settling.
Place the lilac in the hole, spreading the roots out evenly. Hold the plant steady while you backfill with soil, gently pressing down to eliminate air pockets. I use my hands to firm the soil around the base, ensuring the plant is stable.
Water thoroughly once the hole is half-filled to settle the soil, then finish filling and water again. This two-step watering ensures the roots make good contact with the soil. You’ll see the soil level drop slightly—that’s normal.
Apply a 2-3 inch layer of mulch around the base, keeping it 3 inches away from the stem to prevent rot. Mulch helps retain moisture and suppresses weeds, which is especially important in the first year.
Water deeply 2-3 times per week for the first month, then taper off to once a week unless it’s particularly dry. You’ll know it’s time to water when the top inch of soil feels dry. Overwatering is just as harmful as underwatering, so check the soil before each session.
After planting, trim back any broken or excessively long roots. I also prune the top growth by one-third to reduce stress on the plant and encourage bushier growth. Use clean, sharp pruners to make clean cuts at a 45-degree angle.
This initial pruning might feel counterintuitive, but it directs energy toward root establishment. You’ll see new growth within 4-6 weeks, which confirms the plant is settling in well. Avoid heavy pruning after this—just shape lightly as needed.
These small details make the difference between a struggling plant and one that thrives for years.
Soaking Secret: Don’t rush the 2-3 hour soak in Step 1. I learned the hard way that skipping this or using cold water slows down root recovery. Lukewarm water helps the roots absorb moisture faster, giving your plant the best possible start.
Planting Depth Matters: That 1-2 inch crown elevation in Step 2 isn’t just suggestion—it’s insurance against rot. After planting, I always double-check by laying a ruler across the hole. Too deep and the crown suffocates; too shallow and roots dry out.
Watering Wisdom: During those first 4-6 weeks, consistency beats quantity. I set phone reminders for my 2-3 times weekly deep watering in Step 3, and I always check soil moisture with my finger before adding more. The top inch should feel dry, but not bone-dry.
Mulch Placement: That 3-4 inch gap around stems in Step 3 prevents more problems than you’d think. I’ve seen mulch piled against stems cause rot and invite pests. Spread it like a donut around the base, not a volcano.
The ideal time is during late fall or early spring when the plant is dormant. This allows roots to establish before extreme temperatures hit, ensuring stronger growth come spring.
Keep roots moist (not soggy) and store in a cool, dark place. Soak them in water for 1-2 hours before planting to rehydrate. Handle gently to avoid root damage.
Patience is key! Bare roots may take 1-2 years to bloom. Ensure full sun (6+ hours), well-draining soil, and proper pruning (remove only dead wood the first year).
Yes, but choose a large pot (18+ inches deep) with drainage holes. Use quality potting mix and monitor moisture closely, as containers dry out faster.