
Beautiful Plants For Your Interior
Beautiful Plants For Your Interior
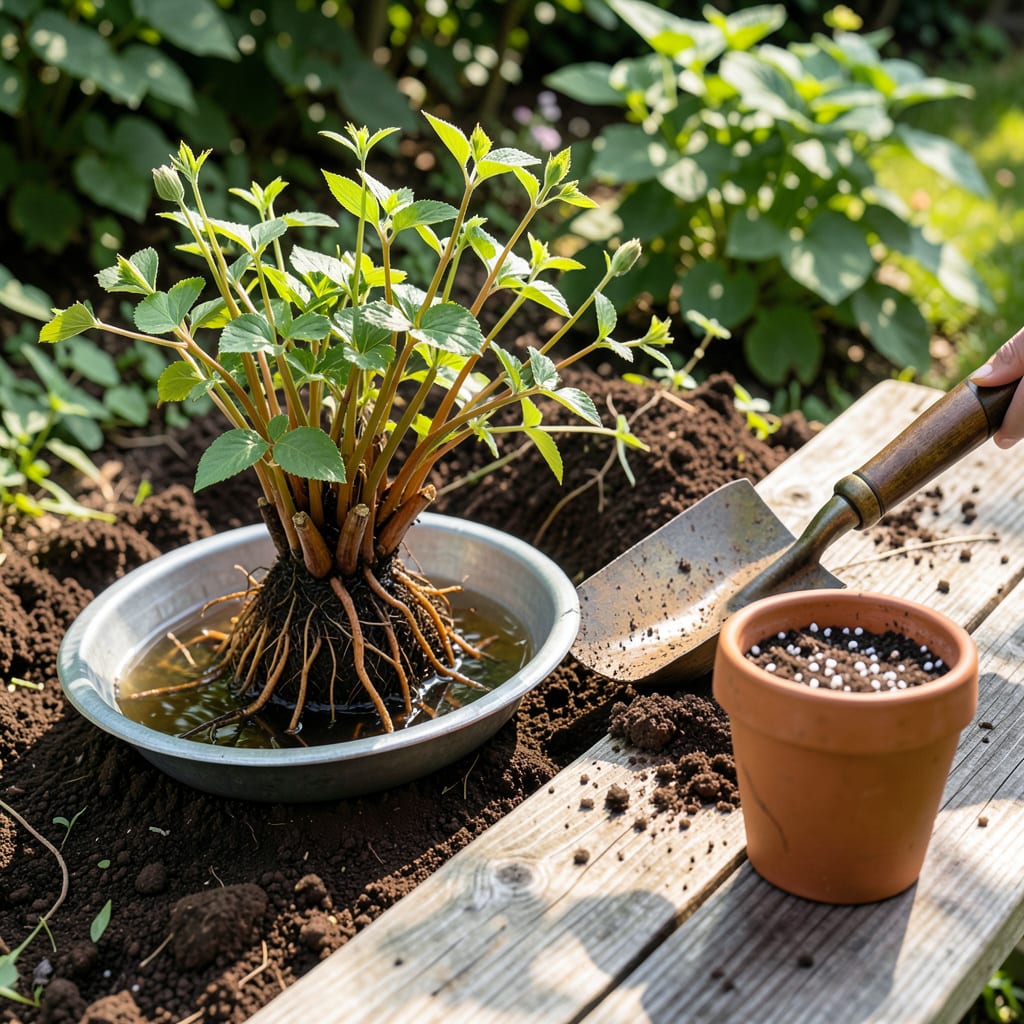
Early spring is the perfect time to plant bare root clematis. I’ve learned the hard way that timing and technique matter more than luck with these vines.
Soak the roots for 2-3 hours before planting, dig a wide hole, and position the crown 2 inches below soil level. This encourages strong growth and prevents wilt. Trust me, it works.
📚 In This Guide
This method ensures strong root establishment and vibrant early growth for your vines.
Begin by soaking the bare root clematis in lukewarm water for 2-3 hours to rehydrate the roots. This step revives the plant after dormancy and kickstarts root activity. While soaking, choose a planting location with full sun to partial shade—clematis thrives with at least 6 hours of sunlight daily but appreciates afternoon shade in hotter climates.
The soil should be well-draining and rich in organic matter. Dig a hole 12-18 inches deep and wide, enough to accommodate the root system comfortably. Loosen the soil at the base of the hole to encourage deep root penetration. If your soil is heavy clay, mix in compost or aged manure to improve drainage.
After soaking, trim any broken or excessively long roots to 12-18 inches to encourage branching. Place the clematis in the hole so the crown (where roots meet stems) is 2-3 inches below the soil surface. This deep planting protects the base from temperature swings and encourages additional stem growth from below ground.
Backfill the hole with soil, firming gently to eliminate air pockets. Water thoroughly to settle the soil around the roots. Immediately install a support structure, such as a 5-6 foot trellis or obelisk, since clematis vines need something to climb. Position the support so the plant can twine around it naturally as it grows.
Apply a 2-3 inch layer of organic mulch, such as shredded bark or compost, around the base of the plant. Keep the mulch 2 inches away from the stems to prevent rot. Mulching conserves moisture, suppresses weeds, and maintains a consistent soil temperature, all critical for early root development.
Water deeply after planting and maintain consistent moisture for the first 4-6 weeks. Aim for 1 inch of water per week, either from rainfall or supplemental irrigation. Check soil moisture by inserting your finger 1 inch into the soil—if it feels dry, it’s time to water. Avoid overhead watering to keep foliage dry and prevent disease.
After planting, prune the stems back to 12-18 inches above ground level. This may seem drastic, but it stimulates vigorous new growth from the base, resulting in a bushier, more floriferous plant. Use clean, sharp pruners to make cuts just above a set of healthy buds.
As new growth appears, gently tie the vines to the support structure with soft garden twine or plant clips. Train the vines horizontally at first to encourage even growth along the support. This early training sets the stage for a well-shaped, productive clematis that will reward you with abundant blooms in its first season.
These practical insights will help you avoid common pitfalls and ensure your clematis thrives from day one.
The Soaking Step: Don’t rush the 2-3 hour soaking time in Step 1—this revives dormant roots and ensures they absorb enough moisture to survive the transplant shock. I’ve skipped this before, and the plants struggled to establish properly.
Planting Depth Matters: In Step 2, planting the crown 2-3 inches below the soil surface is non-negotiable. This protects the base from freeze-thaw cycles and encourages new shoots to emerge from underground, leading to a fuller plant.
Mulch Placement: When applying the 2-3 inch layer of mulch in Step 3, keep it 2 inches away from the stems. Mulch touching the base can cause rot, which I learned the hard way after losing a few plants early on.
Initial Pruning: The pruning in Step 4 might feel drastic, but cutting stems back to 12-18 inches forces the plant to focus energy on root development and new growth. Trust me, it pays off with a stronger, bushier clematis.
Early spring, while the plant is still dormant, is ideal. This gives roots time to establish before warm weather. Avoid planting in late fall or winter when the ground is frozen.
Dig a hole about 12-18 inches deep and wide. Place the crown (where roots meet stems) 2-3 inches below soil level to encourage strong root growth and protect the base from frost.
Yes! Soak the roots in water for 1-2 hours before planting. This rehydrates the plant and gives it a healthy start, reducing transplant shock.
Check for proper depth, watering, and sunlight (6+ hours daily). Clematis can be slow to sprout—be patient! If no growth appears in 4-6 weeks, inspect the roots for rot or damage.
