
Beautiful Plants For Your Interior
Beautiful Plants For Your Interior
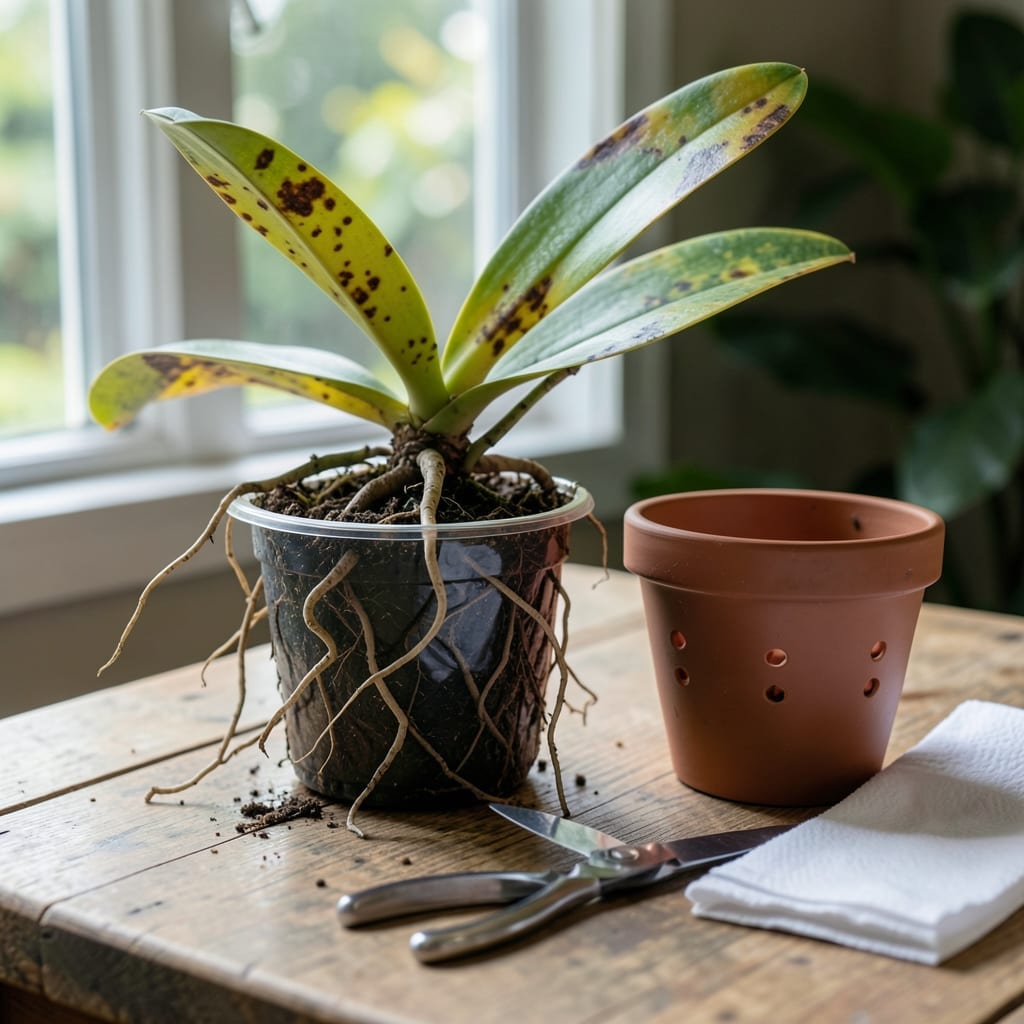
Yesterday, my orchid’s roots were gray and mushy. Today, I’m sharing the exact method that brought it back to life—no fancy tools required.
Overwatering suffocates roots, but there’s a simple fix. Remove the plant, trim the damaged parts, and let it dry in fresh air. It sounds drastic, but it works.
Within two weeks, new growth appears if you act fast. The key is patience and resisting the urge to water again too soon.
This approach saved my collection, and it’ll save yours too. No more guessing—just results.
Overwatering orchids often stems from misunderstanding their natural habitat and care needs. Orchids, particularly Phalaenopsis or moth orchids, are epiphytes, meaning they grow on trees in the wild, not in soil. Their roots are adapted to absorb moisture from the air and rain, not sit in waterlogged conditions. Here’s a breakdown of the most common causes:
Many beginners treat orchids like typical houseplants, watering them on a fixed schedule (e.g., once a week). However, orchids thrive on a “soak and dry” method. Their roots need time to dry out between waterings to prevent rot. Overwatering disrupts this balance, suffocating the roots and fostering fungal or bacterial growth.
Orchids require excellent drainage to mimic their airborne roots’ natural conditions. Using pots without drainage holes or dense, water-retentive potting mixes (like regular soil) traps moisture around the roots. This stagnation leads to root asphyxiation and decay, as oxygen cannot reach the root tissues.
Pots that are too large hold excess moisture, increasing the risk of overwatering. Orchids prefer snug containers where their roots can quickly access air and dry out. Additionally, non-breathable pots (e.g., plastic without ventilation) exacerbate the problem by preventing evaporation.
Low light, high humidity, or cool temperatures slow down an orchid’s metabolism, reducing its water needs. Ignoring these factors and watering on autopilot can overwhelm the plant. For example, orchids in dimly lit rooms or during winter dormancy require less frequent watering than those in bright, warm conditions.
Overwatering can leave your orchid with mushy roots and sad leaves, but don’t worry—it’s often fixable! Here’s how to address the most common causes of overwatering and nurse your plant back to health.
If the roots are brown, mushy, or smell foul, they’re likely rotting. Gently remove the orchid from its pot and rinse the roots under lukewarm water. Trim away all soft, dark roots with sterilized scissors (use rubbing alcohol to clean them). Repot the orchid in fresh, well-draining bark mix and a pot with drainage holes. Avoid watering for 5–7 days to let the roots recover.
Prevention tip: 💡 Always check the roots before watering—if they’re silver or gray, they’re thirsty; if they’re green, hold off!
Orchids hate soggy feet. If your pot lacks drainage holes or uses dense soil, switch to an orchid-specific pot (clear plastic or slatted) and a chunky, airy medium like firm bark or sphagnum moss. Elevate the pot on a tray with pebbles to improve airflow.
Prevention tip: 🌡️ Place a fan nearby on low to enhance air circulation around the roots.
Orchids thrive on infrequent, deep watering. Instead of a fixed schedule, water only when the top inch of the medium feels dry—usually every 7–10 days. For Phalaenopsis (moth orchids), soak the pot in room-temperature water for 10 minutes, then let it drain completely.
Prevention tip: ✨ Use a wooden skewer: insert it into the medium, and if it comes out dry, it’s time to water.
Yellowing leaves or black spots may signal a fungal or bacterial infection from excess moisture. Remove affected leaves and treat the plant with a diluted hydrogen peroxide solution (3%) or a copper-based fungicide. Isolate the orchid to prevent spreading to other plants.
Prevention tip: 🎯 Sterilize your tools between uses and avoid wetting the leaves when watering.
Check for brown, mushy roots that fall apart when touched. Healthy roots are firm and silver-green when dry. If roots smell foul, rot is present and needs immediate attention.
No, always use fresh orchid mix. Old medium may harbor fungi or bacteria that caused the rot. Choose chunky bark mix for best drainage and airflow.
With proper care, new roots typically appear in 2-4 weeks. Leaves may take longer to recover. Be patient and avoid overwatering during this recovery period.
Clear plastic pots with drainage holes work best. They let you monitor root health and allow moisture to escape. Elevate the pot to ensure water doesn’t pool underneath.