
Beautiful Plants For Your Interior
Beautiful Plants For Your Interior
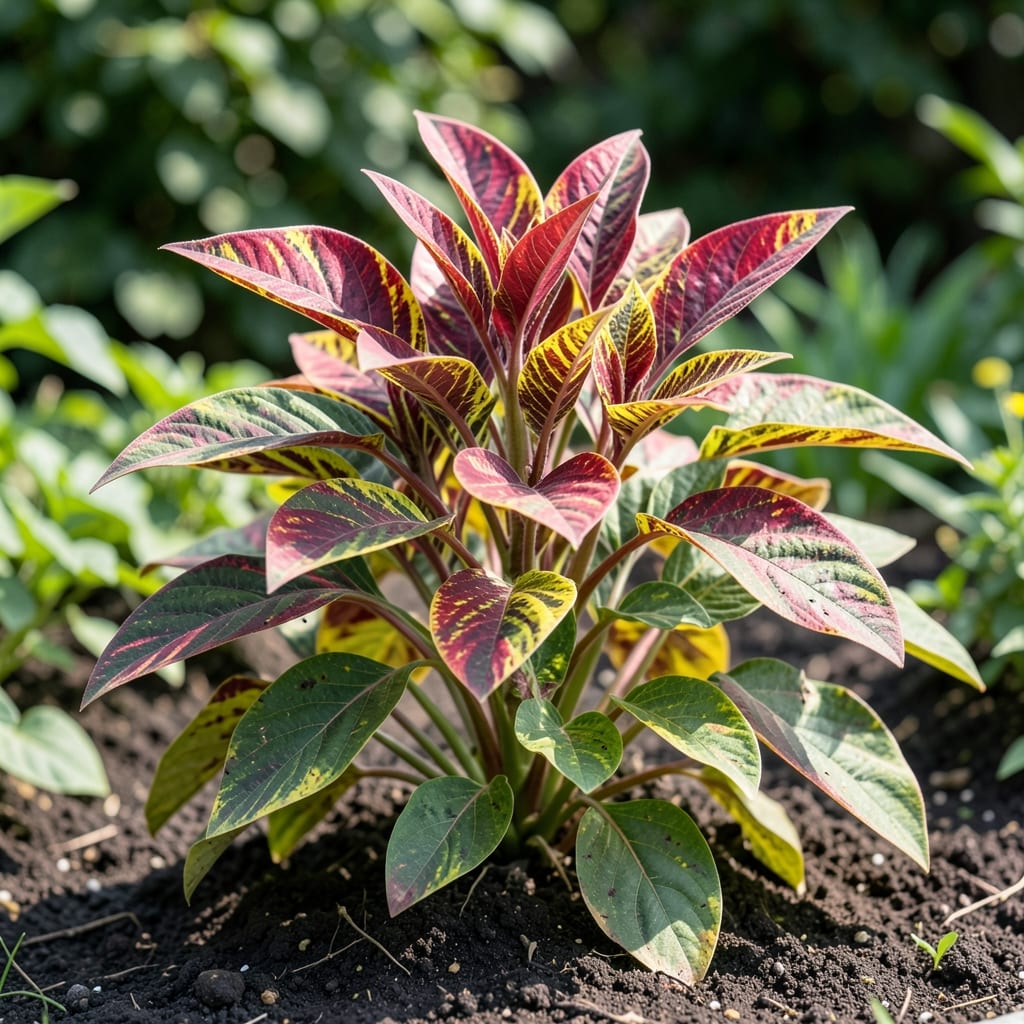
I first noticed amaranthus tricolor for its shockingly vibrant leaves—red, yellow, and green all on one plant. It grows fast, needs little care, and doubles as both a garden showpiece and a tasty leafy green.
This plant handles heat like a champ, thrives in poor soil, and keeps producing new growth all season. You’ll harvest tender leaves for salads or let it reach 3-4 feet tall for a dramatic backyard display.
📚 In This Guide
This method ensures vibrant foliage and a steady harvest of colorful, tender leaves.
Choose a spot with full sun to partial shade. Amaranthus tricolor thrives in 6-8 hours of sunlight daily, but it can tolerate some afternoon shade, especially in hotter climates. The soil should be well-draining and moderately fertile.
I always test the soil first—dig a small hole and fill it with water. If it drains within 1-2 hours, you’re good to go. If not, work in some compost to improve drainage and fertility.
Sow seeds directly into the garden after the last frost when soil temperatures reach 60-70°F. Plant seeds ¼ inch deep and space them 12-18 inches apart. Thin seedlings to the same spacing once they’re 2-3 inches tall.
If you prefer transplants, start seeds indoors 4-6 weeks before the last frost. Harden off seedlings before transplanting by gradually exposing them to outdoor conditions over 7-10 days.
Keep the soil consistently moist but not waterlogged. Water at the base of the plant to avoid wetting the leaves, which can invite fungal diseases. Aim for 1-1.5 inches of water per week, adjusting based on rainfall and soil conditions.
I fertilize lightly every 3-4 weeks with a balanced, water-soluble fertilizer. Amaranthus tricolor responds well to moderate feeding, but avoid over-fertilizing, which can lead to excessive leafy growth with less vibrant coloring.
Begin harvesting leaves when the plants are 8-12 inches tall. Use clean, sharp scissors to snip individual leaves or cut entire stems just above a leaf node. This encourages bushier growth and more leaves for future harvests.
Harvest in the morning for the best flavor and texture. Younger leaves are more tender and mild, while mature leaves can be slightly more fibrous. Regular harvesting keeps the plant productive and compact.
Watch for common pests like aphids and flea beetles. I inspect the leaves weekly, especially the undersides, and treat any infestations promptly with insecticidal soap or neem oil. Good air circulation helps prevent fungal issues like powdery mildew.
Remove any yellowing or diseased leaves immediately to keep the plant healthy. Rotating crops yearly can also reduce the risk of soil-borne diseases building up in the garden.
Small adjustments make a big difference when growing these colorful leaves.
The Sun Factor: Those 6 hours of direct sunlight in Step 1 aren’t just a suggestion. I noticed my ‘Illumination’ variety developed its deepest reds and yellows only after hitting that full sun threshold. Partial shade works, but you’ll sacrifice some vibrancy.
Planting Depth: Pressing seeds exactly ¼ inch deep as mentioned in Step 2 prevents them from drying out or washing away during watering. Any deeper and they struggle to emerge; shallower and they might not establish properly.
Watering Wisdom: The first 3-4 weeks after planting are critical for moisture. I learned the hard way that letting the top 1 inch of soil dry out completely during this period stunts growth. Keep it consistently moist but not soggy.
Harvest Strategy: When you start harvesting at 12-18 inches tall in Step 4, always pinch from the top. This forces the plant to grow outward rather than upward, giving you that bushy shape with more leaves to harvest later.
Yes! The young, tender leaves of Amaranthus tricolor are edible raw and often added to salads. They have a mild, spinach-like flavor. Ensure they’re fresh, pesticide-free, and harvested from non-toxic varieties.
Harvest leaves when the plant is 4-6 weeks old, before flowering. Pick the upper leaves first, leaving the lower ones to continue growing. Morning is ideal for the best flavor and tenderness.
If unavailable, try spinach, Swiss chard, or lambsquarters as substitutes. These greens offer similar textures and nutritional benefits, though flavors may vary slightly.
Yellowing leaves often indicate overwatering, poor drainage, or nutrient deficiencies. Check soil moisture and ensure proper drainage. Adjust watering and fertilize with nitrogen if needed.