
Beautiful Plants For Your Interior
Beautiful Plants For Your Interior
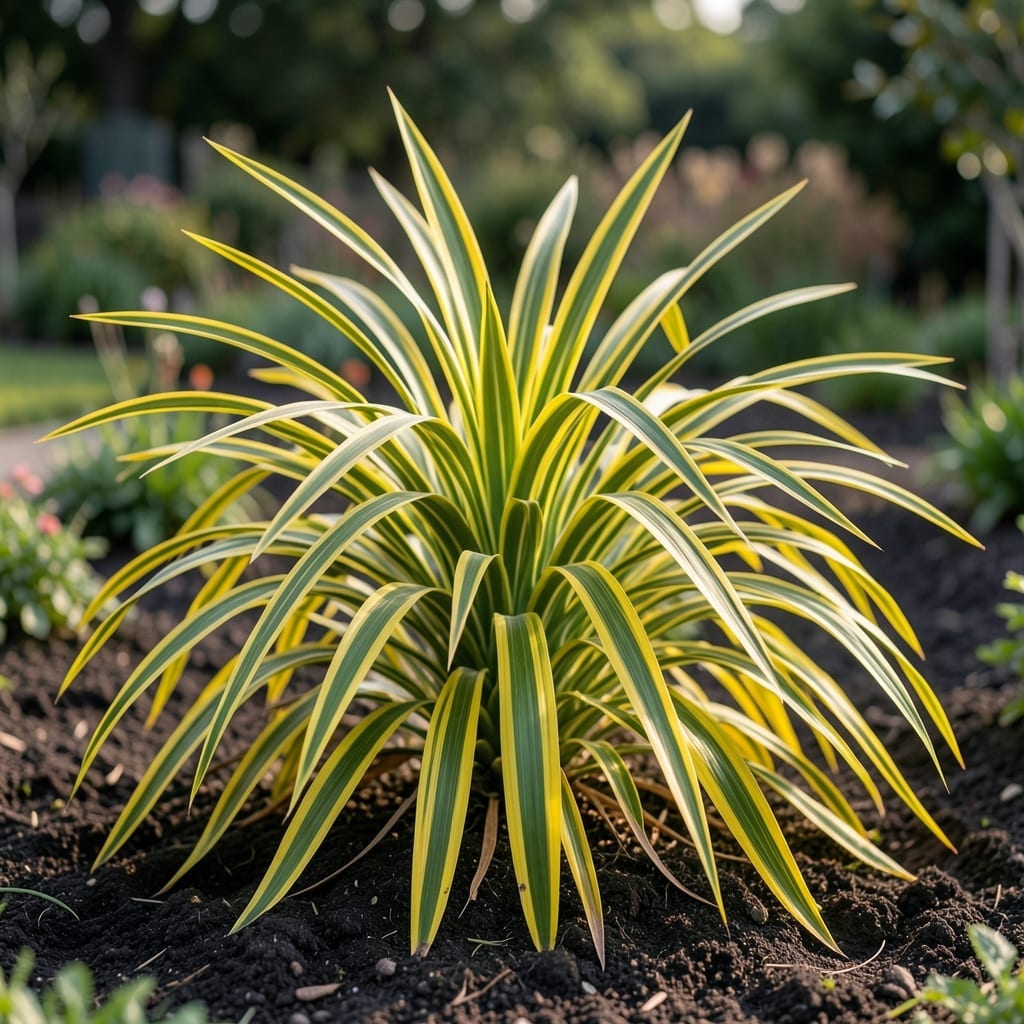
Phormium ‘Yellow Wave’ stops people in their tracks. That neon-yellow foliage with bronze edges looks like a sunset frozen in plant form, and it thrives with almost zero fuss once established.
I’ve grown this for years in full sun with well-draining soil, and it laughs at drought once the roots dig in. The secret is giving it room—the clumps can spread to 3-4 feet wide, but that’s what makes the display so dramatic.
📚 In This Guide
This method ensures vibrant foliage and strong establishment in your landscape.
Select a spot with full sun to partial shade, as this cultivar thrives in 6+ hours of direct sunlight daily. I’ve found morning sun with afternoon protection works well in hotter climates to prevent leaf scorch.
Ensure the soil drains well—these plants despise soggy roots. Test by digging a 12-inch hole and filling it with water. If it drains within 1-2 hours, you’re good to go. Amend heavy clay with compost to improve drainage before planting.
Dig a hole twice as wide as the root ball but no deeper. Phormium roots spread outward, so width matters more than depth. Loosen the soil at the sides and bottom of the hole to encourage outward root growth.
Mix a handful of compost or aged manure into the native soil you removed. This provides a nutrient boost without overwhelming the plant. Avoid fresh manure—it burns roots. I also add a slow-release fertilizer at this stage for long-term feeding.
Gently remove the plant from its container and check the roots. If they’re circling, tease them apart slightly to prevent girdling. Place the root ball in the hole so the top sits 1 inch above the surrounding soil level—this allows for natural settling.
Backfill with the amended soil, pressing lightly to eliminate air pockets. Water thoroughly once the hole is half-filled, then finish backfilling. This ensures the soil settles evenly around the roots. Mulch with 2-3 inches of organic material, keeping it away from the base to prevent rot.
Water deeply immediately after planting, soaking the root zone to a depth of 12-18 inches. For the first 2-3 weeks, water every 3-4 days unless rain provides at least 1 inch weekly.
After establishment, Phormium Yellow Wave is drought-tolerant. Reduce watering to every 10-14 days, allowing the soil to dry slightly between sessions. Overwatering is the most common mistake—yellowing leaves often signal too much moisture, not too little.
Fertilize lightly in early spring with a balanced, slow-release product. Avoid high-nitrogen formulas, which promote leafy growth at the expense of the plant’s dramatic form. Prune only to remove dead or damaged leaves, using clean shears to prevent disease.
Watch for signs of stress, like browning leaf tips, which often indicate underwatering or salt buildup from tap water. If this happens, flush the soil with a deep watering to leach out excess salts. In colder zones, apply a thick mulch layer in late fall for winter protection.
These planting insights will help you avoid issues and get the best results.
Sunlight Strategy: The 6+ hours of daily direct sunlight mentioned in Step 1 is non-negotiable for vibrant foliage. In hotter climates, I’ve learned the hard way that morning sun with afternoon shade prevents leaf scorch while still meeting this requirement. Trust me on this.
Drainage Test: That 12-inch hole test from Step 1 is your best friend—if water doesn’t drain within 1-2 hours, your plant’s roots will suffocate. I’ve ruined more plants by skipping this simple check than I care to admit.
Planting Depth: The 1 inch above soil level in Step 3 isn’t arbitrary. Planting too deep causes root rot, while this slight elevation accounts for natural settling. Press that soil firmly to eliminate air pockets—loose soil leads to poor root contact.
Watering Wisdom: The first 2-3 weeks are critical. That 12-18 inch deep watering after planting ensures roots establish properly. After that, resist the urge to overwater—the 10-14 day interval for established plants is perfect. Yellowing leaves almost always mean too much water, not too little.
Yes! Once established, Phormium Yellow Wave is highly drought-tolerant. It thrives in well-drained soil and can handle dry spells, making it ideal for low-maintenance gardens.
Water deeply once a week during the first growing season to help roots establish. After that, reduce watering—mature plants only need occasional hydration during prolonged dry periods.
Consider Cordyline (Ti Plant) or Dracaena for similar bold, architectural foliage. Both offer vibrant colors and thrive in comparable conditions.
Brown tips often signal underwatering or poor drainage. Check soil moisture and ensure the plant isn’t sitting in soggy soil. Trim damaged leaves to encourage healthy growth.
Spring or early fall is ideal, allowing roots to settle before extreme heat or cold. Avoid planting in peak summer or winter to reduce stress on the plant.