
Beautiful Plants For Your Interior
Beautiful Plants For Your Interior
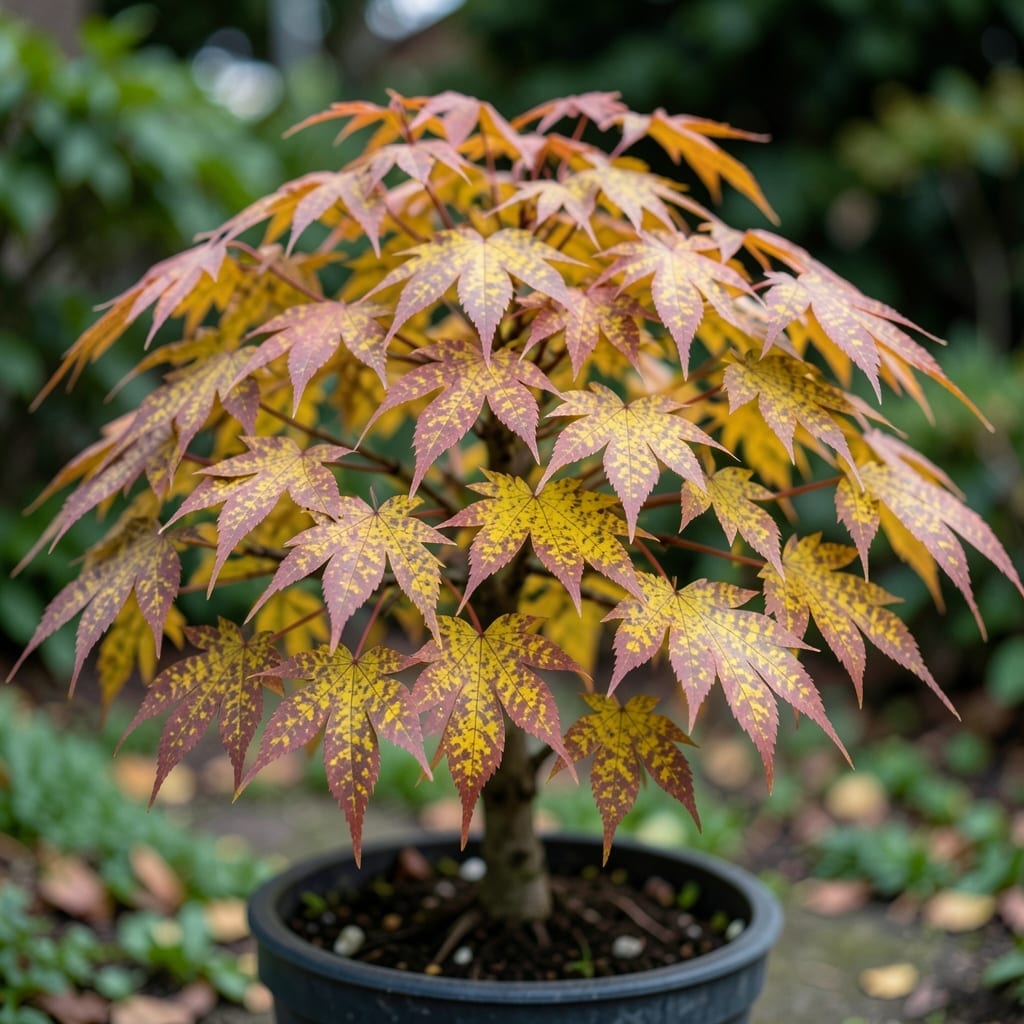
Those yellow spots on your Japanese maple aren’t just unsightly—they’re a call to action. I’ve seen this too many times: a perfectly healthy tree starts showing spots that spread fast.
Most cases trace back to 3 common culprits: fungal infections, pests, or environmental stress. The good news? With quick diagnosis and the right care, your tree can recover full color and vigor.
Quick fix for stressed maples. Most supplies are garden center staples.
| Ingredient | Amount | Notes |
|---|---|---|
| Neem Oil 🌿 | 1 piece | Cold-pressed for fungicide |
| Fungicide Spray 💧 | 1 bottle | Copper-based recommended |
| Garden Shears ✂️ | 1 piece | Sterilize between cuts |
| Mulch 🪵 | 2 bags | Organic bark or wood chips |
| Soil pH Tester 🌡️ | 1 piece | Digital or probe style |
| Balanced Fertilizer 🧪 | 1 bag | Low-nitrogen 5-10-10 |
| Hose with Adjustable Nozzle 💦 | 1 piece | Gentle spray setting |
| Leaf Rake 🪣 | 1 piece | For debris removal |
[recipe_ingredient_scaler]
Neem oil is your first line of defense against fungal spots—cold-pressed works best and won’t harm beneficial insects. Home Depot or Lowe’s stock copper fungicides if you prefer a stronger solution. The pH tester (worth the $10) reveals if your soil is too alkaline for maples.
No neem oil? Baking soda spray (1 tsp baking soda + 1 quart water + drop of soap) works in a pinch. Pine bark mulch is ideal for acid-loving maples, but any organic mulch beats bare soil. Skip high-nitrogen fertilizers—they promote leafy growth that’s prone to disease.
Store neem oil in a cool, dark place—it degrades in heat. Fungicide lasts 2-3 years unopened. Always clean shears with rubbing alcohol after pruning infected leaves (trust me on this one).
This method combines prevention and treatment to restore your tree’s health and protect it long-term.
Start by examining the pattern of yellow spots. If they appear with dark borders or black specks, you’re likely dealing with a fungal issue. Use the leaf rake to gather fallen leaves immediately—this prevents reinfection from overwintering spores. Don’t compost them; dispose in sealed bags.
For visible spots on branches, use the garden shears to prune affected leaves and stems. Sterilize the blades between cuts with rubbing alcohol to avoid spreading pathogens. This step is critical: removing infected material now stops the problem from worsening during damp weather.
Mix the neem oil with water according to package instructions and apply evenly to all leaf surfaces using the hose with adjustable nozzle on its gentlest setting. Neem oil disrupts fungal growth and prevents new spores from taking hold. Cover both tops and undersides—fungal spores often land on the lower surface first.
For severe cases, follow up with the fungicide spray 7-10 days later. Copper-based fungicides create a protective barrier that lasts through rain. Apply in the early morning when leaves are dry and temperatures are below 85°F to prevent leaf burn.
Use the soil pH tester to check your tree’s root environment. Japanese maples thrive in slightly acidic soil (5.5-6.5 pH). If your reading is off, amend accordingly before fertilizing. This ensures nutrients remain available to the roots.
Apply the balanced fertilizer (5-10-10 ratio) at half the recommended strength. Over-fertilizing, especially with high nitrogen, can stress the tree and exacerbate leaf problems. Water deeply after application to help roots absorb nutrients without burning.
Spread the 2 bags mulch in a 2-3 inch layer around the base of the tree, keeping it 3 inches away from the trunk to prevent rot. Organic bark or wood chips work best as they decompose slowly, improving soil structure over time.
Mulch maintains consistent soil moisture and temperature, which reduces stress on the tree. It also prevents soil splashing onto leaves during rain—a common way fungal spores spread. Replenish the mulch layer annually as it breaks down.
Japanese maples thrive in moderate temperatures. If yellow spots appear, check for heat stress. Avoid direct afternoon sun, especially in summer months. Use shade cloth to protect leaves from scorching.
Overwatering or drought can cause yellowing. Water deeply once a week, ensuring the soil stays moist but well-drained. Mulch around the base to retain moisture and regulate temperature.
Yellow spots may signal nutrient deficiencies. Test soil pH and amend with balanced fertilizer (10-10-10) in early spring. Avoid over-fertilizing, which can harm roots and worsen leaf discoloration.
Remove affected leaves promptly to prevent spread. Use sterilized pruning shears and cut at a 45-degree angle. Disinfect tools between cuts to avoid transmitting pathogens.