
Beautiful Plants For Your Interior
Beautiful Plants For Your Interior
Your garden’s potential starts with what’s under your feet. I’ve watched too many gardeners struggle with plants that should thrive—only to realize their soil was working against them. The good news? You can diagnose your dirt in less than 10 minutes using just your hands and a mason jar. Here’s the thing—soil isn’t just “dirt.” […]
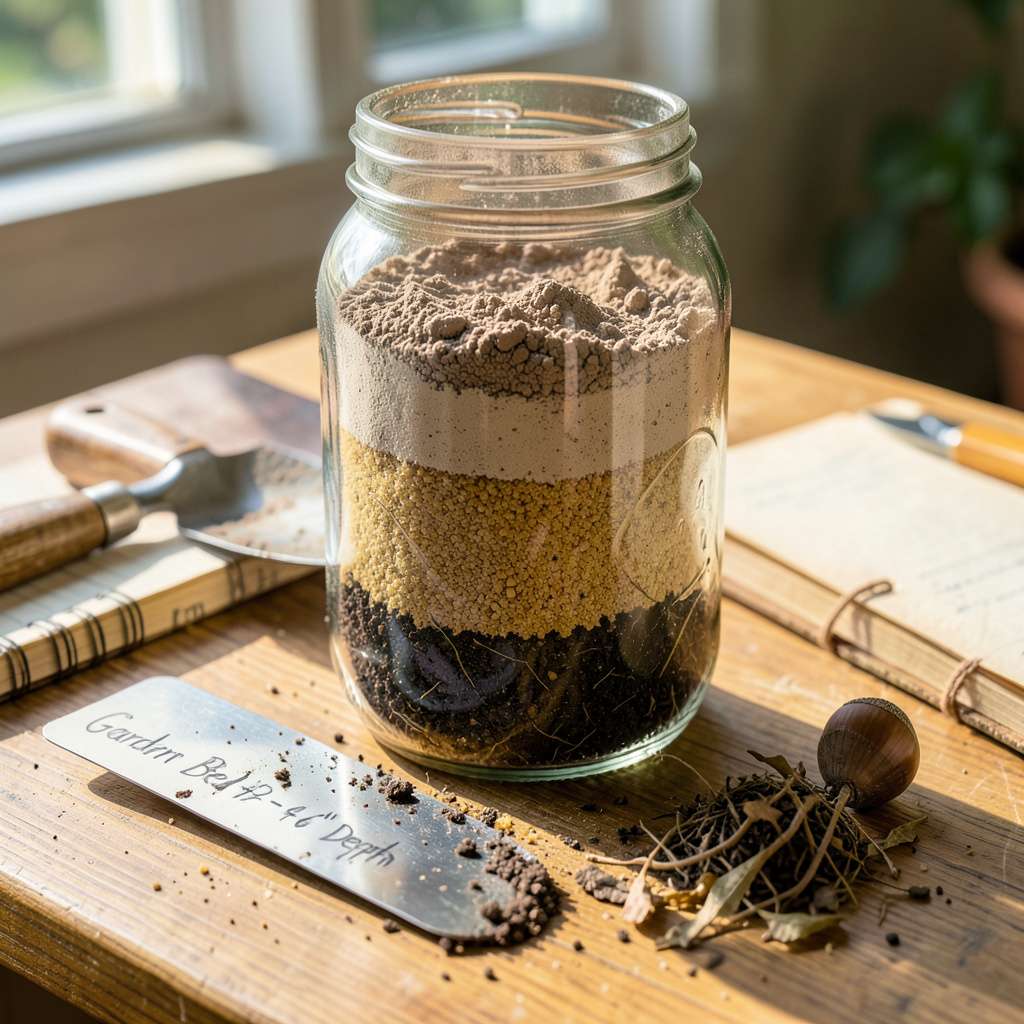
Your garden’s potential starts with what’s under your feet. I’ve watched too many gardeners struggle with plants that should thrive—only to realize their soil was working against them. The good news? You can diagnose your dirt in less than 10 minutes using just your hands and a mason jar.
Here’s the thing—soil isn’t just “dirt.” It’s a living system that’s either sandy and fast-draining, clay-heavy and compacted, or that perfect loamy balance most plants crave. My first vegetable garden failed because I assumed all soil was the same. After running this simple test, I finally understood why my carrots were stubby and my tomatoes stayed yellow.
You’ll walk away knowing exactly what you’re working with: gritty sand that needs organic matter, sticky clay that needs aeration, or that ideal crumbly loam. The test reveals texture, drainage speed, and even hints about nutrient levels. No fancy equipment, no waiting for lab results—just clear answers from materials you already have.
Best part? Once you know your soil type, improving it becomes straightforward. Sandy soil drinks water too fast? We’ll fix that. Clay soil drowns your plants? There’s a solution. This isn’t about guessing—it’s about giving your plants exactly what they need to grow their strongest.
📚 In This Guide
This foolproof method takes less than 10 minutes and reveals exactly what you’re working with in your garden.
Grab a clean trowel and collect 1 cup of soil from 3-4 different areas of your garden. Dig down about 4-6 inches deep—that’s where plant roots live, so it’s what matters most. Avoid surface soil, which often contains organic debris that doesn’t represent your true soil type.
Mix all samples together in a clean bucket and break up any clumps with your fingers. You want a uniform blend that represents your entire garden area. Remove any rocks, roots, or sticks—these will interfere with your test results and give you a false reading.
Fill a clear quart jar about one-third full with your mixed soil sample. Add water until the jar is nearly full, leaving about 1 inch of air space at the top. Screw the lid on tightly and shake vigorously for 3 full minutes—this completely breaks down the soil particles.
Set the jar on a level surface where it won’t be disturbed. Watch what happens over the next 24 hours. The soil will separate into distinct layers, with sand settling first (within minutes), followed by silt (after a few hours), and clay remaining suspended the longest.
After 24 hours, measure the thickness of each distinct layer using a ruler. Sand will be on the bottom (feels gritty), silt in the middle (feels smooth like flour), and clay on top (feels sticky when wet). Note the proportions—if sand makes up more than 60% of your jar, you’ve got sandy soil.
Clay-heavy soil will show a thick top layer that stays suspended longest, while loamy soil (the ideal type) shows roughly equal layers. Write down your measurements—this becomes your soil profile. I like to take a photo of the jar for future reference when planning amendments.
Take a handful of moist (not wet) soil from your garden and try to form it into a ribbon between your fingers. Sandy soil won’t hold shape at all—it’ll crumble immediately. Clay soil forms a long, flexible ribbon that holds together well. Loamy soil makes a short ribbon that breaks easily when you bend it.
Pay attention to how the soil feels: gritty indicates sand, smooth indicates silt, and sticky indicates clay. This tactile test confirms what you saw in the jar. I always do both tests because sometimes the ribbon test reveals nuances the jar test misses, especially in mixed soils.
Compare your jar test measurements and ribbon test results to standard soil type descriptions. Sandy soil drains too quickly, clay holds too much water, and loam represents the perfect balance. Write down your soil type—this becomes your gardening baseline for choosing plants and amendments.
Don’t worry if your soil isn’t perfect—most gardens aren’t. The real value comes from knowing exactly what you’re working with. I’ve found that simply understanding my soil type has improved my gardening success more than any single technique or product I’ve tried over the years.
After testing countless garden plots over the years, I’ve learned these key details make all the difference in getting reliable results.
Sampling Strategy: When collecting your 1 cup of soil from 3-4 different areas in Step 1, focus on spots where you’ve had plant struggles. I always include one sample from my best-performing area and one from my worst – this reveals hidden variations in your garden. Digging the full 4-6 inches deep is crucial because surface soil often contains mulch or organic matter that doesn’t represent your true soil composition.
Jar Test Precision: During the 3 full minutes of shaking in Step 2, I’ve found that holding the jar horizontally (like a maraca) works better than vertical shaking. This motion more effectively separates the particles. After setting it down, mark the water level on the jar with a dry-erase marker – this helps you accurately measure the layers after 24 hours when some water may have evaporated.
Layer Interpretation: When analyzing results after 24 hours in Step 3, don’t just look at thickness – examine the clarity of separation between layers. Well-defined layers indicate distinct soil components, while blurred transitions suggest a more balanced loam. I always measure each layer’s thickness as a percentage of the total soil column, not just in inches, for more accurate comparisons between tests.
Ribbon Test Nuances: For Step 4’s ribbon test, the moisture level of your soil sample dramatically affects results. Soil should be moist enough to hold together but not wet enough to stick to your fingers. I test moisture by pressing soil between my palms – if it leaves residue, it’s too wet. The ideal consistency feels like damp putty that just holds its shape when squeezed.
You can do a simple jar test! Fill a clear jar ⅓ with soil, add water until it’s ¾ full, then shake and let it settle for 24 hours. Layers will form: sand (bottom), silt (middle), and clay (top). Measure each layer’s thickness to determine your soil type—sandy, loamy, or clay-heavy.
Aim for early spring or fall when soil is moist but not soggy. Avoid testing right after heavy rain or during drought—extreme conditions can skew results. For veggie gardens, test 4-6 weeks before planting to adjust soil as needed.
Amendments work wonders:
Sandy soil? Add compost or peat moss to retain moisture.
Mix in gypsum or organic matter to improve drainage.
Use lime (to raise pH) or sulfur (to lower it).
Re-test annually to track progress!
Dark soil often means high organic matter, but if it’s compacted (common in clay-heavy mixes), water can’t flow. Try aerating with a garden fork or adding coarse sand/perlite. Avoid over-watering—soggy soil smothers roots and attracts pests.
Nope! Potting soil is lightweight, sterile, and designed for containers (often peat-based). Garden soil is denser, may contain weeds/seeds, and is meant for in-ground use. Never swap them—your plants’ roots (and your wallet) will thank you!
Now that you’ve unlocked the secrets of your soil, you’re one step closer to a thriving garden! 🌱 Whether it’s sandy, clay, loamy, or silty, knowing your dirt type helps you pick the right plants, amend the soil, and avoid common pitfalls. No more guessing—just smarter gardening!
Ready to put your new knowledge to work? Grab a soil amendment (like compost or peat moss) and start tailoring your soil to your plants’ needs. Happy digging! 🏡✨
