
Beautiful Plants For Your Interior
Beautiful Plants For Your Interior
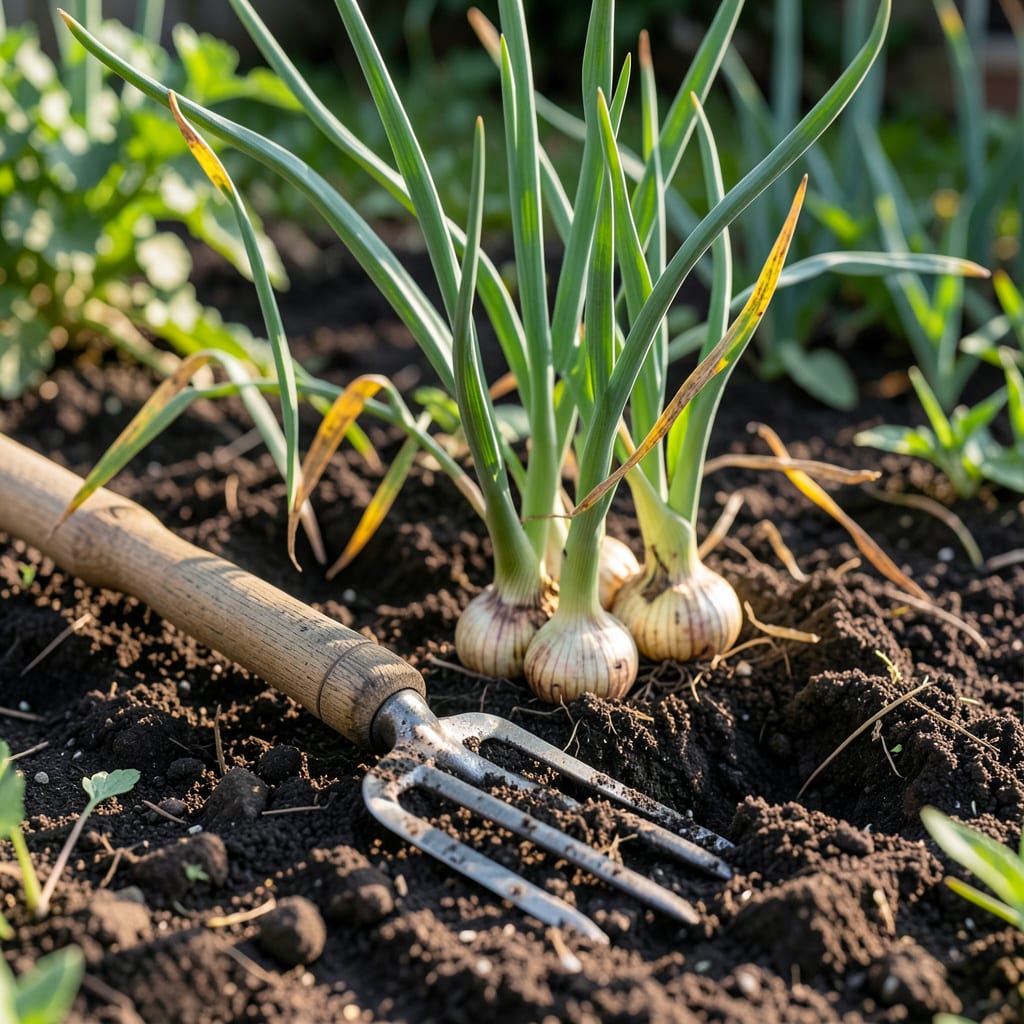
Knowing exactly when to pick your 🧅 Shallot can make or break your harvest. Unlike other garden crops, these alliums give off clear signals when they’re ready.
From yellowing leaves to softening necks, I’ll show you the exact visual cues to look for. No more guessing games—just perfectly timed harvesting every time.


I love how shallots give clear visual signals when they’re ready to harvest. Unlike onions, which can be tricky, shallots show obvious changes in their foliage and bulbs as they mature.
The most telling sign is when the green tops begin to yellow and flop over. This natural dieback indicates the plant is redirecting energy to bulb development, a sure sign of approaching harvest time.
| Harvest Sign | Description |
| Tops turn yellow | Leaves lose green color |
| Tops fall over | Foliage wilts and collapses |
| Necks feel soft | Stem just above bulb softens |
| Outer skin dry | Papery texture forms on bulb |
I always check the neck softening first. When the stem just above the bulb becomes soft and begins to shrivel, that’s your green light. This typically happens about 90-120 days after planting, depending on variety.
The foliage collapse is another unmistakable indicator. When about 50-75% of the tops have yellowed and fallen over naturally, your shallots are likely ready. Don’t confuse this with disease—healthy dieback is gradual and uniform.
Bulb size matters too. Mature shallots should have well-formed clusters with visible swelling at the base. I gently brush away soil to check size if I’m unsure about the foliage signs.
Remember, these signs differ from onions or garlic. Shallots often have more pronounced neck softening and their clusters form tighter groups. The papery outer skin should be completely dry when ready.
Timing affects flavor and storage. Harvest too early and you’ll get small, mild bulbs. Wait too long and they may split or rot. The sweet spot is when most tops have yellowed but some green remains.
I’ve found that morning harvesting works best. The soil is cooler and the bulbs are less likely to bruise. Use a fork to gently lift the clusters, being careful not to damage the delicate skins.
After harvesting, let them cure in a well-ventilated area for a week. This drying period helps form the protective outer layers that extend storage life. I spread mine in a single layer on a screen in my shed.
Watch for these signs and you’ll never miss the perfect harvest window again. Your shallots will thank you with full flavor and long storage potential. 🌱
I always use gentle inspection methods to check shallot readiness without disturbing the entire bed. This saves time and prevents accidental damage to still-growing plants.
My first step is to brush away soil carefully at the base of a few plants. This lets me examine the bulb size and check for the characteristic swelling that indicates maturity.
I pay special attention to the stem thickness. As shallots mature, the stem just above the bulb thins and softens. If it’s still thick and firm, I know to wait a few more days.
The leaf dryness test is another reliable method. I gently bend a leaf – if it snaps easily and feels dry, that’s a good sign the plant is nearing harvest time.
For ambiguous cases, I check the papery skin development. When the outer layers start to dry and form that characteristic paper-like texture, it’s usually safe to harvest.
If you’re still unsure, wait until 50-75% of the tops have naturally yellowed and fallen over. This is nature’s way of saying your shallots are ready for picking. 🌱
Harvesting shallots at the wrong time can ruin months of careful growing. I’ve seen many gardeners make simple mistakes that cost them their crop. Let me share the most common pitfalls and how to steer clear.
One of the biggest errors is harvesting too early. If you pull shallots while the tops are still green and upright, you’ll get small, underdeveloped bulbs that won’t store well. Patience is key here.
⚠️ Warning: Never harvest shallots with firm necks or moist outer skins. These are sure signs they need more time in the ground to mature properly.
On the flip side, waiting too long can be just as problematic. Overripe shallots may split or begin to rot in the soil. I check my patch daily once the tops start yellowing to catch the perfect moment.
Improper handling post-harvest is another common issue. Rough treatment can damage the delicate outer skins, making them more susceptible to disease. Always use a fork to lift them gently from the soil.
Many gardeners skip the curing process, which is crucial for storage. After harvesting, I spread my shallots in a single layer in a well-ventilated area for about a week to properly dry and form their protective outer layers.
By avoiding these mistakes, you’ll ensure a bountiful harvest of perfectly mature shallots that will store well and taste great. 🌱
Gently squeeze the stem just above the bulb. When ready, it will feel soft and shriveled, not firm. This typically occurs after 90-120 days of growth.
Wait until 50-75% of the tops have yellowed and fallen over. Partial yellowing means the plant is still maturing. Harvesting too early results in small, underdeveloped bulbs.
Avoid harvesting when the soil is wet. The bulbs are more prone to damage, and excess moisture can lead to rot. Always wait for dry conditions to lift them gently.
Spread them in a single layer in a well-ventilated area for about 1 week. This drying period helps form protective outer layers for better storage.
