
Beautiful Plants For Your Interior
Beautiful Plants For Your Interior
That first golden cascade of creeping jenny spilling over my stone wall changed everything. What started as three small cuttings became a vibrant 10-foot carpet in one season—no fancy tools, no greenhouse, just a few simple techniques anyone can master. This plant doesn’t just grow; it transforms spaces with shockingly little effort. Here’s the thing—most […]
That first golden cascade of creeping jenny spilling over my stone wall changed everything. What started as three small cuttings became a vibrant 10-foot carpet in one season—no fancy tools, no greenhouse, just a few simple techniques anyone can master. This plant doesn’t just grow; it transforms spaces with shockingly little effort.
Here’s the thing—most propagation guides overcomplicate it. You don’t need rooting hormone, special lights, or perfect humidity. My method uses what you already have: a sharp pair of scissors, a glass of water, and about 15 minutes of your time. The cuttings root so eagerly you’ll wonder why you ever bought plants.
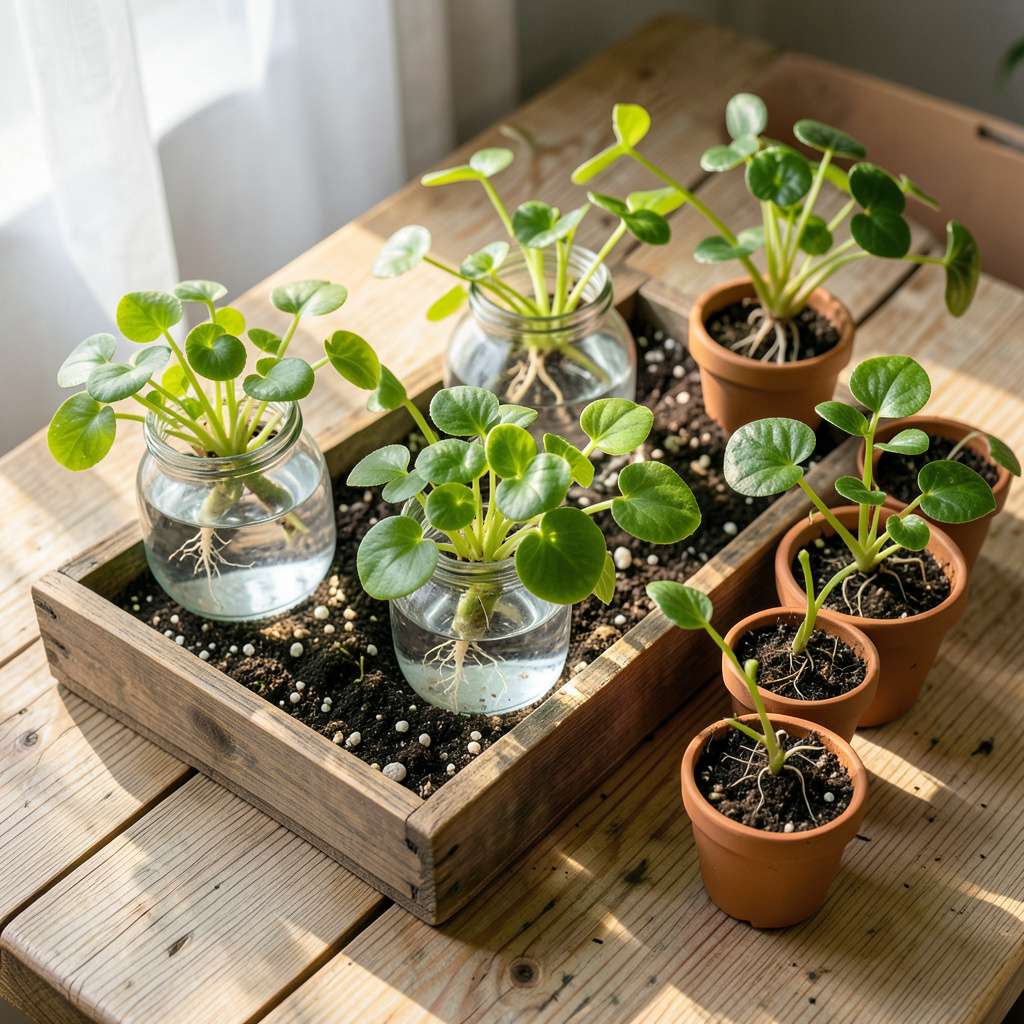
Within three weeks, you’ll see white roots snaking through the water, and by week six, you’ll have sturdy plants ready for transplanting. They’ll spread faster than you expect, filling gaps between pavers, softening container edges, or creating living mulch under trees. The color stays electric—even in partial shade.
Fair warning: this plant means business. It thrives where others struggle, asks for almost nothing in return, and rewards you with that unmistakable chartreuse glow. Whether you’re covering bare spots or creating a cascading effect, these cuttings deliver results that’ll make your garden look intentionally wild in the best way.
📚 In This Guide
Clean water (room temperature, 1–2 cups in a glass jar 🥛).
This simple method turns a single plant into endless ground cover—no special tools required.
Start by choosing vigorous, disease-free creeping jenny plants in early spring or fall. Look for stems that are 4-6 inches long with bright green leaves and no brown spots. I always pick stems that haven’t flowered yet—they root faster than older growth.
Gently trace the stem back to where it roots at the soil surface. You’ll want sections that have visible nodes (those little bumps where leaves emerge). These nodes are where new roots will form, so count at least 3-4 nodes per cutting for best results.
Using clean scissors or pruners, snip just below a node at a 45-degree angle. This increases the surface area for rooting. Each cutting should be 3-5 inches long—long enough to handle but not so long it loses moisture before rooting.
Remove the lower leaves from the bottom 1-2 inches of each cutting. I leave the top few leaves intact to continue photosynthesis, but strip enough so you’ll have bare stem to bury. If any flowers are present, pinch them off—they’ll divert energy from root production.
For water rooting, place cuttings in a glass with 1-2 inches of room-temperature water. Only the bare stem should be submerged—leaves in water will rot. Change the water every 3-4 days to prevent bacterial growth. You’ll see white roots emerging within 2-3 weeks.
Alternatively, stick cuttings directly into moist potting mix. Use a pencil to make holes first—this prevents the stems from snapping. Bury 1-2 inches deep and firm the soil gently. Keep the soil consistently moist but not soggy. A clear plastic bag over the pot creates humidity until roots establish.
Once roots reach 1-2 inches long (for water-rooted cuttings) or you see new leaf growth (for soil-rooted ones), they’re ready to transplant. Choose a spot with partial to full shade—creeping jenny thrives where other plants struggle with too little light.
Space plants 6-12 inches apart for quick coverage or 18 inches apart if you want them to fill in more slowly. Water deeply after planting and keep the soil moist for the first 7-10 days. You’ll know they’ve taken when you see new growth emerging from the center of the plant.
After 4-6 weeks, your new plants will start sending out runners. Gently direct these horizontal stems toward bare spots in your garden. Wherever a node touches soil, it can form new roots. I pin down runners with bent wire or small stones to encourage rooting at multiple points.
Once established, creeping jenny spreads 12-18 inches per season under ideal conditions. For faster coverage, trim back vertical growth by one-third every 4-6 weeks. This redirects energy into horizontal spread rather than upward growth, creating that lush carpet effect you want.
Here’s what I’ve learned from years of propagating creeping jenny—these small details make all the difference between struggling cuttings and thriving ground cover.
Selection Secret: In Step 1, when choosing parent plants, look beyond just healthy stems. The most vigorous cuttings come from plants growing in partial shade—they’ve already adapted to the ideal light conditions you’ll want for your new plants. I always check the undersides of leaves for pests before taking cuttings, as even healthy-looking plants can harbor spider mites that will spread to your new propagations.
Cutting Technique: For Step 2, here’s what nobody tells you—make your 45-degree cut just below a node, but also make a tiny vertical slit (about 1/4 inch) at the base of each cutting. This creates more surface area for root emergence. I use a razor blade for this precision cut, and it’s dramatically increased my success rate with both water and soil propagation methods.
Rooting Environment: During Step 3’s water propagation, place your glass of cuttings on a windowsill with bright, indirect light—but not direct sun. I learned the hard way that direct sunlight heats the water too much, causing stem rot. For soil propagation, mist the inside of your plastic bag daily to maintain humidity without making the soil soggy. The difference between damp and waterlogged soil at this stage can mean success or failure.
Transplant Timing: When you reach Step 4, don’t rush the transplant just because you see roots. Wait until those roots are actually 1-2 inches long and have secondary root hairs—these fine roots are what will anchor your plant and absorb water efficiently. I’ve found that plants transplanted with only primary roots often struggle to establish, even if they technically have “roots” according to the timeline.
Here are the most common questions about propagating creeping Jenny—answered!
Under ideal conditions (warm soil, consistent moisture), roots typically form in 2–4 weeks. Faster rooting occurs in water propagation (1–2 weeks), while soil propagation may take slightly longer. Patience is key—avoid tugging on cuttings to check progress!
Spring or early summer (when temps stay above 50°F/10°C) is ideal for outdoor propagation. For indoor starts, year-round works if you provide bright light. Avoid extreme heat or frost, which can stress new cuttings.
Absolutely! Water propagation is beginner-friendly. Snip 4–6″ stems, remove lower leaves, and place in a jar of water. Change water weekly, and transplant to soil once roots reach 1–2 inches long. Just avoid leaving them in water too long—roots can get mushy.
This usually signals overwatering, poor drainage, or too much sun. Trim dead foliage, ensure containers have drainage holes, and move cuttings to bright, indirect light. If propagating in water, refresh it every 3–4 days to prevent bacterial growth.
If you want similar vibes with less spread, try golden oregano (edible + fragrant) or sedum ‘Angelina’ (drought-tolerant). For shady spots, sweet woodruff offers delicate foliage without aggressive growth.
With these simple yet effective tips, you’re now ready to propagate creeping jenny like a pro! 🌿 Whether you choose stem cuttings, division, or layering, patience and consistency will reward you with a vibrant, low-maintenance ground cover. Remember, the key is keeping the soil moist and providing gentle sunlight as your new plants take root.
Ready to get started? Grab your shears, pick a healthy parent plant, and dive in—your garden will thank you with a cascade of golden-green beauty in no time! For even more propagation success, consider experimenting with different methods to see what works best in your climate. Happy gardening! 🌱
