
Beautiful Plants For Your Interior
Beautiful Plants For Your Interior
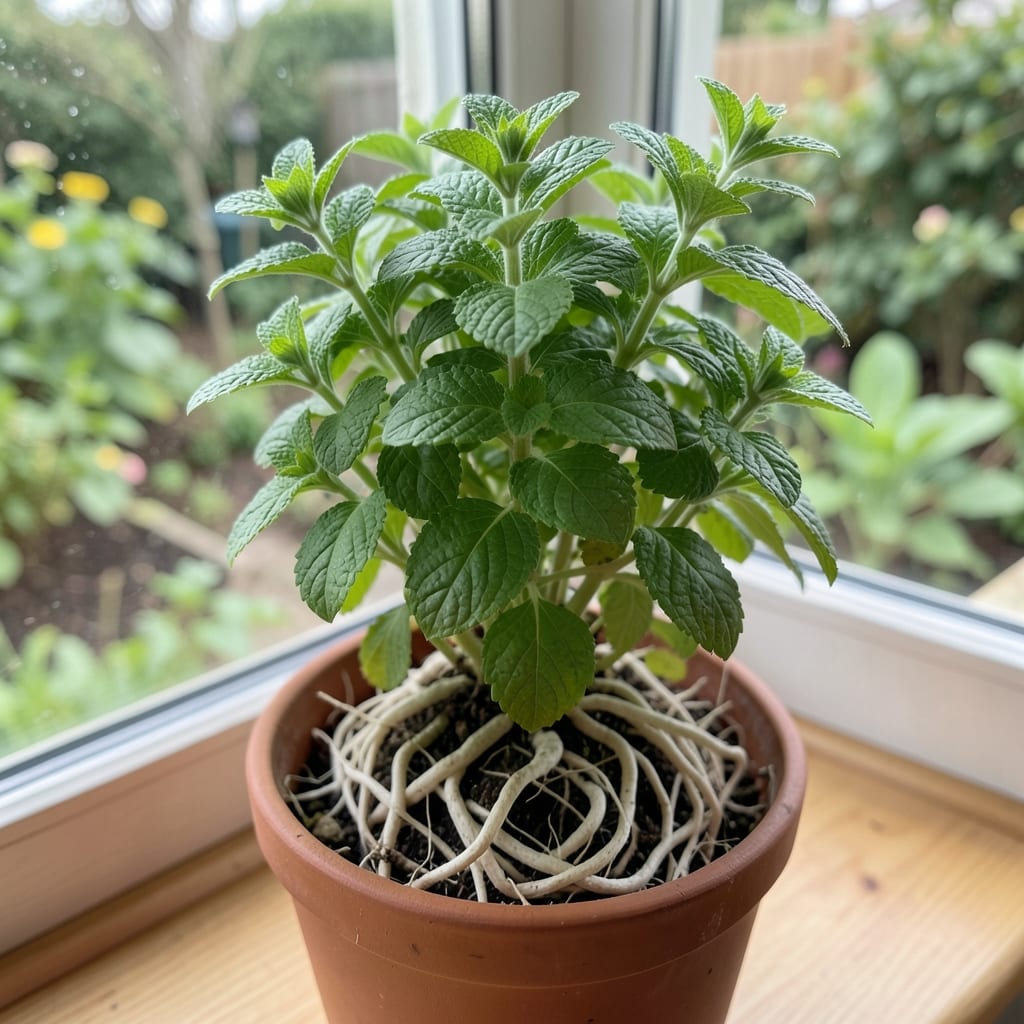
Your mint looks sad, leaves yellowing, growth stunted. I’ve been there—root bound mint is a silent growth killer that sneaks up when you least expect it.
The roots coil around themselves in a tight ball, choking the plant. Repotting or root pruning brings it back to life fast, and you’ll see new vibrant growth within 2 weeks.
📚 In This Guide
Here’s the method I rely on to rescue a pot-bound mint plant without shock or stress.
Gently squeeze the sides of the pot and tilt it at a 45-degree angle. If the root ball slides out easily, it’s not yet bound. A truly root-bound plant resists removal, and you’ll see roots circling the soil surface or poking through drainage holes. I’ve found that mint often shows stunted growth and yellowing lower leaves when it’s circling for space.
Another sign is water running straight through the pot without being absorbed—this happens because the dense root mass repels moisture instead of letting it penetrate. If you notice these symptoms, it’s time to act before the plant declines further.
Once removed from the pot, use your fingers to gently tease apart the outer roots, working your way inward. The goal is to break the circular pattern so roots grow outward into fresh soil. I prefer doing this with slightly damp roots—they’re more pliable and less likely to snap.
For severely bound plants, make 3-4 vertical cuts through the root ball with a clean knife, about ½ inch deep. This encourages new root growth at the cut edges. Don’t worry about being too gentle here—mint recovers quickly from aggressive root pruning.
Choose a new pot that’s 2-3 inches wider in diameter than the current one. Fill it with fresh potting mix, then position the plant so it sits at the same depth as before. I always water the new soil lightly before adding the plant to help settle it and eliminate air pockets.
After placing the mint, fill around the root ball with more mix, pressing lightly to secure it. Leave a ½-inch gap at the top to prevent water from spilling over the edge during irrigation. The fresh soil gives roots immediate access to nutrients and moisture.
Water thoroughly until you see it draining from the bottom, then place the pot in bright, indirect light for 3-5 days. This reduces stress while the plant establishes. I’ve learned that direct sun can scorch the leaves of a recently repotted mint.
Hold off on fertilizing for 1-2 weeks—new soil contains enough nutrients, and adding more can burn tender new roots. Resume normal care once you see new leaf growth, which usually appears within 7-10 days.
If the plant wilts slightly in the first day or two, don’t panic. This is normal as it adjusts. Just keep the soil consistently moist but not soggy during this recovery period.
These insights will help ensure your mint thrives after repotting.
The Root Check: In Step 1, tilting at that 45-degree angle is key—many miss the subtle resistance of a truly bound plant. Also check drainage holes; visible roots there confirm it’s time to act before growth stalls completely.
Pruning Precision: For Step 2, those 3-4 vertical cuts through the root ball should be exactly ½ inch deep. Shallower cuts won’t stimulate enough new growth, while deeper ones risk damaging the core root system mint relies on.
Pot Selection: When choosing your new container in Step 3, stick to that 2-3 inches wider diameter guideline. A pot that’s too large holds excess moisture, which can lead to root rot in the delicate recovery phase.
Recovery Environment: The 3-5 days of bright, indirect light in Step 4 is non-negotiable. Direct sun during this period can cause leaf scorch, while low light slows the establishment of new roots in the fresh soil.
Look for roots circling the pot, slow growth, or yellowing leaves. Gently remove the plant to check for a dense, tangled root ball—this is a classic sign!
Yes! Repot it into a larger container with fresh soil, or divide the roots and replant. With proper care, it’ll bounce back quickly.
Early spring or fall is ideal, as cooler temps reduce stress. Avoid repotting during extreme heat or while the plant is flowering.
For a quick fix, prune the roots and trim the foliage to reduce stress. However, repotting or planting in the ground is the best long-term solution.
Mint grows aggressively! Use a larger pot (12+ inches) or plant it in the ground with barriers to control its spread. Regular root pruning helps too.