
Beautiful Plants For Your Interior
Beautiful Plants For Your Interior
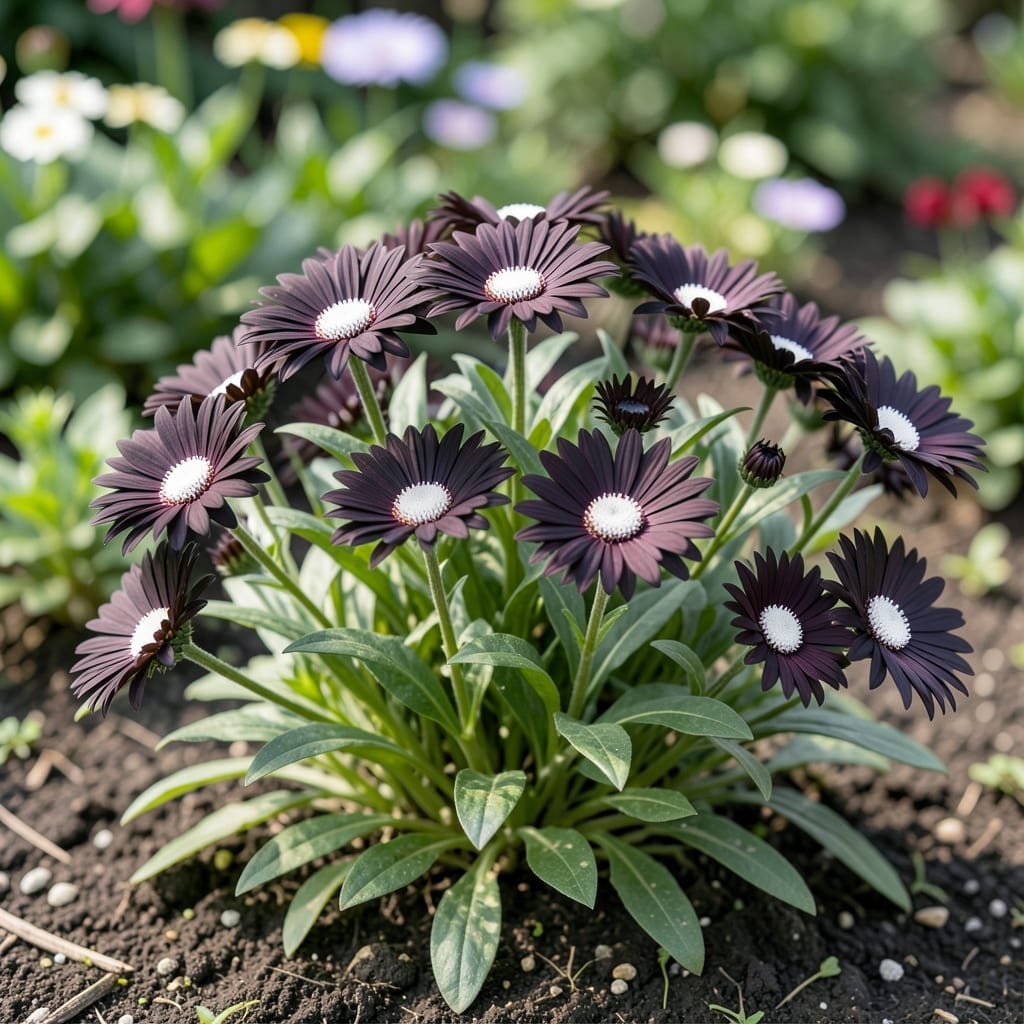
Black Widow osteospermum stopped me in my tracks the first time I saw it. Those deep purple petals with white centers look like something from another planet, and they keep blooming from spring through fall with barely any effort.
This plant thrives in full sun and well-draining soil, and it laughs at drought once established. I’ve grown it in containers, borders, and even dry slopes where other plants give up. The secret is giving it room to spread and resisting the urge to overwater.
📚 In This Guide
Follow these straightforward steps to get the most vibrant blooms from your garden addition.
Select a spot that receives full sun for at least 6-8 hours each day. Osteospermum thrives in bright light, and insufficient sun leads to weak stems and sparse blooms. I always check the area’s light exposure at different times of day to ensure it meets this requirement.
Ensure the soil drains well to prevent waterlogging. If your garden has heavy clay soil, amend it with compost or plant in raised beds. You’ll notice healthier growth when roots aren’t sitting in soggy conditions.
Dig a hole that’s roughly twice the width of the plant’s root ball but no deeper. Place the plant in the hole so the top of the root ball sits slightly above the soil level. This prevents settling, which can bury the stem too deeply.
Space plants 12-18 inches apart to allow for air circulation and future growth. Crowding can lead to disease and weak blooms. After planting, water thoroughly to help the roots establish in their new home.
Water deeply after planting, then let the top 1-2 inches of soil dry out between waterings. Overwatering is a common mistake—these plants prefer drier conditions once established. You’ll know it’s time to water when the soil feels dry to the touch.
Feed with a balanced, water-soluble fertilizer every 2-3 weeks during the growing season. I’ve found that too much fertilizer results in lush foliage but fewer flowers, so stick to the recommended dose.
Pinch back the tips of young plants to encourage bushier growth. This step is simple but effective—just use your fingers to snip the top 1-2 inches of each stem. The plant will respond by branching out, leading to more blooms.
Remove spent flowers regularly to promote continuous blooming. Deadheading prevents the plant from putting energy into seed production, so it focuses on creating new flowers instead. Do this every 1-2 weeks for best results.
If temperatures drop below 40°F, consider covering plants with frost cloth or moving potted specimens indoors. These plants are sensitive to cold and can suffer damage if exposed to frost.
In extreme heat, provide afternoon shade to prevent wilting. You’ll notice leaves drooping if the plant is stressed. A little shade during the hottest part of the day keeps it looking its best.
These simple adjustments will help your plants thrive with minimal effort.
Sunlight Requirement: The 6-8 hours of full sun mentioned in Step 1 isn’t just a suggestion—it’s essential for those striking blooms. I check my garden’s light patterns by placing a stick in the soil and marking its shadow every hour. If you notice weak stems or sparse flowers, your spot likely isn’t getting enough direct sunlight.
Soil Preparation Insight: In Step 1, the advice about well-draining soil is critical. I learned this the hard way when my first batch sat in clay soil and developed root rot. If you’re unsure about drainage, dig a 1-foot-deep hole, fill it with water, and see how quickly it drains. Anything over 4 hours means you’ll need to amend the soil or use raised beds.
Watering Technique: The 1-2 inches of dry soil between waterings in Step 3 is your best indicator. I use the finger test—stick your finger into the soil up to the second knuckle. If it feels dry at that depth, it’s time to water. Overwatering shows up as yellowing leaves or wilting, even when the soil is wet.
Pruning Timing: For Step 4, the every 1-2 weeks deadheading schedule keeps blooms coming. I set a calendar reminder to check my plants every Sunday. The more consistently you remove spent flowers, the more energy the plant puts into new blooms rather than seed production.
Keep it in well-draining soil with full sun to partial shade. Water moderately, allowing the soil to dry between waterings. Deadhead spent blooms to encourage continuous flowering.
This variety typically blooms from late spring to early fall, producing striking dark-centered flowers. Regular deadheading can extend the blooming season.
Watch for aphids, slugs, or powdery mildew. Treat pests with neem oil and ensure good air circulation to prevent fungal issues. Healthy plants resist problems better!
Yes! Use a pot with drainage holes and a quality potting mix. Containers allow you to move the plant for optimal sunlight. Just water more frequently in hot weather.
Lack of blooms often means insufficient sunlight or over-fertilizing (especially with nitrogen). Adjust care to prioritize phosphorus-rich fertilizer and 6+ hours of sun daily.