
Beautiful Plants For Your Interior
Beautiful Plants For Your Interior
That moment when a single orchid stem becomes two thriving plants? Pure magic. I’ve turned what used to be a nervous experiment into a reliable way to multiply my collection—no fancy greenhouse required. The key is working with the plant’s natural growth patterns, not against them. The process starts with choosing the right stem (hint: […]
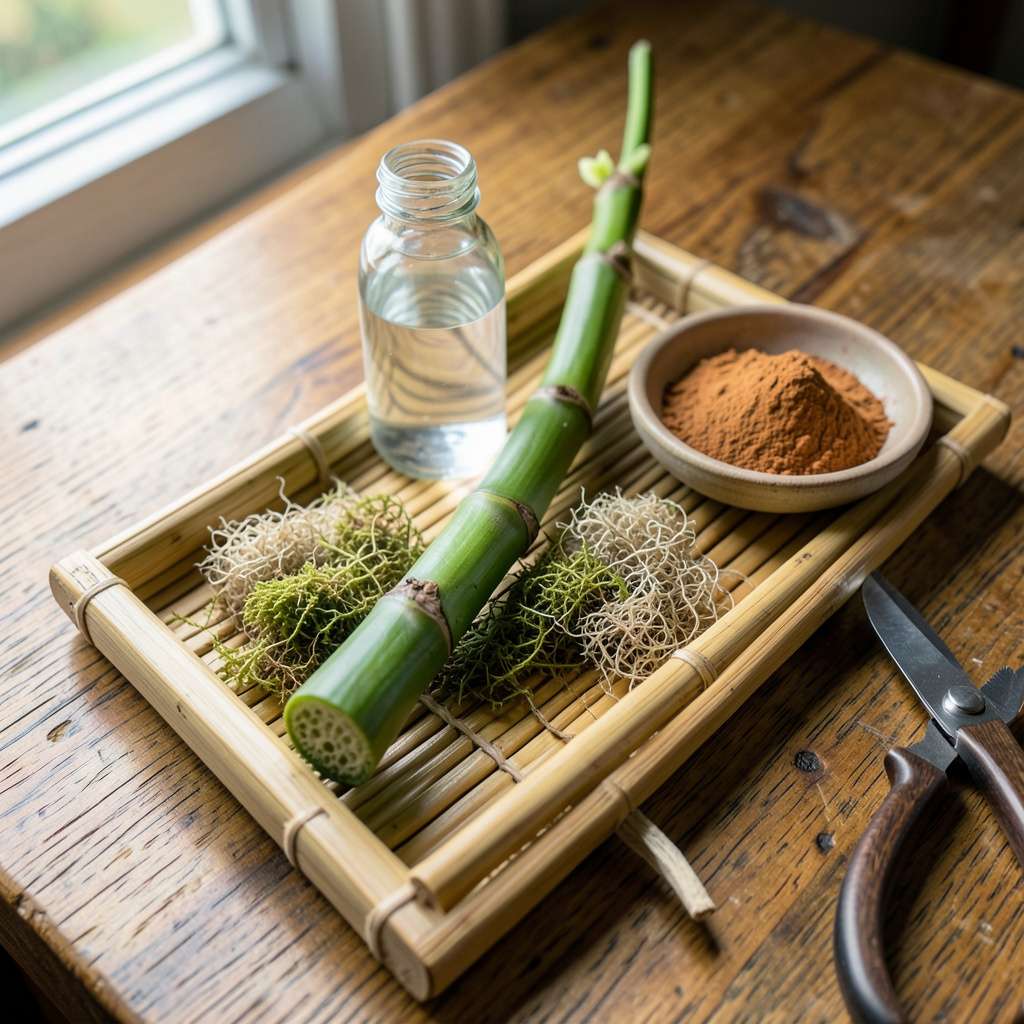
That moment when a single orchid stem becomes two thriving plants? Pure magic. I’ve turned what used to be a nervous experiment into a reliable way to multiply my collection—no fancy greenhouse required. The key is working with the plant’s natural growth patterns, not against them.
The process starts with choosing the right stem (hint: look for nodes with dormant buds) and making clean cuts. I ruined my first attempts by using dull scissors that crushed the tissue. Now I know a sharp blade and quick action make all the difference in whether those cuttings take root or rot.
Within 4-6 weeks, you’ll see new roots forming and baby leaves emerging. The first time I checked my propagation setup and spotted tiny white root tips, I actually did a little victory dance. These new plants grow faster than seed-grown orchids and bloom true to the parent plant.
Works for phalaenopsis, dendrobium, and many other common orchid types. Whether you’re rescuing a leggy plant or expanding your collection, this method delivers results. Here’s exactly how to do it right the first time.
📚 In This Guide
Sphagnum moss (1 cup, soaked in water and squeezed dry), OR
This method transforms a single orchid stem into multiple thriving plants—no green thumb required.
Choose a healthy stem that has finished blooming but remains green and firm. Look for one with at least two nodes (those small brown lines where leaves or roots emerge). I always pick stems that are 12-18 inches long—shorter ones lack the energy reserves needed for new growth.
Using sterilized scissors, cut the stem just below the lowest node at a 45-degree angle. This slanted cut increases the surface area for water absorption and prevents the stem from sitting flat in your propagation medium. Wipe the blade with rubbing alcohol between cuts to avoid spreading bacteria.
Dip the cut end in cinnamon powder (a natural antifungal) then in rooting hormone gel to encourage growth. Let it sit for 5 minutes—this gives the hormone time to adhere properly. You’ll see a faint white film form; that’s the active ingredient working.
Fill a shallow tray with 1 inch of sphagnum moss (soaked and squeezed to dampen). The moss should feel like a wrung-out sponge—not dripping, but thoroughly moist. Place the treated stem horizontally on the moss, ensuring at least one node makes direct contact with the medium.
Cover the tray with a clear plastic dome or plastic wrap to maintain 80% humidity. Orchid stems propagate best in 70-75°F with indirect light. I use a seedling heat mat under the tray to keep temperatures consistent, especially in cooler rooms.
Check daily for condensation inside the dome. If droplets disappear, mist the moss lightly. You’ll know the environment is right when you see tiny water beads on the plastic within 24 hours. Avoid opening the dome for at least 2 weeks—disturbing the humidity slows root development.
After 4-6 weeks, you’ll notice small green nubs emerging from the nodes. These are new roots or keikis (baby orchids). Once roots reach 1-2 inches long, carefully lift the stem and separate each new growth with its attached root system.
Plant each keiki in a 3-inch pot filled with orchid bark mix. Water lightly, then place in bright, indirect light. The original stem may produce multiple keikis—don’t discard it until it turns brown. I’ve gotten up to 4 new plants from a single healthy stem using this method.
Keep the new plants in 60-70°F with 50% humidity for the first month. Water when the top layer of bark feels dry—usually every 5-7 days. You’ll see new leaf growth within 6-8 weeks, which means the plant has successfully established.
Begin fertilizing with quarter-strength orchid fertilizer after the first new leaf appears. These propagated orchids will bloom in 12-18 months, identical to their parent plant. The key is patience—orchids grow slowly but reward you with years of stunning flowers.
These practical insights will help you avoid common pitfalls and maximize your success with this propagation method.
Stem Selection Secret: When choosing your stem in Step 1, look for one that’s not just green but has a slight firmness when gently squeezed. I’ve found that stems with a diameter of about ¼ inch work best—they have enough stored energy to support multiple keikis. Avoid stems with any yellowing or soft spots, as these indicate the plant is already diverting energy away from that growth.
Hormone Application Technique: In Step 2, when applying the rooting hormone gel after the cinnamon powder, use a clean cotton swab to spread it evenly over the entire cut surface. The 5-minute waiting period is crucial—don’t rush it. I like to set a timer and watch for that faint white film to form, which signals the hormone is properly adhered and ready to stimulate root growth.
Humidity Maintenance: During the 2-week period mentioned in Step 3 when you shouldn’t open the dome, resist the urge to check on your stem too frequently. Every time you lift the cover, you lose valuable humidity and heat. Instead, observe through the clear plastic—healthy condensation should form within those first 24 hours and remain consistent. If droplets disappear, mist the sides of the dome rather than opening it.
Patience With Growth: When you reach the 4-6 week mark in Step 4, don’t be discouraged if you don’t see immediate results. Some orchid varieties take the full 6 weeks to show signs of new growth. The key is maintaining consistent 70-75°F temperatures and 80% humidity. I’ve noticed that stems placed near east-facing windows (with indirect morning light) often develop keikis faster than those in other locations.
Got questions about propagating orchids from stems? You’re not alone! Here are the most common concerns—with quick, actionable answers to help your orchids thrive.
Not all orchids work well with stem propagation. Phalaenopsis (moth orchids) and Dendrobium are beginner-friendly, while Cattleya or Vanda often need keikis (baby plants) or division. Always check your orchid’s species first!
Patience is key! With proper humidity (70-80%) and warmth (70-80°F), roots may appear in 4-12 weeks. Some slow growers (like Dendrobium) can take up to 6 months. Mist daily and avoid overwatering to speed things up.
Rot usually means too much moisture or poor airflow. Use a sterile razor for cuts, let the stem callus (dry) for 24 hours before planting, and choose a chunky mix (like sphagnum moss + perlite). Skip waterlogged setups!
It depends! Stem propagation is great for rescuing leggy plants or creating clones, but division is faster for mature orchids with multiple pseudobulbs. Try both to see what works for your plant’s health and your goals.
Aim for early spring (just before active growth) or after blooming. Avoid winter dormancy or extreme heat. Warmth and longer daylight hours = faster rooting and less stress on the parent plant.
Propagating orchids from stems is a rewarding way to expand your collection without breaking the bank! 🌱 With the right tools, patience, and a little care, you can turn a single healthy stem into multiple thriving plants. Remember, sterilization, humidity, and consistency are your best friends in this process.
Now that you’re equipped with the know-how, why not pick your favorite orchid and give it a try? Start with a healthy, mature stem, follow the steps, and soon you’ll be enjoying the satisfaction of watching new roots and leaves emerge. Happy propagating—your green thumb is about to level up! 🌸
