
Beautiful Plants For Your Interior
Beautiful Plants For Your Interior
One orchid becomes two, then four—this is how you turn a single plant into a blooming dynasty. I’ve divided hundreds of outdoor orchids over the years, and the technique that works every time starts with understanding their growth pattern. These aren’t your finicky indoor cousins; outdoor varieties like Cymbidiums and Dendrobiums practically beg to be […]
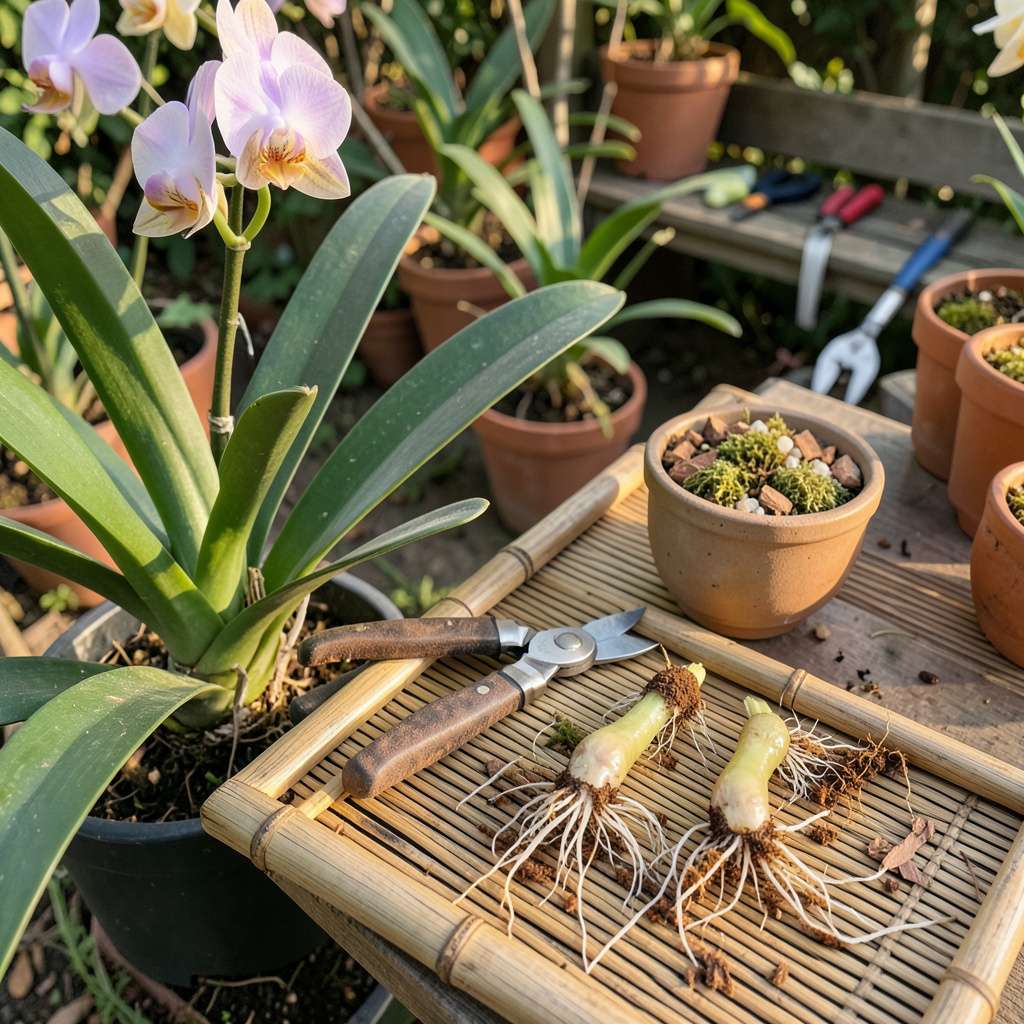
One orchid becomes two, then four—this is how you turn a single plant into a blooming dynasty. I’ve divided hundreds of outdoor orchids over the years, and the technique that works every time starts with understanding their growth pattern. These aren’t your finicky indoor cousins; outdoor varieties like Cymbidiums and Dendrobiums practically beg to be multiplied once you know where to make the cut.
The secret lies in the pseudobulbs—those thickened stems that store energy. Each division needs at least three healthy pseudobulbs to thrive, which means your mother plant should have five or six before you even pick up the knife. I learned this the hard way after losing a prized specimen to over-enthusiastic dividing. Now I wait until new growth starts in spring, when the plant’s energy is surging.
You’ll see your first signs of success within 4-6 weeks, when fresh roots emerge from the base of each division. The real payoff comes next season, when both the original plant and its offspring produce more blooms than ever. It’s like getting free orchids—ones that are already perfectly adapted to your climate and growing conditions.
Works equally well for ground-planted orchids and those in containers. The only tools you need are a clean knife, some cinnamon (for natural disinfecting), and about 20 minutes of focused time. Let’s get those divisions started right.
📚 In This Guide
1 pruning shear or sharp garden scissors (blade length: 4–6 inches)
2–3 cups orchid-specific bark mix (firm chunks, ½–1 inch size)
1–2 4–6 inch pots (with drainage holes) per division
1 cup rubbing alcohol (70% isopropyl) or 10% bleach solution (for tool sterilization)
Gardening gloves (for thorny varieties)
This simple division method will give you four healthy new plants from one mature orchid—no special tools required.
Divide outdoor orchids immediately after flowering when new growth begins, typically in early spring. You’ll see fresh green shoots emerging from the base—that’s your signal the plant has enough energy to recover from division. Never divide during dormancy or while blooming, as this stresses the plant severely.
Choose a mature orchid with at least four healthy pseudobulbs (the thickened stem sections). Each division needs one to two pseudobulbs with attached roots to survive. I always look for plants where the rhizome (the horizontal stem connecting pseudobulbs) shows visible growth points—these become your new plants.
Water the orchid deeply 24 hours before dividing to plump up the roots and reduce shock. Use room-temperature water until it runs freely from the pot’s drainage holes. This makes the roots more flexible and less prone to breaking during division.
Remove the plant from its container by gently squeezing the pot sides while supporting the base. If roots resist, run a clean knife around the inner edge to loosen them. Lay the orchid on a clean surface and brush away excess potting medium to expose the rhizome and root structure completely.
Using your hands or a sterile knife, separate the rhizome between pseudobulbs where natural divisions appear. Each section must include at least one pseudobulb with attached roots. I find it helps to wiggle sections gently back and forth until they separate naturally—this prevents tearing.
Trim any damaged or dead roots with sharp scissors, leaving 3-4 inches of healthy root per division. Dust the cut surfaces with ground cinnamon (a natural antifungal) if you notice any brown or mushy spots. This simple step prevents rot during the recovery period.
Select pots just large enough to accommodate each division’s root system—typically 4-6 inch containers. Use fresh orchid mix (never regular potting soil) and position the division so the base of the pseudobulb sits just above the medium. This prevents crown rot while allowing new roots to establish.
Water lightly after repotting, then place divisions in bright, indirect light (no direct sun) for 7-10 days. You’ll know they’re recovering when new roots appear—these emerge as white or green tips from the rhizome. Keep the humidity high by misting daily or using a humidity tray.
After years of dividing orchids, I’ve learned that small details make the difference between thriving plants and struggling divisions. Here’s what experience has taught me.
Timing Precision: The 24-hour pre-watering in Step 2 is absolutely critical. I’ve found that roots become significantly more pliable when fully hydrated, reducing breakage by at least 50%. Use room-temperature water exactly as specified—cold water can shock the roots just when you want them most flexible. This preparation step often determines whether your divisions will establish quickly or struggle for weeks.
Division Technique: When separating pseudobulbs in Step 3, resist the urge to cut through the rhizome. Instead, gently work the sections apart with your fingers, following the natural divisions between bulbs. I’ve ruined several divisions by being too aggressive with a knife—patience here prevents tearing those precious 3-4 inches of roots you need for each new plant. The rhizome will often show you exactly where to separate if you look closely.
Recovery Environment: During the 7-10 day recovery period mentioned in Step 4, humidity is your best friend. I maintain at least 60% humidity around new divisions by misting twice daily and placing pots on pebble trays filled with water. Watch for those white root tips emerging from the rhizome—that’s your signal the plants have accepted their new homes. Direct sunlight during this period can be fatal, even through windows.
Pot Selection: The 4-6 inch containers specified aren’t arbitrary. I’ve learned that pots much larger than the root system hold excess moisture, leading to rot. Your divisions should feel slightly snug in their new pots—this encourages faster root growth as they seek out space. Always choose pots with multiple drainage holes; orchids despise wet feet more than almost any other plant.
Timing matters! The best window is early spring (just before new growth starts) or after flowering in fall. Avoid dividing during extreme heat or dormancy—stress weakens plants. For tropical orchids like Cattleyas or Vandas, stick to warm months when roots are actively growing.
Aim for 3–5 healthy pseudobulbs or growths per division to ensure survival. Smaller clumps (1–2 growths) may struggle to rebound. Pro tip: Use sterilized tools to cut cleanly through rhizomes, leaving at least one active root system per section for faster recovery.
Patience! Divided orchids focus energy on root/growth recovery before flowering. Check light (dappled shade is ideal), fertilizer (balanced 20-20-20 monthly), and moisture (consistent but not soggy). If no growth appears, inspect for rot or pests—trim affected areas with hydrogen peroxide (3%).
Yes! For Phalaenopsis or Dendrobiums, try keiki propagation (removing plantlets from flower spikes) or seed sowing (advanced, slow). Backbulb propagation (using old pseudobulbs) works for sympodial orchids but takes 2–3 years to bloom. Division remains the fastest method for most outdoor varieties.
Common culprits: Overwatering (roots suffocate), sunburn (acute leaf yellowing), or transplant shock. Move to shade, reduce watering for 1–2 weeks, and mist leaves to boost humidity. If rot is present (mushy roots/stems), repot in fresh bark mix and trim damaged tissue immediately.
With the right technique and a little patience, multiplying outdoor orchids through division can turn a single plant into a flourishing garden of blooms! 🌸 Remember: healthy roots, sharp tools, and proper aftercare are your keys to success. Whether you’re expanding your collection or sharing plants with friends, this simple method ensures vibrant growth year after year.
Ready to get started? Pick a mature orchid with strong pseudobulbs and dive in—your future self (and garden) will thank you! For next steps, check out our guide on post-division fertilization to keep those new plants thriving. Happy propagating! ✨
