
Beautiful Plants For Your Interior
Beautiful Plants For Your Interior
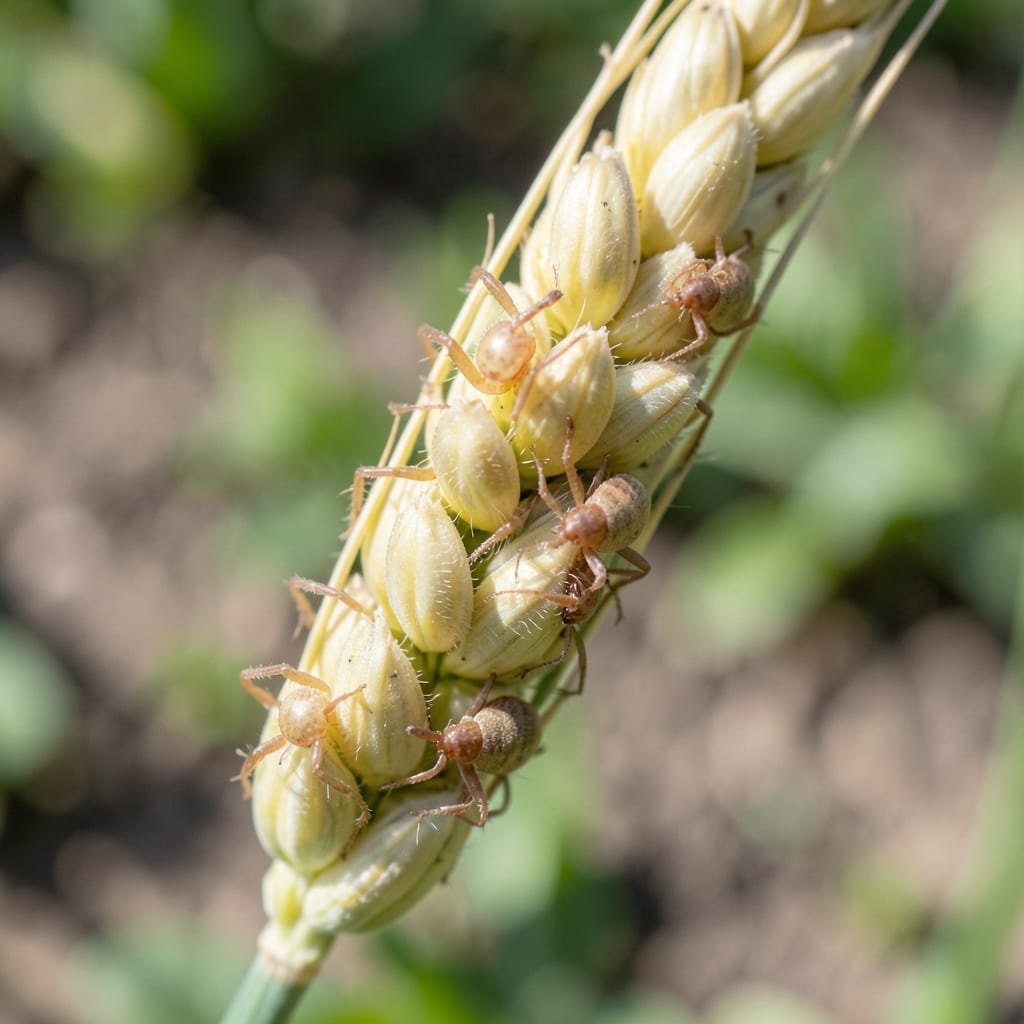
Tiny pests, big problems. Mites in wheat can silently reduce yields before you even notice they’re there. I’ve seen healthy-looking fields lose 20-30% of their potential harvest because of these microscopic invaders.
The damage starts with stippling on leaves, then progresses to stunted growth and poor grain development. Early detection is key, but most growers miss the signs until it’s too late. They thrive in dry, hot conditions, making summer wheat especially vulnerable.
Non-toxic solutions do exist. Beneficial predators, crop rotation, and proper irrigation disrupt their lifecycle without chemicals. These methods protect your yield while keeping the soil and surrounding ecosystem healthy.
Prevention beats treatment every time. A few simple habits now can save your crop from infestation later.
Mites in wheat fields don’t appear out of nowhere—they thrive when specific conditions align. Understanding these triggers helps growers take preventive action before an outbreak. Below are the primary causes, backed by agronomic science.
Mites, especially wheat curl mites (Aceria tosichella), flourish in hot, arid environments (75–85°F/24–29°C). Low humidity accelerates their reproduction, as dry air reduces fungal pathogens that naturally suppress mite populations. Drought-stressed wheat plants also produce weaker defenses, making them easier targets.
Planting wheat year after year in the same field (monocropping) depletes soil biodiversity and eliminates natural predators like lady beetles or lacewings. Without these checks, mite colonies expand unchecked. Crop rotation with non-host plants (e.g., legumes) disrupts their life cycle.
Wheat curl mites are highly mobile, hitching rides on wind currents to infest new fields. Infestations often start at field edges near overwintering hosts (e.g., volunteer wheat, corn, or grassy weeds). Regular scouting of border rows can catch early migrations.
Broad-spectrum insecticides kill beneficial insects that prey on mites, creating a vacuum for populations to explode. Studies show fields treated with neonicotinoids or pyrethroids often see secondary mite outbreaks within weeks. Integrated Pest Management (IPM) prioritizes selective treatments or biological controls.
Using contaminated seed is a direct route to infestation. Mites can survive on seed surfaces or within kernels, especially if stored in warm, humid conditions. Always source certified mite-free seed and treat with hot water or diatomaceous earth pre-planting.
Tackling mite infestations in wheat requires a mix of immediate action and long-term prevention. Here’s how to address the most common causes and keep your crop healthy.
Mites thrive in dense, humid environments. Thin your wheat plants to improve airflow and reduce moisture buildup. Aim for at least 6–8 inches between rows. If the infestation is severe, consider removing heavily affected plants to prevent the mites from spreading. Rotate crops annually to break the mite life cycle.
Dusty, dry fields invite mites. Water your wheat consistently—early morning is best to allow foliage to dry by evening. Mulch with organic matter to retain soil moisture and create a less inviting environment for mites. For existing infestations, a strong blast of water can dislodge mites from plants.
Weak or stressed wheat is more susceptible. Apply balanced, organic fertilizers to promote vigorous growth. Neem oil or insecticidal soap (sprayed in the evening) can smother mites without harming beneficial insects. Introduce predatory mites or ladybugs as natural predators to keep populations in check.
With these steps, you can effectively manage mites while keeping your wheat thriving naturally. ✨
Look for yellow or white stippling on leaves, which indicates feeding damage. Fine webbing on the plant surface is another clear sign. Check leaf undersides with a magnifying glass for tiny, moving dots.
Yes, some species can persist in stored wheat for weeks. Store grain in airtight containers and keep humidity below 12%. Freezing infested grain for 72 hours kills mites effectively.
Ladybugs, lacewings, and predatory mites like Phytoseiulus persimilis feed on them. Encourage these beneficial insects by planting companion flowers and avoiding broad-spectrum pesticides.
Act at first signs of damage, typically in early morning or evening when mites are most active. Treat before populations explode, as they reproduce rapidly in warm, dry conditions.