
Beautiful Plants For Your Interior
Beautiful Plants For Your Interior
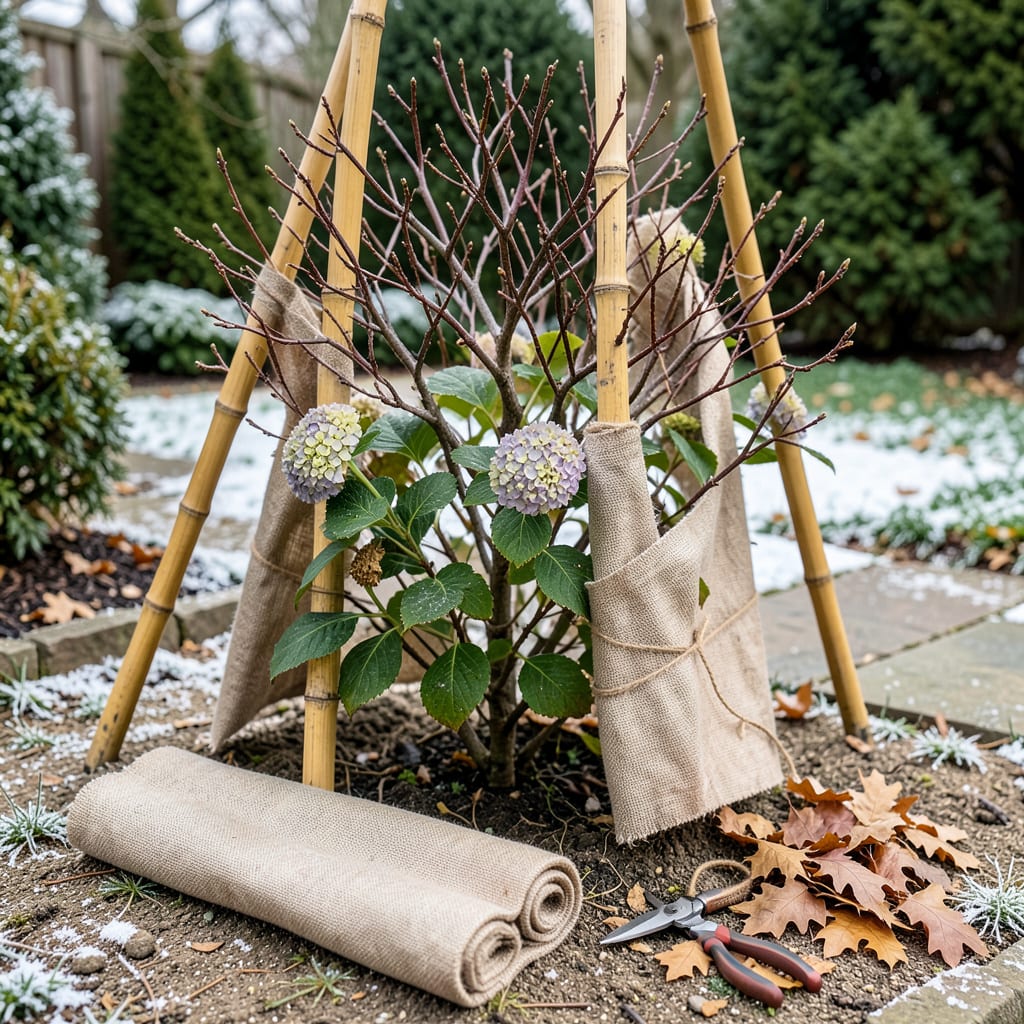
I learned the hard way that winter doesn’t just test our patience—it tests our shrubs. That first year I skipped wrapping, my hydrangeas looked like they’d been through a blender by spring. The right winter wrap acts like a cozy jacket, shielding plants from freeze-thaw cycles, biting winds, and hungry deer that see your landscape as a buffet.
Timing matters more than you’d think. Wrap too early and you risk moisture buildup; wait too long and you’re playing catch-up with frost damage. The sweet spot is after the first light frost but before the ground freezes solid—usually late fall. Evergreens, young plants, and anything with thin bark (like Japanese maples) need this protection most. Here’s how to do it right.
📚 In This Guide
This method keeps your plants safe from freezing winds and heavy snow—no guesswork, just reliable protection.
Wait until after the first light frost when leaves have dropped but before temperatures dip below 25°F. This timing prevents pests from nesting inside while ensuring you beat the worst cold. I use burlap, breathable fabric wraps, or commercial plant protection blankets—never plastic, which traps moisture and causes rot.
Gather twine, soft plant ties, or zip ties to secure the wrapping. For taller shrubs, you’ll need stakes or a wooden frame to support the wrap without crushing branches. Check that your materials are clean and dry before starting—damp fabric will freeze and damage what it’s meant to protect.
First, water the shrub deeply at the base until the soil is moist 6 inches down. Hydrated roots survive winter stress better than dry ones. Gently remove any remaining leaves or debris from the branches—these can trap moisture and encourage fungal growth under the wrap.
For evergreens like arborvitae or boxwood, lightly tie the branches upward with twine to prevent snow accumulation from splaying them. Don’t pull too tight—you should still see natural gaps between branches. This step is crucial: broken limbs from snow load are the most common winter damage I see in unprotected shrubs.
Start at the base and work upward, overlapping each layer by 3-4 inches like shingles on a roof. For burlap, wrap it around the shrub and secure with twine at 12-inch intervals. The wrap should be snug but not tight—you want air circulation while blocking wind.
For a frame method (ideal for pyramids or columns), build a simple wooden A-frame or wrap chicken wire around the shrub first, then attach the burlap to the frame. This creates an air pocket that insulates better than direct contact. Leave the top slightly open on mild winter days to prevent heat buildup, but secure it tightly before storms.
Double-check all ties and fastenings after the first strong wind—wraps often loosen within the first 24 hours. Throughout winter, brush off heavy snow accumulation gently with a broom (don’t shake branches—this causes breakage). On sunny days above 40°F, partially open the top to allow ventilation.
Inspect monthly for animal activity—mice and rabbits love to nest in cozy wrapped shrubs. If you notice chewing at the base, spray the lower wrap with a hot pepper repellent (reapply after rain). The wrap should stay in place until spring when nighttime temperatures consistently stay above 32°F.
Take the wrap off gradually on a cloudy day in early spring when new growth begins to show at the branch tips. Sudden exposure to strong sun can scorch tender new leaves. Start by opening the top for a few hours each day, then remove the sides completely after 3-4 days of acclimation.
Discard any wrapping that shows signs of mildew or rodent damage—don’t reuse compromised materials. Give the shrub a deep watering after unwrapping and apply a layer of mulch to conserve moisture as it recovers. You’ll see the difference this protection makes when your shrubs leaf out full and healthy while neighbors’ plants struggle.
After years of winterizing gardens, I’ve learned that small details make all the difference between thriving shrubs and springtime disappointments.
Timing is Everything: The window between the first light frost and temperatures dropping below 25°F is critical. I’ve seen gardeners wait too long and struggle with frozen soil that makes securing wraps nearly impossible. Mark your calendar when local forecasts predict that first frost, then act within the following week. This timing also prevents pests from moving in for the winter.
Watering Wisdom: Many people skip the deep watering mentioned in Step 2, but this is your shrub’s lifeline. The 6-inch soil moisture depth isn’t arbitrary—it ensures roots have adequate hydration to survive freezing cycles. Use a moisture meter or dig a small test hole to verify depth. I water until I see moisture at that 6-inch mark, which often takes longer than you’d expect.
Wrap Technique Matters: The 3-4 inch overlap and 12-inch interval securing in Step 3 aren’t just suggestions—they’re engineered for maximum protection. I learned this after a particularly windy winter where my loosely wrapped shrubs developed windburn. Now I use a measuring tape to ensure consistent overlaps and spacing. For taller shrubs, I add an extra tie at the midpoint to prevent fabric from ballooning in strong winds.
Ventilation Balance: The instruction to partially open wraps on days above 40°F is crucial for preventing moisture buildup. I set phone reminders to check my wrapped shrubs on sunny winter days. A quick 10-minute ventilation session can prevent weeks of fungal issues. Just remember to reseal everything before temperatures drop at night.
Wrap shrubs after the first hard frost (when temps drop below 25°F/-4°C) but before heavy snow. For most zones, late fall (November–early December) is ideal. Wrapping too early can trap moisture and encourage pests.
Avoid plastic—it traps moisture, leading to mold or rot. Trash bags aren’t breathable either. Stick to burlap, frost cloth, or landscape fabric to allow airflow while blocking wind. Pro tip: Double-layer burlap for extra insulation!
Wrap snugly but not tightly—like a cozy blanket, not a straitjacket! Leave 1–2 inches of space between the shrub and wrapping for airflow. Secure with twine or clips, but avoid constricting branches. Too tight = broken limbs!
For tall shrubs (like arborvitae), focus on wrapping the lower 2/3 and securing the top with twine to prevent snow buildup. Alternatively, build a wooden or stakes frame around it and wrap the frame instead.
Yes! Remove wraps in early spring (March–April, depending on your zone) once temps consistently stay above freezing. Leaving wraps on too long can cause heat stress or pest infestations. Check for new growth—it’s your cue!
