
Beautiful Plants For Your Interior
Beautiful Plants For Your Interior
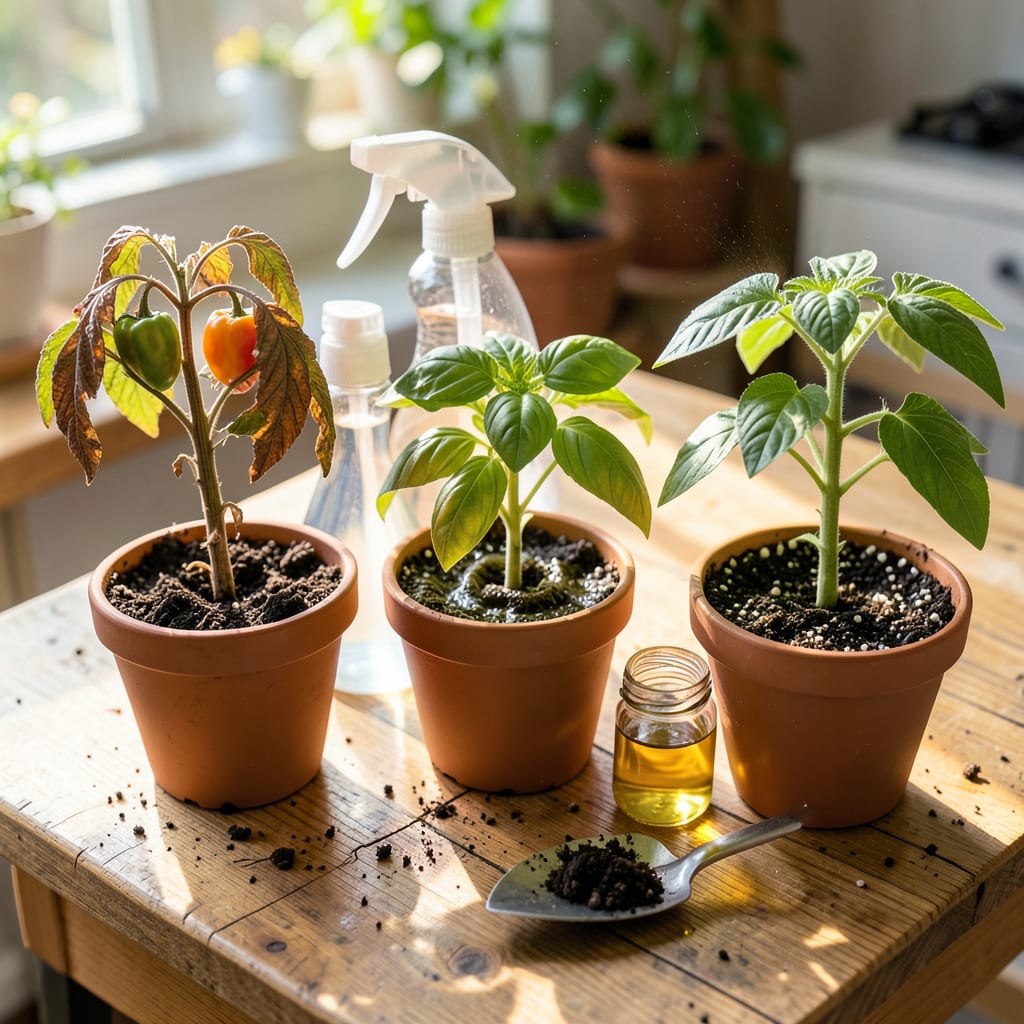
That sinking feeling when your newly transplanted dahlia wilts overnight? I’ve been there—staring at drooping leaves, wondering if I just killed another plant. Transplant shock hits fast, but here’s the good news: most plants bounce back with the right care. The key is acting quickly before stress turns into permanent damage.
You’ll spot the signs—yellowing edges, crispy tips, or growth that screeches to a halt. My go-to recovery plan starts with gentle watering (not drowning), temporary shade, and a boost of seaweed extract to reduce stress. Within 3-5 days, you’ll see perked-up leaves and new growth pushing through. No green thumb required, just smart timing and a little patience.
📚 In This Guide
These recovery steps will help your plants bounce back faster—tested on everything from tomatoes to ornamentals.
First, identify how severely your plant is affected. Mild shock shows as slight wilting or leaf drooping that recovers overnight. Moderate cases include yellowing lower leaves, stunted growth, or leaf curl that persists for days. Severe shock presents as crispy brown leaf edges, complete wilting that doesn’t recover, or stem collapse—this requires immediate intervention.
Check the root zone by gently tugging the base. If the plant lifts easily, roots haven’t established—a key sign of transplant trauma. Note that some leaf drop is normal during adjustment, but more than 30% leaf loss indicates serious stress that needs aggressive treatment.
Using clean pruners, remove all crispy brown leaves, severely yellowed foliage, and any stems showing dieback. These damaged areas won’t recover and drain the plant’s limited energy. Cut back to healthy tissue—you’ll see the difference immediately: healthy stems are firm and green inside when scratched lightly, while damaged ones appear brown or mushy.
For woody plants, reduce canopy by one-third to balance the compromised root system. On herbaceous plants, focus on removing only the most affected leaves. Never remove more than 25% of total foliage at once—this prevents pushing the plant into survival mode where it may abandon root growth entirely.
Prepare a recovery drench using 1 tablespoon of seaweed extract or 1 teaspoon of vitamin B1 per gallon of water. These contain natural auxins that stimulate root growth and cytokines that reduce oxidative stress. Water deeply at the root zone until you see runoff from the drainage holes—this ensures the solution reaches the entire root ball.
Apply this solution every 3-4 days for two weeks, but never when the soil is already moist. Overwatering stressed plants suffocates roots that are already struggling to function. The ideal moisture level feels like a wrung-out sponge—damp but not dripping when you squeeze a handful of soil.
Erect temporary shade using 30-50% shade cloth or even an upside-down laundry basket for small plants. This reduces transpiration stress while roots re-establish. Position it to block only the harshest midday sun (11 AM to 3 PM)—morning light is gentler and actually helps recovery.
For wind protection, surround the plant with a cylinder of hardware cloth or stake a burlap barrier on the windward side. Even gentle breezes can desiccate stressed foliage. Monitor soil moisture daily in these protected zones—shade and windbreaks significantly reduce evaporation, so adjust your watering schedule accordingly.
Apply 1 inch of compost or worm castings around the base (keeping it 2 inches away from the stem to prevent rot). These provide readily available nutrients without the burn risk of synthetic fertilizers. Water this in lightly to activate the microbial activity that will help roots colonize the new soil.
Avoid all fertilizers for the first 10-14 days—new roots can’t process nutrients efficiently. After two weeks, you can apply a balanced organic fertilizer at half strength. Watch for new growth at the branch tips and soil level—these are your visual confirmation that the root system is recovering and ready for normal feeding.
Begin reducing shade protection after 7-10 days, removing it completely by day 14 unless temperatures exceed 85°F. Check soil moisture daily during this transition—plants often need more frequent, lighter waterings as they adjust to increased sun exposure.
Test root establishment by gently tugging the base after two weeks. Resistance indicates new root growth. If the plant still lifts easily, extend your recovery protocol another week. The final sign of full recovery is when you see 2-3 inches of new growth—this means the plant has shifted from survival to active growth mode.
For future transplants, harden off plants by exposing them to outdoor conditions gradually over 7-10 days. Start with 2 hours of morning sun in a protected location, increasing by 1-2 hours daily. This builds cuticle thickness and activates stress-response pathways before the move.
Always transplant on overcast days or in late afternoon to minimize immediate sun stress. Water thoroughly 24 hours before moving and again immediately after planting—this ensures the root ball stays hydrated during the critical first 48 hours when roots are most vulnerable to drying out.
The difference between a struggling plant and one that thrives after transplanting often comes down to these critical details.
Assessment Accuracy: In Step 1, don’t underestimate the importance of that gentle tug test. I’ve found that plants with less than 30% leaf loss often recover with basic care, but anything beyond that requires immediate action. Pay special attention to the root zone—if the plant lifts too easily, you’ll need to be more aggressive with your recovery protocol. The first 48 hours are absolutely critical for establishing whether your intervention will work.
Pruning Precision: When executing Step 2, remember that less is often more. I learned this the hard way after over-pruning a stressed azalea and setting it back even further. Focus on removing only what’s clearly damaged—those crispy brown edges won’t recover, but slightly wilted leaves might bounce back. For woody plants, that one-third canopy reduction isn’t arbitrary; it directly correlates with the root loss that occurs during transplanting.
Hydration Strategy: The 3-4 day interval in Step 3 isn’t just about frequency—it’s about allowing the soil to reach that perfect “wrung-out sponge” consistency between applications. I use a simple finger test: insert your finger 2 inches into the soil. If it feels dry at that depth, it’s time to water. The seaweed extract solution works best when applied in the early morning, giving plants all day to absorb the nutrients before temperatures drop at night.
Microclimate Management: That 11 AM to 3 PM window in Step 4 isn’t just about shade—it’s about protecting plants during peak transpiration hours. I’ve had success using old bedsheets as temporary shade for larger plants when I didn’t have proper shade cloth. Just remember to remove them by late afternoon to allow for air circulation. The wind protection is equally crucial; even a gentle 5 mph breeze can double a plant’s water needs during recovery.
Most plants recover from transplant shock within 1–3 weeks, but severe cases (or sensitive species like tomatoes or peppers) may take 4–6 weeks. Speed up recovery by maintaining consistent moisture, providing shade, and avoiding fertilizers until new growth appears. Patience is key—don’t replant or disturb roots during this time!
Yes! Start by pruning dead/dying leaves to redirect energy. Keep soil evenly moist (not soggy) and use a shade cloth to reduce stress. For extreme cases, a weak seaweed or fish emulsion solution (diluted to ½ strength) can help. If the stem is mushy or black, unfortunately, the plant may not recover.
Prevent shock before it starts! Pro tips:
No! Fertilizer can burn stressed roots. Wait until you see new growth (usually 2–3 weeks) before applying a gentle, balanced fertilizer (like 5-5-5) at half strength. Instead, focus on water, shade, and root support (e.g., compost tea) to help the plant stabilize.
Some plants are highly shock-prone and may not bounce back, including:
