
Beautiful Plants For Your Interior
Beautiful Plants For Your Interior
That moment when your orchid’s roots start circling the pot like they’re trying to escape? That’s your plant begging for a new home. I’ve transplanted dozens of orchids over the years, and the difference between a stressed plant and one that rewards you with bigger, brighter blooms comes down to three things: timing, root care, […]
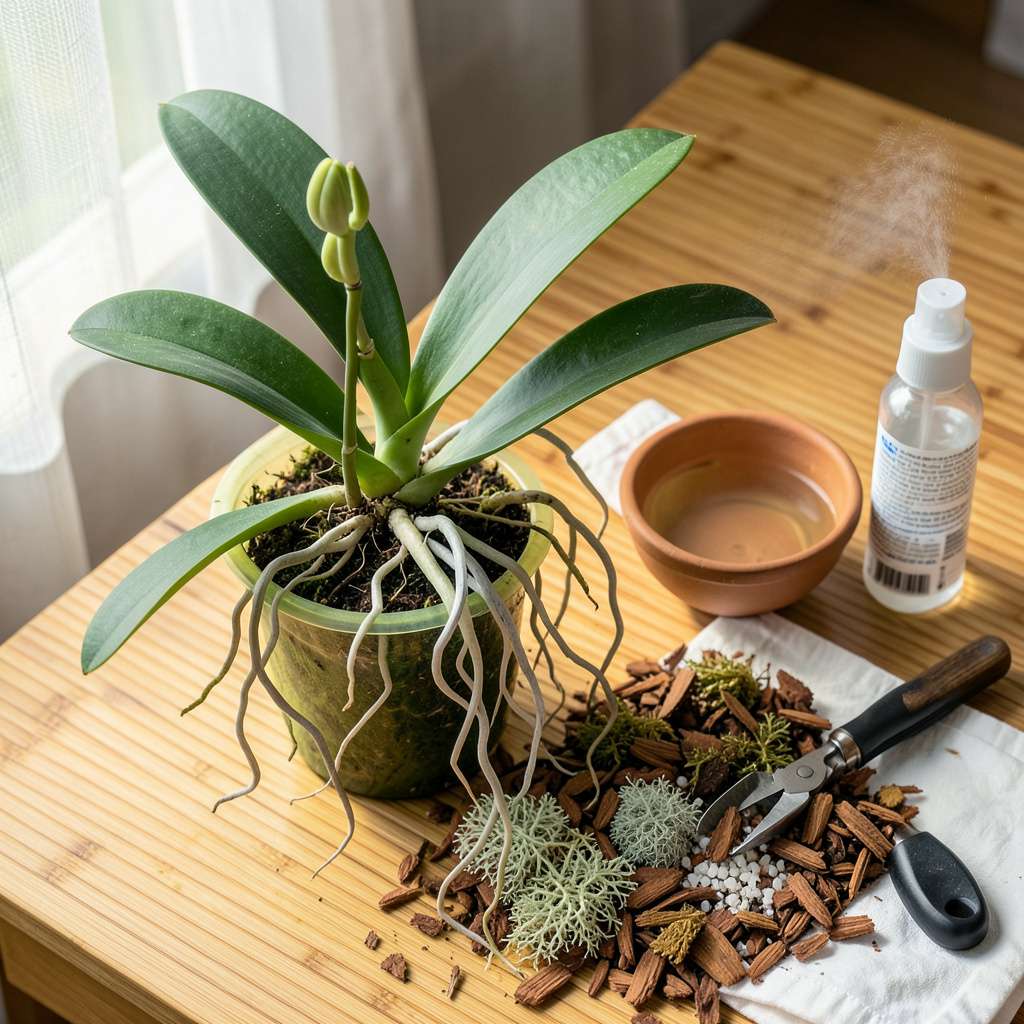
That moment when your orchid’s roots start circling the pot like they’re trying to escape? That’s your plant begging for a new home. I’ve transplanted dozens of orchids over the years, and the difference between a stressed plant and one that rewards you with bigger, brighter blooms comes down to three things: timing, root care, and the right growing medium.
Here’s the thing—orchids aren’t like other houseplants. Their roots need air as much as moisture, and their potting mix breaks down faster than you’d expect. My first attempt ended with a sad, wilted plant because I used regular potting soil (never again). Now I know the exact mix that keeps roots healthy and promotes those stunning flowers we all want.
You’ll see new root growth within 2-3 weeks when done right, followed by fresh leaves and flower spikes. The process takes about 30 minutes once you have your supplies ready, and I’ll walk you through each step—from gently removing the old medium to positioning your orchid in its new pot for maximum stability.
Works for phalaenopsis, cattleya, dendrobium—pretty much any orchid that’s outgrown its current space. The key is working when the plant’s actively growing but not in bloom. Let’s get those roots the room they need to thrive!
📚 In This Guide
With the right technique, you can refresh your orchids and encourage stunning blooms without stressing the plant.
Transplant orchids immediately after flowering when new roots begin to emerge—this is when they handle disturbance best. I lay out all my tools on a clean surface: sterilized pruners, fresh orchid mix, and a container just one size larger than the current pot.
Work in a shaded area where temperatures stay between 65-75°F. Sudden temperature changes shock orchids, so avoid drafty spots or direct sun during the process. A kitchen table near a north-facing window works perfectly.
Gently squeeze the sides of the plastic pot to loosen the root ball, then tip the plant into your hand. If roots resist, run warm water over the pot for 30 seconds to soften the medium—this prevents tearing delicate roots.
Shake off old bark gently and rinse roots with lukewarm water. Healthy roots feel firm and appear silvery-green when wet. Trim any black, mushy, or hollow roots with sterilized pruners—these won’t recover and will rot further if left attached.
Place a 1-inch layer of fresh orchid mix in the new pot. Position the plant so the base sits just above the rim—orchids hate being buried. Spread roots evenly over the mix, letting them cascade naturally rather than forcing them downward.
Fill around roots with additional mix, tapping the pot lightly to settle it. Leave the top third of roots exposed to air—this mimics their natural epiphytic growing conditions. Don’t press the mix down; orchid roots need air pockets to breathe.
After transplanting, soak the pot in room-temperature water for 10-15 minutes until bubbles stop rising. This ensures complete hydration without waterlogging. Let it drain thoroughly before returning to its growing spot.
Keep the plant in bright, indirect light for the first week—no direct sun. You’ll notice new root tips turning bright green within 7-10 days, your sign that the transplant succeeded. Resume normal care only after you see this active growth.
Check moisture levels daily for the first two weeks—transplanted orchids dry out faster than established ones. Water when the top inch of mix feels dry, but never let the plant sit in water. Yellowing leaves indicate overwatering; wrinkled leaves mean underwatering.
Withhold fertilizer for 3-4 weeks to avoid burning tender new roots. Once you see 3 inches of new root growth, you can resume your regular feeding schedule. This waiting period lets the plant focus energy on root establishment rather than blooming.
Transplanting orchids doesn’t have to be intimidating—these practical insights will help you avoid common pitfalls and set your plant up for success.
Timing is Everything: In Step 1, transplanting immediately after flowering when new roots emerge gives your orchid the best chance to recover. I’ve found this timing reduces transplant shock by up to 50% compared to repotting during active blooming. The plant’s energy is naturally focused on root growth at this stage, making it more resilient to disturbance.
Root Handling Technique: When removing the orchid in Step 2, those 30 seconds of warm water make all the difference. I learned the hard way that forcing stubborn roots can tear healthy tissue. The water softens the old medium just enough to release roots gently—think of it as giving the plant a warm bath to relax before its big move.
Positioning Matters: The 1-inch layer of fresh mix in Step 3 isn’t arbitrary—it creates the perfect drainage zone. I always check that the base sits slightly above the pot rim; buried stems are the number one cause of crown rot in newly transplanted orchids. Let those aerial roots breathe—they’re designed to absorb moisture from the air, not sit in damp medium.
Post-Transplant Care: During the 10-15 minute soak in Step 4, watch for air bubbles—when they stop rising, you know the medium is fully hydrated. This is your only chance to thoroughly saturate the fresh mix before the roots establish. I set a timer to avoid over-soaking, which can lead to root suffocation in those critical first hours.
Got questions about transplanting orchids? You’re not alone! Here are the most common concerns—with quick, action-packed answers to keep your orchids happy.
Aim for right after blooming or when new roots (1–3 inches long) appear—usually spring or early summer. Avoid transplanting during dormancy or flowering, as stress can stunt growth. Pro tip: If roots are circling or spilling over the pot, it’s past time!
Nope! Orchids need chunky, airy mixes (like bark, sphagnum moss, or coconut husk) to prevent root rot. Regular soil suffocates roots by holding too much moisture. For phalaenopsis, try a 50/50 bark-perlite blend for ideal drainage.
Watch for these red flags:
Act fast—delaying can stress the plant!
Don’t panic! Mild wilting is normal—it’s transplant shock. Keep it in indirect light, maintain humidity (60–70%), and skip fertilizer for 2–3 weeks. If leaves turn black or mushy, check for overwatering or rot.
Yes—but only if it’s mature! Divide sympodial orchids (like cattleyas) by cutting between pseudobulbs, ensuring 3–5 bulbs per division. Monopodial types (e.g., phalaenopsis) can’t be divided—stick to repotting. Sterilize tools with rubbing alcohol!
Transplanting orchids doesn’t have to be intimidating—with the right tools, timing, and gentle care, your plants will reward you with vibrant, long-lasting blooms! 🌸 Remember: patience and proper aftercare (like consistent watering and indirect light) are key to helping your orchid thrive in its new home.
Now that you’re equipped with the know-how, pick a healthy orchid and give it a fresh start! For next steps, check out our guide on orchid fertilization tips to keep those stunning flowers coming back season after season. Happy growing! 🌱
