
Beautiful Plants For Your Interior
Beautiful Plants For Your Interior
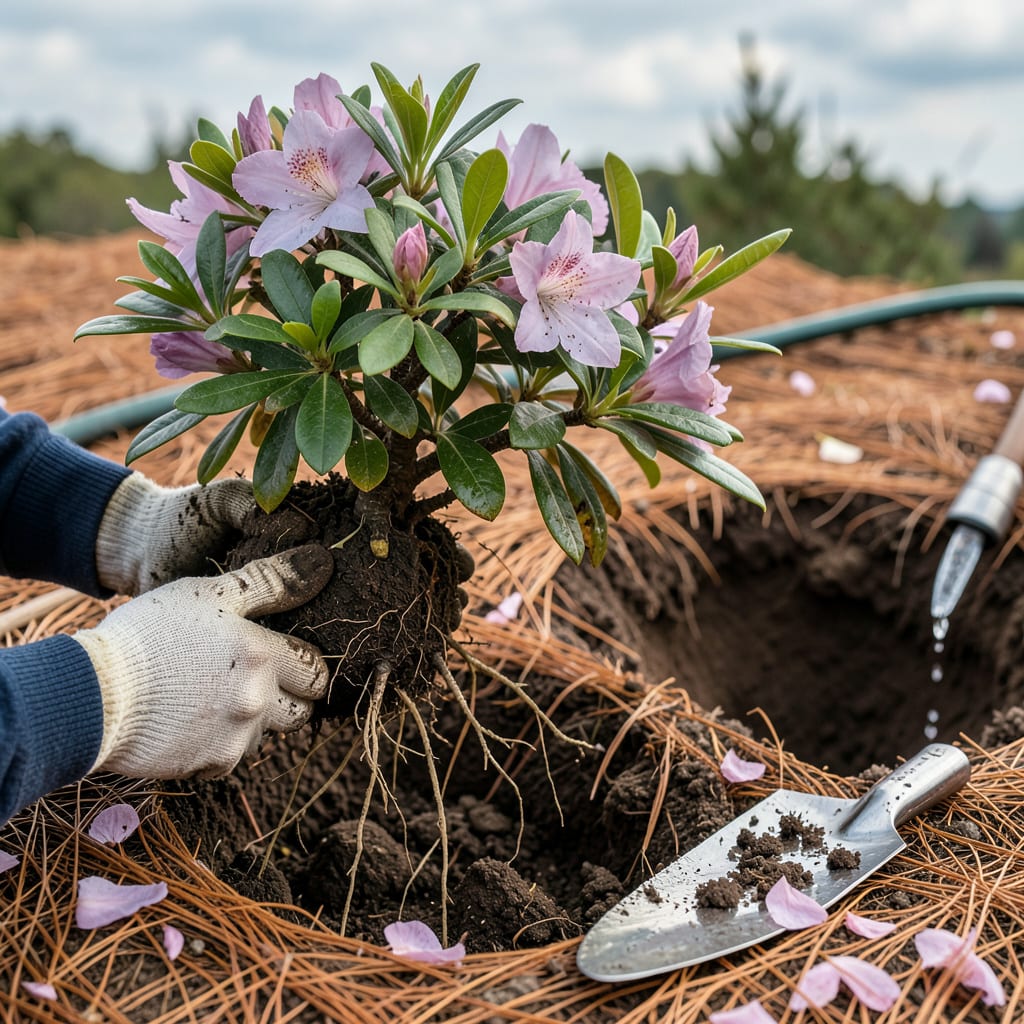
Moving an azalea feels like performing surgery on your garden—one wrong cut and you risk losing those stunning spring blooms. I’ve transplanted dozens over the years, and the difference between a thriving shrub and a wilting disappointment comes down to timing and technique. Do it right, and your azalea will reward you with bigger, brighter flowers next season than ever before.
The secret isn’t just digging it up and hoping for the best. You’ve got to work with the plant’s natural rhythm—early fall or late winter, when it’s dormant but the soil’s still workable. I’ll walk you through exactly how to lift that root ball without tearing it apart, where to replant for ideal light and drainage, and the one post-transplant trick that cuts recovery time in half. No guesswork, just results.
📚 In This Guide
Moving azaleas doesn’t have to be stressful—follow this method and your shrubs will reward you with vibrant blooms next season.
Early fall or late winter (when azaleas are dormant) is ideal for transplanting. I always pick a cloudy day to minimize stress on the plant. Start by digging the new hole first—it should be twice as wide as the root ball but no deeper than the original planting depth.
Test the hole size by placing the azalea’s root ball in it before lifting the plant. The top of the root ball should sit 1-2 inches above the surrounding soil level to prevent water pooling. Mix a handful of compost into the backfill soil to give your azalea a nutrient boost in its new home.
Water the azalea deeply 24 hours before transplanting to help the root ball hold together. Use a sharp spade to dig a trench around the plant, starting about 12 inches out from the main stem. Work your way around, then under the root ball, keeping as much soil intact as possible.
Here’s the thing—azalea roots are shallow but spread wide. If you feel resistance, widen your circle rather than forcing the spade. Once free, lift the plant by the root ball (never the stems) and immediately move it to the prepared hole. I like to place a tarp nearby to set the plant on if I need to pause.
Position the azalea in the new hole so it sits at the same depth as before. The soil line on the stem should match its original level. Fill the hole halfway with your amended soil, then water deeply to eliminate air pockets. This is the moment that matters: let the water soak in completely before filling the rest of the hole.
Create a 3-inch-high water ring around the perimeter of the hole to help direct moisture to the roots. Water again until the soil is saturated but not muddy. I promise this extra watering makes all the difference in preventing transplant shock.
Apply 2-3 inches of mulch (pine bark works beautifully with azaleas) around the base, keeping it 2 inches away from the stem to prevent rot. The mulch should extend to the plant’s drip line. Water every 2-3 days for the first two weeks unless rain provides at least 1 inch of moisture.
Watch for wilting leaves in the first week—this is normal. But if you see yellowing or leaf drop after 10 days, the plant needs more water. Real talk: azaleas tell you exactly what they need if you pay attention. By spring, you’ll see new growth proving your transplant was successful.
Transplanting azaleas successfully comes down to a few key details that make all the difference in recovery.
Timing Strategy: The 24-hour pre-watering in Step 2 is absolutely critical—don’t skip this. Deep watering ensures the root ball stays intact when you lift the plant, reducing transplant shock. I’ve found that watering in the evening before transplanting the next morning works best, as it gives the roots maximum time to absorb moisture.
Root Ball Technique: When digging in Step 2, remember that azalea roots spread much wider than they go deep. That 12-inch radius from the stem might seem excessive, but it’s necessary to capture the full root system. If you hit resistance, widen your circle another 6 inches rather than forcing the spade through roots. This extra care prevents the “transplant droop” that often happens when too many feeder roots are severed.
Watering Wisdom: The two-stage watering in Step 3 isn’t just for show—it’s the secret to eliminating air pockets that can suffocate roots. After filling the hole halfway, water until you see it pool at the surface, then let it drain completely before adding more soil. This process, which might take 5-10 minutes, ensures the soil settles properly around the roots. The 3-inch water ring you create afterward acts like a moat, directing every drop of water straight to the root zone where it’s needed most.
Recovery Monitoring: Those first 10 days after transplanting are when most people overreact to normal stress signs. Wilting in the first week is completely expected as the plant adjusts. However, if you see yellowing leaves or leaf drop after that 10-day mark mentioned in Step 4, that’s your signal to increase watering frequency. I check my transplanted azaleas daily by sticking my finger 2 inches into the soil—if it feels dry at that depth, it’s time to water, regardless of the 2-3 day schedule.
Here are the most common questions about transplanting azaleas—answered!
Early spring (before new growth starts) or early fall (4-6 weeks before frost) are ideal. Avoid transplanting in summer heat or winter dormancy. Cool, moist conditions help roots establish faster.
It’s risky! Transplanting during bloom stresses the plant and may cause flower drop. Wait until after flowering ends in late spring or opt for fall. If urgent, prune blooms first to redirect energy to roots.
For small shrubs (under 3 feet tall), dig a 12–18-inch-wide root ball. Larger plants need 24+ inches. Use a sharp spade to cut cleanly around the drip line (outer branches) to preserve feeder roots.
Common causes:
Yes! Choose a pot 2–3x wider than the root ball with drainage holes. Use acidic, well-draining potting mix (pH 4.5–6.0). Water when the top inch of soil dries, and protect from extreme temps. Repot every 2–3 years.
