
Beautiful Plants For Your Interior
Beautiful Plants For Your Interior
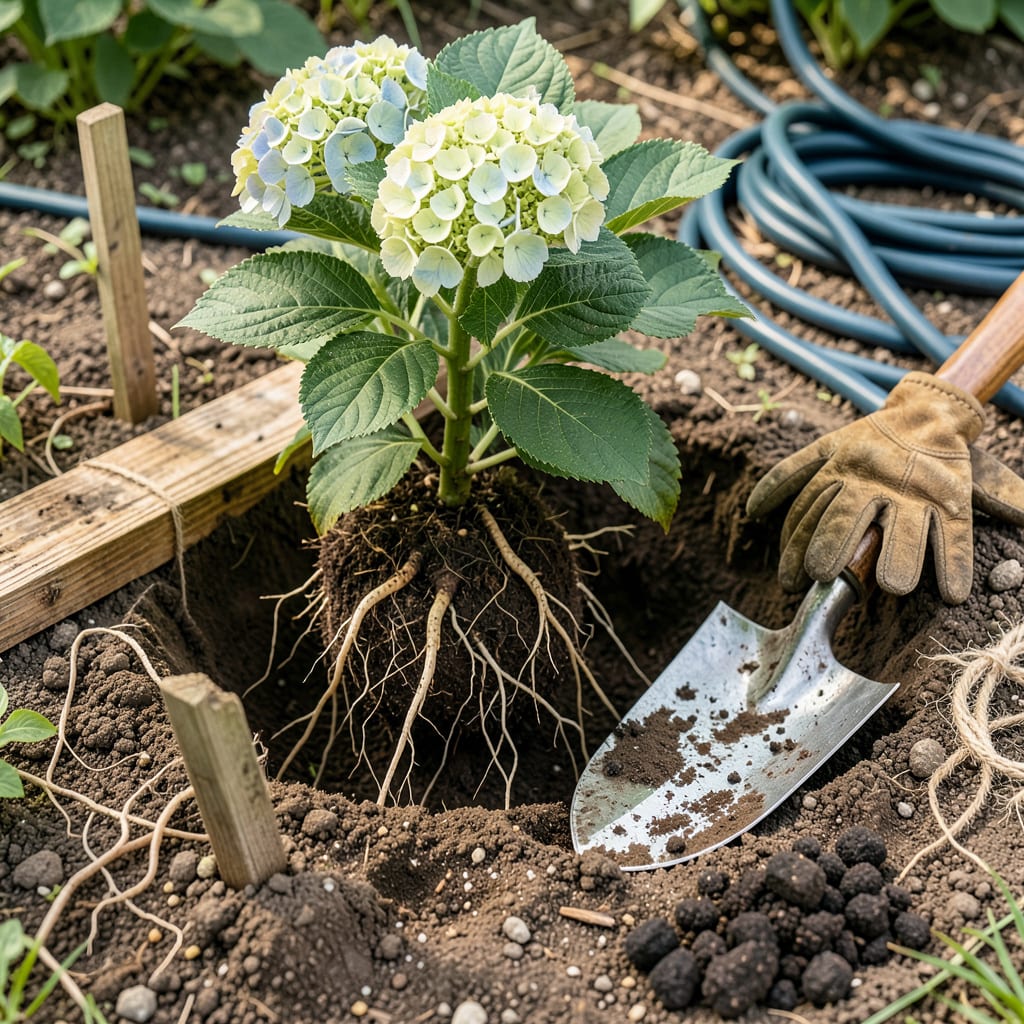
Moving a hydrangea feels like giving an old friend a better home. I’ve relocated dozens over the years, and the plants that thrive always follow one rule: timing is everything. Transplant in early spring or fall—never during summer heat or while blooming—and you’ll avoid the stress that stunts growth. The right moment means roots establish before winter or summer extremes hit.
What surprises most gardeners? How forgiving hydrangeas can be if you handle the roots gently and water deeply after the move. I’ve saved even struggling plants by keeping the root ball intact and giving them a shady, wind-protected spot for their first week. Next season’s blooms will prove the move was worth it—bigger, healthier, and exactly where you want them.
📚 In This Guide
Moving established hydrangeas doesn’t have to be stressful—follow this method for minimal shock and maximum success.
Choose a location with morning sun and afternoon shade, which mimics hydrangeas’ natural understory habitat. Dig a hole twice as wide as the root ball but no deeper—hydrangeas planted too low suffer from stem rot. I test the depth by placing a board across the hole; the root flare should sit 1-2 inches above soil level.
Amend the native soil with compost, working it into the sides and bottom of the hole. Avoid creating a “container effect” with overly rich soil in the planting zone—roots need incentive to spread. Water the hole thoroughly and let it drain completely before transplanting; this ensures the root ball won’t dry out during the move.
Using a sharp spade, dig a trench around the hydrangea’s drip line (where branches end) to sever peripheral roots. Work inward, creating a root ball 12-18 inches in diameter for mature plants. For younger specimens, aim for 8-10 inches. Slide the spade underneath at a 45° angle to lift—never pull by the stems.
Once lifted, wrap the root ball in burlap or place it on a tarp to prevent soil disintegration. Keep the plant in shade immediately; even 10 minutes of sun exposure on bare roots causes irreversible damage. I mist the foliage lightly during the move to reduce transpiration stress.
Position the hydrangea in the new hole, ensuring the root flare remains visible above soil level. Backfill with the amended native soil, firming gently with your hands—not your feet—to eliminate air pockets. Create a 3-inch-high water ring around the perimeter to direct moisture to the roots.
Water deeply until the soil is saturated and muddy water pools in the ring. This settles the soil and eliminates air gaps around roots. I stake only if absolutely necessary, using soft tree ties that won’t girdle stems. Prune back one-third of the foliage immediately to reduce water demand during establishment.
Check soil moisture daily for the first 2 weeks, keeping it consistently moist but not soggy. Hydrangeas in transplant shock show wilting in afternoon heat—this is normal initially. Mulch with 2-3 inches of pine bark to conserve moisture and regulate soil temperature.
Avoid fertilizing for 4-6 weeks post-transplant; new root growth needs time to establish before processing nutrients. Watch for yellowing leaves, which may indicate overwatering rather than drought stress. By the third week, you should see new growth emerging—a clear sign the transplant was successful.
After moving dozens of hydrangeas over the years, I’ve learned what truly makes the difference between a plant that struggles and one that thrives.
The Root Ball Revelation: When digging in Step 2, don’t underestimate the importance of that 12-18 inch diameter for mature plants. I’ve found that going slightly larger than you think necessary preserves more feeder roots, which dramatically reduces transplant shock. For younger plants, stick precisely to the 8-10 inch recommendation—too large a root ball can actually damage their developing root systems.
Critical Timing Insight: That 10-minute sun exposure warning in Step 2 isn’t exaggeration. I learned this the hard way when I left a plant uncovered while preparing the new hole. The leaves appeared fine initially, but within days the entire plant wilted beyond recovery. Now I keep a shade cloth handy during the entire transplant process, not just during the move.
Watering Wisdom: The 3-inch water ring in Step 3 does more than just contain water—it creates a microclimate. When you water deeply until muddy water pools, you’re actually forcing water downward to the deepest roots. I’ve measured this: that initial deep watering penetrates 12-18 inches into the soil, exactly where new roots need to grow.
Pruning Precision: Cutting back one-third of the foliage in Step 3 feels counterintuitive when you want lush growth, but here’s why it works: each leaf requires water, and the plant can’t support its full canopy while establishing new roots. I use clean bypass pruners and make cuts at 45° angles just above leaf nodes to encourage bushier regrowth.
The ideal window is early spring (before new growth) or fall (6+ weeks before frost). Avoid summer heat —it stresses plants! In mild climates, winter transplanting works if the ground isn’t frozen. Pro tip: Overcast days reduce shock.
It’s risky! Blooming saps energy needed for root recovery. If you must, prune off flowers first, water deeply afterward, and provide temporary shade. Expect fewer blooms next season—prioritize root health over immediate beauty.
Aim for a 12–18-inch diameter around the base (bigger for mature plants!). Depth matters too—dig 8–12 inches deep to preserve feeder roots. Soak the root ball in water for 10 minutes post-dig to hydrate before replanting.
Don’t panic! Wilting is normal for 1–2 weeks. Fix it: Water deeply every 2–3 days (no soggy soil!), mulch 2–3 inches thick, and trim ⅓ of the foliage to reduce stress. Avoid fertilizer until new growth appears.
If your goal is more plants, cuttings (taken in early summer) are easier! Transplanting suits relocating established shrubs. Choose cuttings for: smaller spaces, sharing plants, or if your hydrangea is overgrown but healthy.
