
Beautiful Plants For Your Interior
Beautiful Plants For Your Interior
That moment when your orchid’s roots start crawling out of its pot isn’t a crisis—it’s an opportunity. I used to panic when I saw aerial roots escaping, thinking I’d done something wrong. Turns out, these plants actually thrive when given fresh space and mix every couple years. The difference between a struggling orchid and one […]
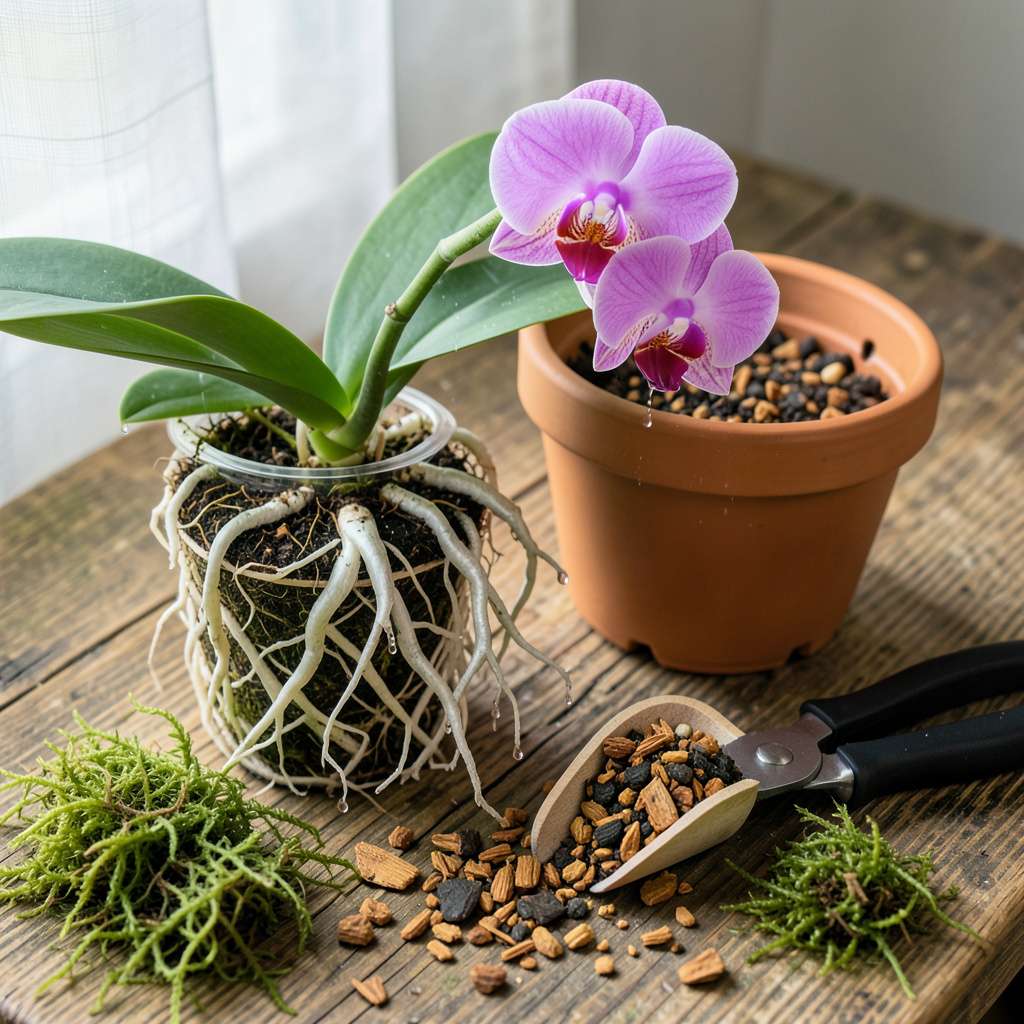
That moment when your orchid’s roots start crawling out of its pot isn’t a crisis—it’s an opportunity. I used to panic when I saw aerial roots escaping, thinking I’d done something wrong. Turns out, these plants actually thrive when given fresh space and mix every couple years. The difference between a struggling orchid and one that explodes with blooms often comes down to this simple process.
Here’s the thing—orchids aren’t like other houseplants. They hate soggy roots but need consistent moisture, and their potting mix breaks down faster than you’d expect. After repotting my first Phalaenopsis (and nearly killing it with the wrong bark size), I landed on a foolproof method that works for any orchid variety. You’ll need just 4 basic supplies and about 30 minutes of focused time.
The real magic happens after the repot. Within weeks, you’ll see new root tips emerging—bright green and eager to grow. Plants that had been stagnant for months suddenly push out fresh leaves and flower spikes. I’ve had orchids that refused to bloom for years finally produce dozens of flowers after a proper repotting session.
Works for any orchid type, from grocery-store Phalaenopsis to fancy Cattleyas. The key is timing it right (just after blooming) and using the correct mix—no regular potting soil allowed. Let’s walk through exactly how to give your orchid the fresh start it’s begging for.
📚 In This Guide
This gentle process will give your orchid fresh space to grow—and you’ll see stronger roots and more blooms.
The best time to repot is right after flowering, when new roots are just beginning to grow. You’ll see silver-green root tips emerging—that’s your signal the plant is ready. Never repot while the orchid is in active bloom, as the stress may cause buds to drop prematurely.
You’ll need a clean pot just 1-2 inches larger than the current one, fresh orchid bark mix, sterile scissors or pruners, and lukewarm water. I always soak the bark mix for 30 minutes before using to ensure it’s properly hydrated and won’t draw moisture away from the roots.
Gently squeeze the sides of the plastic pot to loosen the root ball, then carefully slide the plant out. If it resists, run a butter knife around the inner edge to release any stuck roots. The goal is to minimize root damage—healthy roots are plump and white or green, while rotted roots appear mushy and brown.
Rinse the roots under lukewarm water to remove old bark pieces. This gives you a clear view of what needs trimming. I hold the plant by the base of the stem (never pull on leaves) and let the water flow through the roots for 10-15 seconds to clean thoroughly without being too forceful.
Using sterile scissors, cut away any roots that are black, mushy, or hollow. Healthy roots should feel firm when gently squeezed. Make clean cuts just above the damaged section—each remaining root should be at least 2-3 inches long to support the plant properly.
If you notice any stubborn bark pieces clinging to roots, don’t force them off. Soak the entire root system in room-temperature water for 5-10 minutes to soften the old medium, then gently remove debris with your fingers. This prevents tearing healthy roots during cleaning.
Place a 1-inch layer of fresh bark mix in the bottom of the new pot. Position the orchid so the base of the stem sits just below the pot’s rim, then spread the roots evenly over the bark. The goal is to have roots pointing downward and outward, not crammed together.
Hold the plant steady with one hand while adding bark mix around the roots with the other. Tap the pot gently on the table every few inches to help the medium settle. The plant should sit firmly in place when you’re done, but don’t pack the bark tightly—orchid roots need air circulation.
After repotting, water the orchid thoroughly until water runs freely from the drainage holes. I place mine in the sink and let water flow through for 30-45 seconds, then let it drain completely. This helps the bark settle around the roots and removes any air pockets.
Don’t fertilize for 2-3 weeks after repotting to avoid burning new root growth. Keep the plant in bright, indirect light (no direct sun) for the first week while it adjusts. You’ll know it’s happy when you see new root tips emerging within 3-4 weeks—that’s your sign the repotting was successful.
Repotting orchids becomes much easier once you understand these key details that most guides overlook.
Timing is Everything: The window for repotting is narrower than you might think. Those silver-green root tips mentioned in Step 1 are your only reliable signal that the plant is ready—don’t wait until you see multiple new roots or you’ll risk damaging the emerging growth. I’ve found that repotting within 1-2 weeks of spotting those first new tips gives the best recovery time before the next blooming cycle.
Bark Preparation Matters: Many people skip soaking the bark mix for the full 30 minutes in Step 1, but this step prevents two major problems: dry bark will actually pull moisture from your orchid’s roots, and unsoaked pieces float to the top during watering, leaving bare spots. I use a kitchen timer to ensure I don’t cut this short—trust me, your orchid will thank you with faster recovery.
Root Handling Technique: When rinsing roots in Step 2, the 10-15 seconds of water flow isn’t just about cleaning—it’s about checking root health. Healthy roots should feel firm under that water stream, almost like al dente pasta. If any roots feel soft or slippery during this quick rinse, they need trimming in Step 3 regardless of color.
The Settling Trick: After watering in Step 5, most people stop at the 30-45 seconds of water flow, but here’s what changes everything: let the pot sit in the sink for an additional 5 minutes after draining. This extra time allows the bark to fully absorb water and settle around the roots, eliminating air pockets that could cause rot. I learned this after losing two orchids to hidden air gaps.
Most orchids thrive when repotted every 1–2 years, or when roots overflow the pot. Phalaenopsis (moth orchids) may need it yearly, while slower-growing types (like Cattleyas) can wait 2–3 years. Look for crowded roots, degraded potting mix, or poor drainage as signs it’s time!
It’s best to avoid repotting during active blooming—stress may cause buds to drop. Wait until flowers fade or repot just before a new growth cycle (spring is ideal). If roots are rotting, repot immediately (trim damaged roots first) to save the plant.
In a pinch, use chunky, fast-draining mixes like:
Avoid regular potting soil—it suffocates roots!
Yellowing leaves post-repot are usually stress-related but temporary. Common causes:
Hold off on fertilizer for 3–4 weeks.
Yes! Water thoroughly after repotting to help the mix settle and reduce air pockets. Let excess drain completely, then skip watering for 5–7 days to prevent rot. For bark mixes, a 10-minute soak in lukewarm water works best—avoid cold water!
Repotting your orchid doesn’t have to be intimidating—just follow the steps, choose the right mix, and give your plant the fresh start it deserves! 🌱 With a little patience and care, you’ll set the stage for healthier roots and stunning blooms in no time.
Now that your orchid is snug in its new home, keep an eye on its progress over the next few weeks. Water lightly at first, then resume your regular care routine. Ready to take your orchid game further? Check out our full orchid care guide for tips on light, humidity, and fertilizing!
