
Beautiful Plants For Your Interior
Beautiful Plants For Your Interior
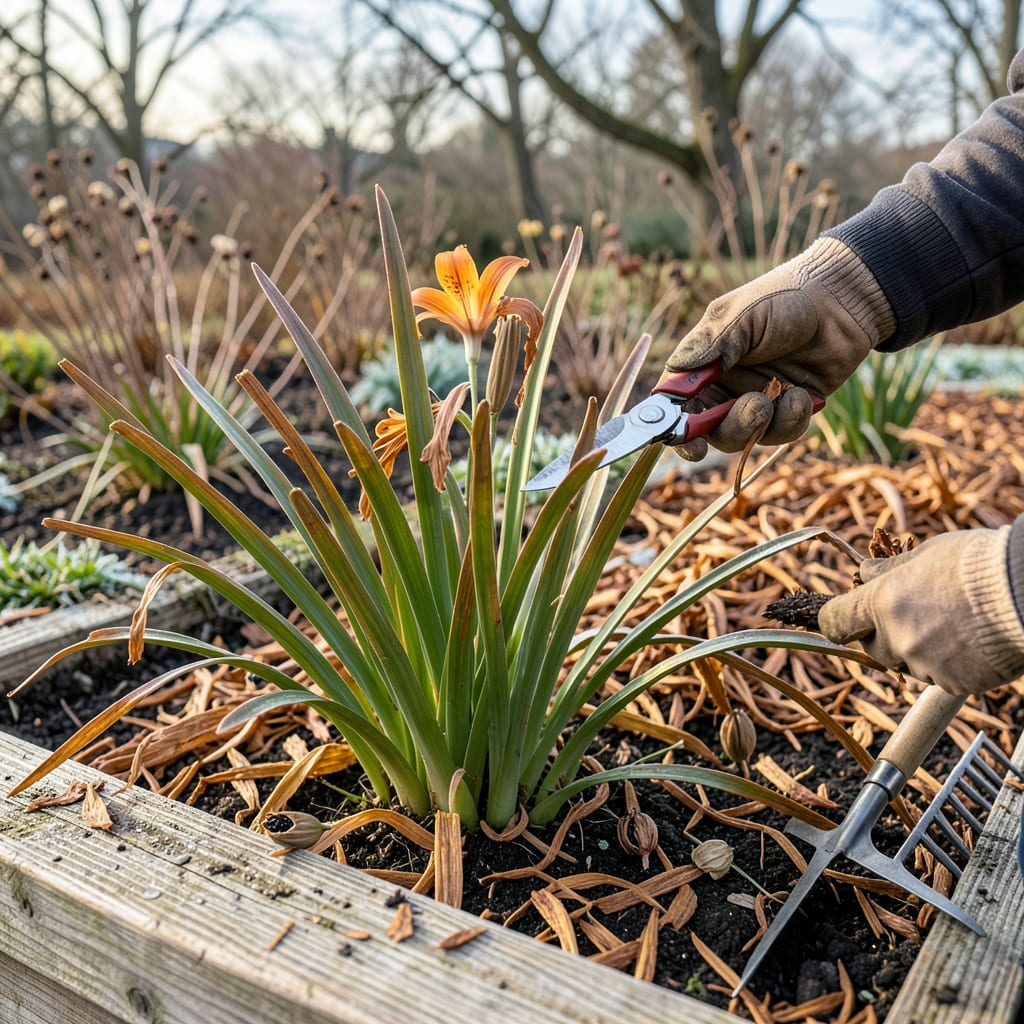
I used to think daylilies were the “plant and forget” stars of the garden—until I realized a little pruning could double their blooms. That first season I finally cut back the old foliage, the difference was shocking: twice as many flowers, healthier plants, and no more sad, brown stragglers ruining the look of my beds.
Timing and technique matter more than fancy tools. Do it right in early spring or after blooming, and you’ll get cleaner growth, fewer pests, and that thick, lush clump every gardener envies. The best part? This takes less than 20 minutes per plant and pays off all season long. Here’s exactly how to make those cuts count.
📚 In This Guide
This simple process takes less than an hour and guarantees healthier plants with more flowers next year.
Wait until late fall after the first hard frost has turned the foliage brown, or in early spring before new growth emerges. I prefer fall pruning because it removes overwintering pests and diseases while the plant is dormant. Never prune while daylilies are actively blooming—this stresses the plant and reduces next season’s flower production.
You’ll know it’s time when the leaves turn completely brown and papery. If you’re pruning in spring, wait until you see the first 1-2 inches of new green growth at the base before making any cuts. This ensures you don’t accidentally remove emerging flower stalks.
Using clean, sharp pruners, cut back all brown foliage to about 2-3 inches above the ground. I make my cuts at a slight angle to prevent water from pooling on the cut ends, which can lead to rot. Don’t worry about being perfectly precise—the daylily’s crown is tough and can handle some variability.
Gather all the cut foliage and dispose of it in the trash (not compost) to prevent spreading any potential diseases. This is also the perfect time to divide overcrowded clumps if needed. You’ll be amazed how much cleaner your garden looks after removing all that dead foliage.
After pruning, clear away any remaining debris from around the base of the plants. I like to use my hands to gently remove old mulch and fallen leaves that might harbor pests. This exposes the crown to air circulation, which is crucial for preventing fungal diseases.
Apply a fresh 2-3 inch layer of mulch around the plants, keeping it slightly away from the crown itself. I prefer shredded bark or pine straw because they allow good air circulation while still protecting the roots. This mulch layer helps maintain consistent soil temperature and moisture through winter.
Right after pruning, I apply a balanced, slow-release fertilizer (like 10-10-10) around the base of each plant. Sprinkle about 1 tablespoon per plant and lightly scratch it into the soil surface. This gives the roots a nutrient boost just as they’re preparing for winter dormancy.
Water the area thoroughly after fertilizing to help the nutrients soak into the root zone. You won’t see immediate results, but come next summer, you’ll be rewarded with stronger plants and more abundant blooms. I’ve found this simple step makes a noticeable difference in flower production.
In spring, watch for new green shoots emerging from the base. These will develop into this season’s flower stalks. I check my daylilies weekly once temperatures warm up, looking for any signs of pest damage or fungal issues on the new growth.
If you notice any brown or spotted leaves on the new growth, remove them immediately to prevent problems from spreading. Healthy new foliage should be deep green and upright. By mid-spring, you’ll see the flower scapes beginning to form—this is when the real excitement starts!
Pruning daylilies is simpler than you might think, but these key insights will help you avoid common pitfalls and get the best results.
Timing is Everything: In Step 1, waiting for that first hard frost in late fall makes all the difference. I’ve found that pruning too early—when leaves are still green—can shock the plant. The completely brown, papery foliage is your signal that the plant is fully dormant and ready. If you’re pruning in spring, that 1-2 inches of new growth is critical; anything less risks cutting off potential flower stalks. Trust me, patience here prevents regrets later.
Cutting Technique: When you get to Step 2, don’t just hack away at the foliage. Those 2-3 inches of stem you leave above ground protect the crown from winter damage. I make my cuts at a 45-degree angle to shed water, which prevents rot. Also, resist the urge to compost those cut leaves—trashing them removes potential disease spores from your garden entirely.
Mulch Matters: The 2-3 inch mulch layer in Step 3 isn’t just about looks. I’ve seen gardens where skipping this step led to winter crown rot. Keep that mulch about an inch away from the crown itself—this “breathing room” prevents moisture buildup while still insulating roots. Shredded bark works better than whole chips because it knits together to block weeds but still allows air flow.
Fertilizer Follow-Through: That single tablespoon of fertilizer in Step 4 might seem insignificant, but it’s perfectly calibrated. More isn’t better here—excess fertilizer can burn dormant roots. I scratch it into the top inch of soil rather than just sprinkling, which helps it reach the root zone where it’s needed. The thorough watering afterward is non-negotiable; it activates the slow-release nutrients so they’re available when spring growth begins.
The ideal time is late fall (after the first frost) or early spring before new growth starts. Avoid pruning in summer—it can stress the plant and reduce next year’s blooms. If deadheading spent flowers, do it throughout the blooming season to encourage more buds.
Sharp bypass pruners (or heavy-duty scissors) work best for clean cuts. Avoid dull blades—they crush stems, inviting disease. For thick clumps, a hori-hori knife or garden saw helps divide roots during renewal pruning.
Deadheading = removing spent flowers (daily/weekly) to tidy the plant and redirect energy to new blooms. Pruning = cutting back entire foliage (1–2” above ground) in fall/spring to remove dead growth and rejuvenate the plant.
Brown, soft stems often mean overwatering or fungal rot (not pruning error). Check drainage and avoid watering the crown. If the center is mushy, dig up and discard the clump—it may be infected. Healthy pruned stems should be firm and hollow.
Do I have to prune daylilies, or can I leave them alone?
You can skip pruning, but expect: fewer blooms, crowded clumps, and potential pest/disease issues. A quick annual trim (even just deadheading) keeps plants vigorous. For reblooming varieties, pruning is essential to trigger a second flush of flowers!
