
Beautiful Plants For Your Interior
Beautiful Plants For Your Interior
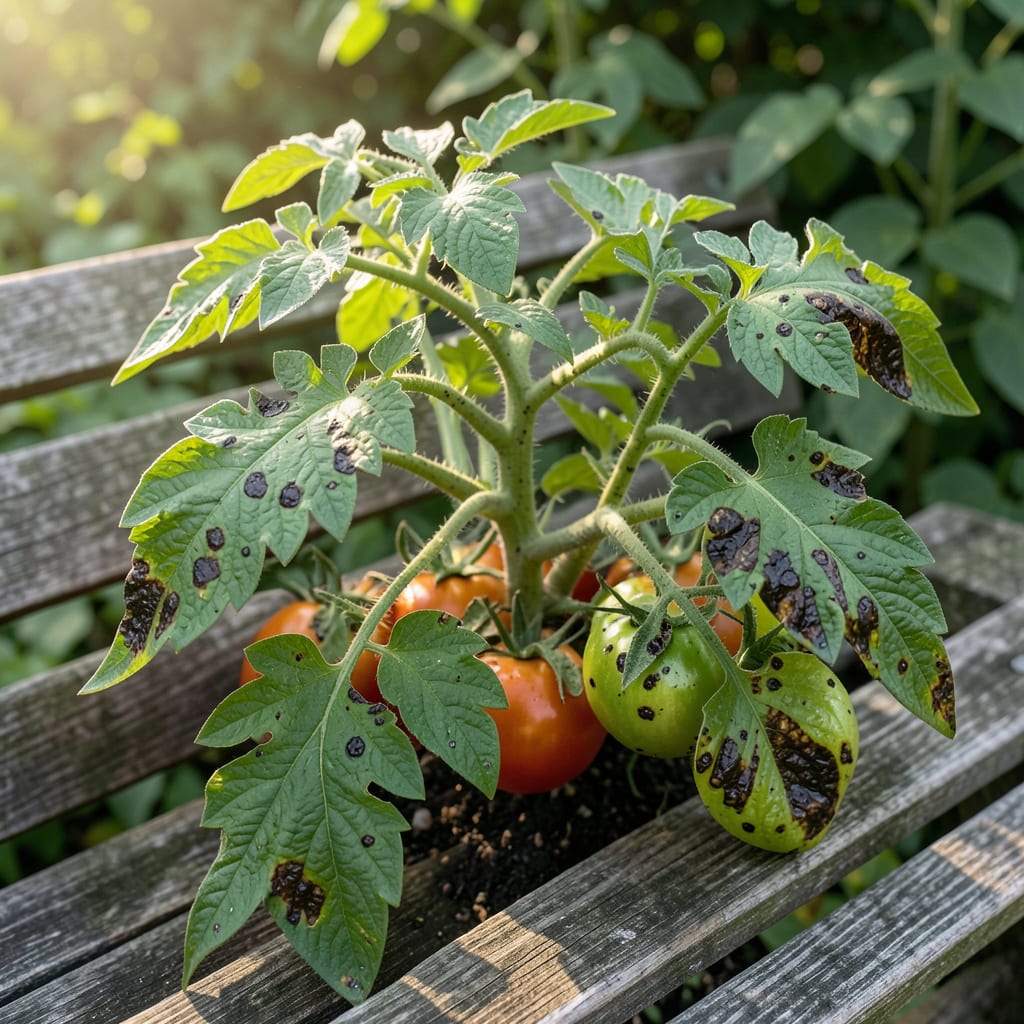
Spotted black marks on your tomato plants? That’s your cue to act fast. I’ve lost entire crops to those tiny dark splotches before learning they’re usually fungal invaders like early blight or septoria.
Catch it early and you can save your plants. Remove infected leaves, improve air circulation, and apply a copper fungicide. Prevention starts with proper spacing and watering at the base—not the leaves.
📚 In This Guide
Here’s how I diagnose and treat black spots on tomatoes before they spread to the whole plant.
Start by examining the undersides of leaves and stem joints where black spots often begin. I use a hand lens to check for tiny black or brown lesions, which may be early signs of fungal or bacterial infection. Note the pattern—irregular spots suggest septoria leaf spot, while concentric rings indicate early blight.
Look for yellowing around the black areas, which often accompanies fungal diseases. If the spots are raised or scab-like, you might be dealing with bacterial speck. Don’t overlook the stems—black streaks there can signal a more serious vascular disease that requires immediate action.
Using clean, sharp pruners, remove all leaves and stems showing black spots. I sterilize my tools with rubbing alcohol between cuts to prevent spreading pathogens. Place the infected material in a sealed bag—never compost it, as many tomato diseases can survive and reinfect your garden.
For severe cases where more than 30% of the plant is affected, I remove the entire plant to protect neighboring tomatoes. Wash your hands thoroughly after handling infected plants, as some pathogens can spread through contact. This step alone can prevent a minor issue from becoming a garden-wide epidemic.
For fungal issues like early blight or septoria, I apply a copper-based fungicide at the first sign of black spots, following label instructions precisely. These treatments work best as preventatives or at the very earliest stages of infection. For bacterial problems, copper sprays can help, but removing infected tissue is more critical.
In organic gardens, I use baking soda solutions (1 tablespoon per gallon of water with a drop of dish soap) as a preventive spray every 7-10 days. While less potent than chemical options, this can slow fungal spread in early stages. Always apply treatments in the evening to prevent leaf burn from sun exposure.
Improve air circulation immediately by pruning excess foliage and spacing plants properly. I aim for at least 18-24 inches between tomato plants to reduce humidity buildup that encourages fungal growth. Stake or cage plants to keep foliage off the ground where soil-borne pathogens can splash onto leaves during rain or watering.
Switch to drip irrigation if you’re overhead watering, as wet foliage is a primary contributor to fungal diseases. I water at the base of plants in the morning to allow foliage to dry completely during the day. Mulch with 2-3 inches of straw or shredded leaves to prevent soil from splashing onto lower leaves during rain.
Rotate your tomato plants to a different location next season, as many pathogens can overwinter in the soil. I maintain a 3-year rotation cycle for nightshade family plants. At the end of each season, remove and destroy all plant debris rather than composting it to eliminate potential disease sources.
Consider planting disease-resistant varieties next year. Look for codes like ‘V’ (verticillium wilt), ‘F’ (fusarium wilt), or ‘T’ (tobacco mosaic virus) on seed packets or plant tags. I’ve had excellent results with ‘Mountain Merit’ and ‘Defiant PhR’ in areas with persistent fungal pressure.
These insights will help you identify and address black spots more effectively.
Diagnostic Precision: In Step 1, pay special attention to the pattern of black spots—irregular edges often indicate septoria leaf spot, while concentric rings suggest early blight. I’ve found that using a hand lens reveals subtle differences that are invisible to the naked eye, which can mean the difference between a targeted fix and a wasted treatment.
Tool Sterilization: During Step 2, sterilizing your pruners with rubbing alcohol between every cut isn’t just a suggestion—it’s critical. I learned this the hard way after accidentally spreading bacterial speck from one plant to another. A quick wipe with alcohol takes seconds and prevents a chain reaction of infection.
Timing for Organic Treatments: For the baking soda solution in Step 3, the 7-10 day interval is non-negotiable for prevention. I apply mine every 7 days during wet weather and stretch to 10 days when conditions are dry. Evening applications are essential; I once sprayed midday and ended up with crispy, sunburned leaves.
Cultural Practice Adjustment: In Step 4, the 18-24 inch spacing between plants isn’t arbitrary. Crowded plants create a humid microclimate that fungal diseases love. I use cages to keep foliage elevated, which reduces soil splash by at least 70%—a simple change that dramatically cuts down on early blight outbreaks.
Black spots are often caused by fungal diseases like early blight or bacterial speck, or environmental stress such as overwatering or nutrient deficiencies.
Yes, if the fruit itself is unaffected. However, if the spots are due to a fungal or bacterial disease, wash the tomatoes thoroughly before eating.
Remove infected leaves, improve air circulation, and apply a fungicide or copper-based spray. Avoid overhead watering to prevent further spread.
Yes, fungal and bacterial infections can spread to nearby plants. Isolate affected plants and practice good garden hygiene to prevent contamination.
Apply fungicide at the first sign of black spots, and reapply every 7–10 days or after rain. Early treatment is key to controlling the spread.
