
Beautiful Plants For Your Interior
Beautiful Plants For Your Interior
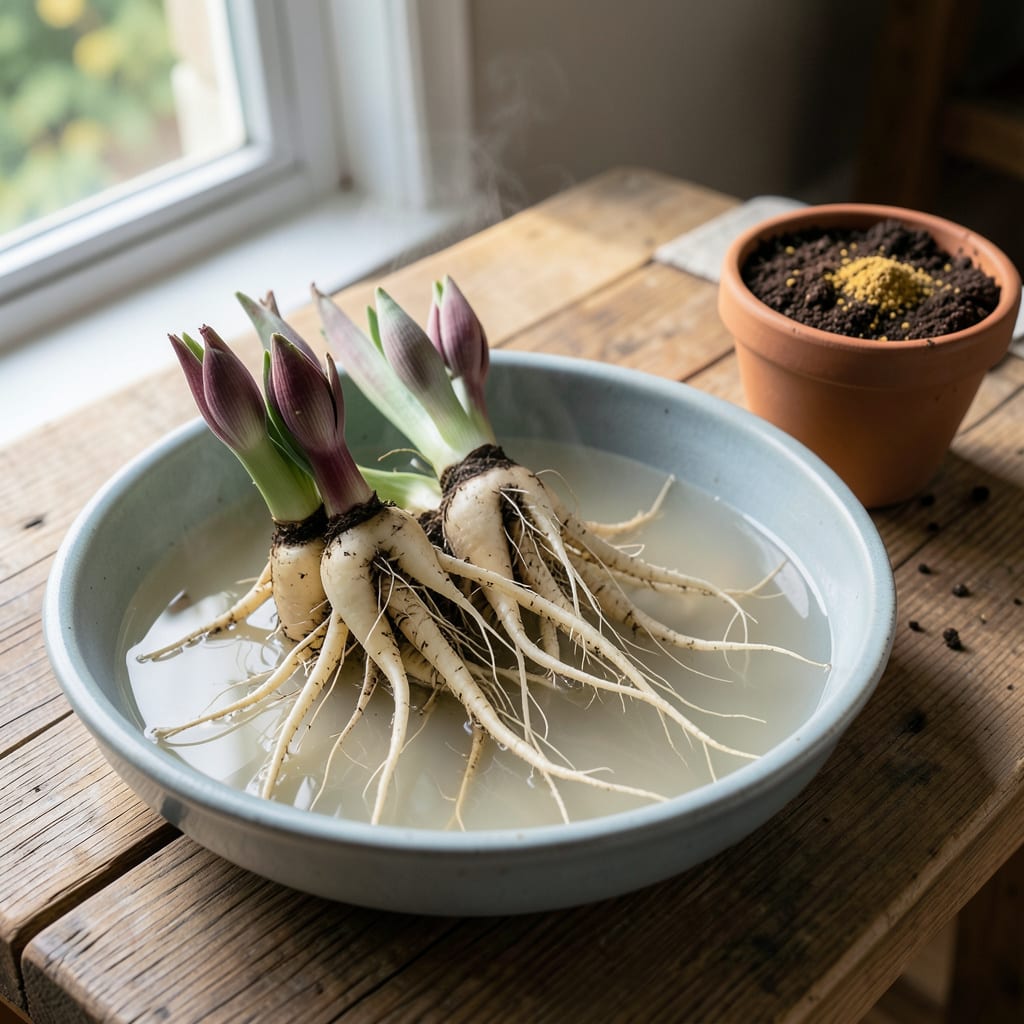
Early spring is the perfect time to plant astilbe bare roots. I’ve learned that proper soil prep and spacing make all the difference for those feathery, lush blooms later in the season.
This method sets you up for success with minimal effort. Just soak the roots first, plant them at the right depth, and keep the soil moist. You’ll see new growth in 2-3 weeks if done right.
📚 In This Guide
This early spring method ensures strong root establishment and vibrant summer blooms in your garden.
Begin by soaking the bare roots in lukewarm water for 1-2 hours before planting. This rehydrates the roots after their dormant period and kickstarts growth. I like to use a shallow bucket or basin so the roots are fully submerged but the tops remain dry.
You’ll know they’re ready when the roots plump up slightly and feel flexible rather than brittle. Don’t rush this step—skipping the soak leads to slower establishment and weaker plants. The water should be room temperature, never hot or cold.
Choose a location with partial shade and rich, well-draining soil. Astilbe thrives in areas that receive morning sun and afternoon shade. Work the soil to a depth of 12-15 inches, removing any weeds or debris.
Mix in a 2-3 inch layer of compost to improve fertility and drainage. The soil should be loose and crumbly—if it clumps tightly when squeezed, it needs more organic matter. I always test drainage by digging a small hole and filling it with water; if it drains within 30 minutes, the conditions are ideal.
Dig a hole wide enough to accommodate the spread roots without bending them. The crown (where the roots meet the stems) should sit 1-2 inches below the soil surface. This shallow depth prevents rot while allowing new shoots to emerge easily.
Spread the roots outward in the hole, ensuring they aren’t tangled or folded. Backfill with soil, pressing lightly to eliminate air pockets. Water thoroughly after planting to settle the soil around the roots.
After planting, water deeply so the soil is moist to a depth of 6-8 inches. Astilbe requires consistent moisture, especially during its first growing season. I check the soil daily by inserting my finger 1 inch deep—if it feels dry, it’s time to water.
Apply a 2-3 inch layer of mulch around the base of the plant to retain moisture and suppress weeds. Use organic mulch like shredded bark or straw, but keep it 1 inch away from the crown to prevent rot. You’ll see new growth emerging within 3-4 weeks if conditions are right.
Keep the soil consistently moist but not waterlogged during the first 6-8 weeks. Overwatering can be just as harmful as drought, so always check the soil before adding more. You’ll notice the first signs of growth as small, fern-like shoots breaking through the soil.
Once shoots appear, reduce watering slightly but maintain even moisture. Fertilize lightly with a balanced, water-soluble fertilizer after 4-6 weeks to encourage strong, healthy growth. Protect young plants from late frosts, as astilbe is sensitive to cold snaps.
Small details in planting make a big difference for healthy astilbe growth.
Soaking Technique: For Step 1, use lukewarm water for that 1-2 hour soak—cold water shocks the roots, while hot water can damage them. I learned this the hard way after my first batch struggled to establish. Room temperature is ideal for rehydrating without stressing the plants.
Soil Preparation: In Step 2, when testing drainage, make sure your hole fills within that 30-minute window. If it drains too quickly, mix in more compost to help retain moisture. Astilbe hates soggy roots but needs consistent dampness, so that 12-15 inch soil prep depth really matters.
Planting Depth: The 1-2 inch crown depth in Step 3 is crucial. Planting too deep causes rot, while too shallow exposes roots. I use a ruler to measure until it became second nature—this prevents guessing and ensures proper growth.
Early Care: During the first 6-8 weeks after planting, resist the urge to overwater. Check that 1-inch soil depth daily as directed in Step 5. Your finger is the best tool here—if it comes out clean, it’s time to water. Overwatering is the most common mistake I see with new astilbe plantings.
Plant astilbe bare roots in early spring, as soon as the soil is workable. This gives them time to establish roots before summer heat arrives. Avoid planting in late fall, as they need time to settle before winter.
Place the crown (where roots meet stems) about 1–2 inches below the soil surface. Ensure the roots are spread out and covered with soil, then water thoroughly to eliminate air pockets.
Yes! Use a well-draining potting mix and a container with drainage holes. Astilbe thrives in pots, but keep the soil consistently moist, as containers dry out faster than garden beds.
Slow growth can result from cold soil, poor soil contact, or insufficient water. Check that roots are properly buried, the soil is moist, and temperatures are consistently above freezing.
