
Beautiful Plants For Your Interior
Beautiful Plants For Your Interior
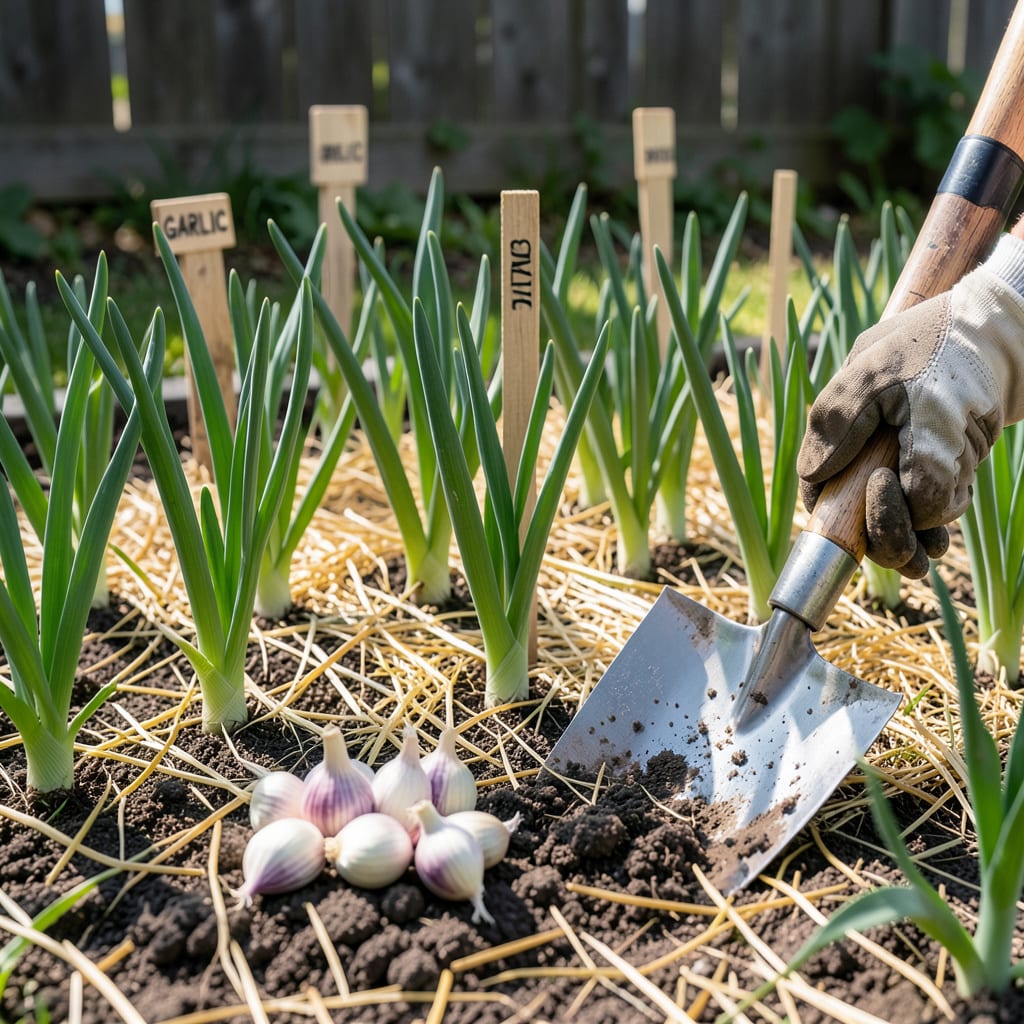
Timing is everything when it comes to growing plump, flavorful 🧄 garlic in Zone 6a. Plant too early, and your bulbs might split or struggle through winter. Wait too long, and you’ll miss the critical root development window before the ground freezes.
After years of testing and tweaking, I’ve nailed down the perfect fall schedule for Zone 6a gardeners. Whether you’re a first-timer or looking to boost your harvest, I’ll show you exactly when to get those cloves in the ground—and why those extra weeks in October or November make all the difference come summer.
If you’re growing garlic in Zone 6a, timing is everything. I’ve found that planting too early can lead to premature sprouting before winter, while planting too late means weak roots that struggle to survive the cold. The sweet spot? Mid-October through early November, when soil temps hover between 50–60°F.☀️
This window gives cloves 4–6 weeks to develop roots before the ground freezes—critical for surviving winter and producing those coveted plump summer bulbs. Miss this period, and you risk stunted growth or even total loss. Trust me, I’ve seen it happen when gardeners rush or delay planting by just a couple of weeks.
Here’s the trick: Soil temperature matters more than air temperature. I use a simple soil thermometer to check depths of 2–3 inches—if it’s above 60°F, wait a week. Below 50°F, and roots may stall. Aim for that Goldilocks zone where cloves wake up just enough to grow roots but not shoots.
In Zone 6a, our average first frost hits around October 15, so I start planting by October 1 to give roots ample time. If you’re in a microclimate (like near a lake or urban heat island), adjust by a week or two. Pro tip: Hardneck varieties like ‘German White’ thrive here, while softnecks may need extra mulch.
What if you miss the window? Don’t panic—you’ve got options. Planting in late November? Add 4–6 inches of straw mulch immediately to insulate. Planting in September? Be ready to cut back green shoots if they emerge before winter; they’ll drain energy from the roots.
I’ve also found that soil prep plays a huge role in success. Garlic hates soggy feet, so I amend my beds with compost and sand to improve drainage. A pH of 6.0–7.0 is ideal—test yours with a kit from the garden center. If it’s too acidic, a sprinkle of wood ash works wonders.
Don’t overlook clove selection. Big cloves = big bulbs, so I always choose the largest, healthiest cloves from my previous harvest (or reputable seed garlic suppliers). Avoid grocery store garlic—it’s often treated to prevent sprouting and may carry diseases. Plant cloves 2 inches deep, pointy-end up, and 6 inches apart.
Finally, mulching is non-negotiable in Zone 6a. I swear by straw or shredded leaves—apply a 4–6 inch layer after planting but before the ground freezes. This protects roots from frost heaving (where freeze-thaw cycles push cloves out of the soil) and retains moisture. Come spring, pull back mulch to let shoots emerge.
If you nail this timing and prep, you’ll be rewarded with harvest-ready bulbs by June or July. I mark my calendar for July 4th weekend—that’s when my garlic is usually ready, with brown lower leaves and firm bulbs. Dig carefully with a fork to avoid bruising, then cure in a shady, breezy spot for 2–3 weeks.🌱
Once you’ve locked in your October–November planting window, it’s time to focus on the how. I’ve refined this process over years of Zone 6a garlic growing, and the details matter—especially when it comes to soil prep and clove selection. Skimp here, and you’ll pay for it in smaller bulbs next summer.
Start with your soil. Garlic thrives in loose, well-draining soil with a pH of 6.0–7.0. I always work in 2–3 inches of compost and a handful of sand to improve drainage. If your soil is heavy clay, consider planting in raised beds to prevent waterlogging. A quick soil test (kits cost $10 at garden centers) will save you headaches later.
Clove selection is where many gardeners go wrong. Bigger cloves yield bigger bulbs, so I always pick the plumpest cloves from my seed garlic. Avoid grocery store garlic—it’s often treated with growth inhibitors and may carry viruses. For Zone 6a, I recommend hardneck varieties like ‘Chesnok Red’ or ‘Spanish Roja’ for their cold hardiness.
When planting, depth and spacing are critical. I plant cloves 2 inches deep—shallow enough to sprout easily but deep enough to avoid frost heaving. Spacing matters too: 6 inches between cloves and 12 inches between rows ensures good airflow, reducing disease risk. Crowded garlic = small, misshapen bulbs.
Mulching is your garlic’s winter coat. In Zone 6a, I apply a 4–6 inch layer of straw immediately after planting. Straw is ideal because it’s lightweight, breathable, and won’t compact like leaves. Avoid hay—it’s full of weed seeds! Mulch prevents frost heaving (where freeze-thaw cycles push cloves out of the soil) and keeps weeds at bay.
After planting, water lightly to settle the soil, then let nature take over until spring. Resist the urge to overwater—garlic rot is a real risk in damp fall conditions. Come spring, pull back mulch as shoots emerge, but keep it handy to suppress weeds. By June or July, you’ll be harvesting bulbs so plump they’ll make your neighbors jealous.🪴
Pro tip: Label your rows with variety names and planting dates. I use popsicle sticks and a Sharpie—it’s low-tech but effective. This helps track which varieties perform best in your microclimate. And if you’re planting multiple types, space them in separate rows to avoid confusion at harvest time.
Even experienced gardeners can trip up when planting garlic in Zone 6a. After years of growing (and occasionally ruining) garlic, I’ve pinpointed the three biggest mistakes that lead to puny bulbs or failed crops. The good news? They’re all avoidable with a little know-how.
First up: planting grocery store garlic. I get it—it’s tempting to grab a head from the produce aisle and call it a day. But here’s the problem: most supermarket garlic is treated with growth inhibitors to prevent sprouting, and it may carry viruses or fungi that’ll wreck your soil. Always source seed garlic from reputable suppliers.
The second mistake is skipping mulch—or using the wrong kind. In Zone 6a, frost heaving (where freeze-thaw cycles push cloves out of the soil) is a real threat. I’ve lost entire rows by neglecting to mulch. The fix? Apply 4–6 inches of straw right after planting, before the ground freezes. Avoid hay (weed seeds!) or leaves (can mat down).
Finally, misjudging spring watering can ruin months of work. Garlic needs consistent moisture in spring as bulbs form, but too much water late in the season causes rot. I stop watering 2–3 weeks before harvest (when lower leaves brown) to let bulbs cure in the ground. This also makes digging easier and reduces disease risk.
Bonus blunder: planting too shallow or deep. Cloves need to be 2 inches deep—any shallower and they’ll heave out of the soil; deeper and they’ll struggle to sprout. I use a planting depth gauge (or just my finger!) to ensure consistency. And always plant pointy-end up—sounds obvious, but I’ve done it backward more times than I’ll admit!
If you’ve made these mistakes before, don’t stress—next season is a fresh start. Focus on quality seed garlic, proper mulching, and smart watering, and you’ll be pulling up record-breaking bulbs by July.🌱
Planting before mid-October risks premature sprouting before winter. Shoots that emerge too early can freeze and die, weakening the plant. The ideal window (50–60°F soil) ensures roots grow without top growth.
You can, but bulbs will be smaller and less flavorful. Spring-planted garlic lacks the 6–8 month growing period needed for full development. If you must, plant as early as possible (March) and choose softneck varieties.
Plant cloves 2 inches deep, pointy-end up. Too shallow risks frost heaving; too deep delays sprouting. Use a ruler or your finger to measure—consistency matters for even growth.
Straw is ideal—it’s breathable, insulates well, and won’t compact. Apply 4–6 inches after planting but before freeze. Avoid hay (weed seeds!) or leaves (can smother shoots). Mulch prevents temperature swings that harm roots.
Cut off water 2–3 weeks before harvesting (when lower leaves brown). This lets bulbs cure in the ground, improving storage life. Overwatering late causes rot and splits wrappers. Watch the leaves—they’ll tell you when to stop!
