
Beautiful Plants For Your Interior
Beautiful Plants For Your Interior
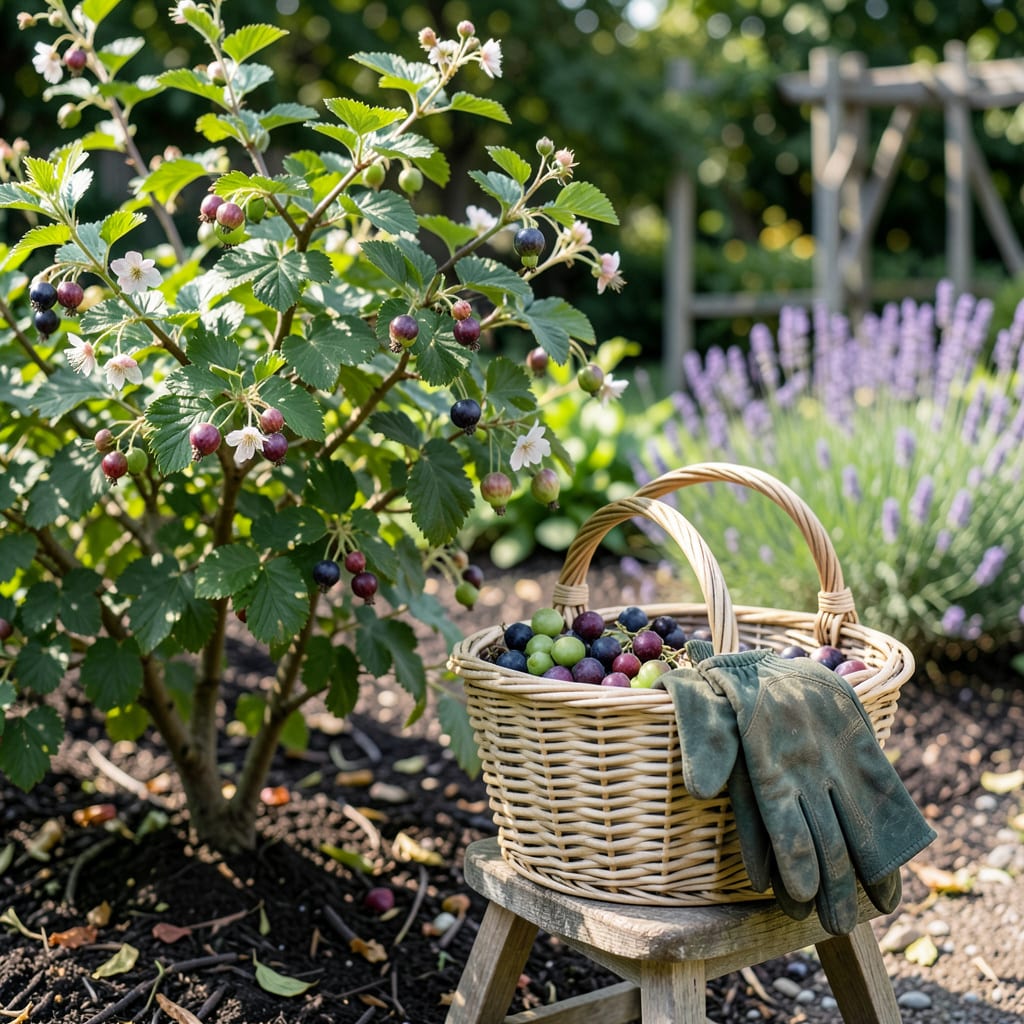
There’s nothing quite like the taste of a perfectly ripe gooseberry—sweet, tangy, and bursting with flavor. But pick too early, and you’ll get a mouthful of sour disappointment; wait too long, and the birds might beat you to it.
Timing your harvest is the secret to that perfect balance of sweetness and tartness. Whether you’re growing them for pies, jams, or fresh snacking, I’ll show you exactly how to know when your gooseberries are ready to come off the bush. Let’s get started.


Knowing exactly when to pick gooseberries can feel tricky, but your plants will give you clear signals. The first thing I check is color changes—most varieties shift from bright green to deeper hues like red, purple, or golden yellow when ripe. Don’t rely on color alone though, because some culinary varieties stay green even when ready.
Next, give the berries a gentle squeeze. Ripe gooseberries should feel slightly soft but still firm—not mushy. If they’re rock-hard, they need more time. I also look at the size; most varieties reach about ½ to 1 inch in diameter when mature. When in doubt, taste-test one or two!
| Sign | Unripe | Ripe & Ready |
|---|---|---|
| Color | Bright green 🟢 | Deep red/purple/gold 🟡 |
| Texture | Hard as a marble 🤏 | Firm with slight give 👌 |
| Size | Small, under ½ inch | ½ to 1 inch diameter |
| Stem | Clings tightly | Separates easily |
Pro Tip: Dessert varieties (like ‘Hinnonmaki Red’) turn sweeter when fully colored, while green culinary types (like ‘Invicta’) are best picked firm for cooking.
I always check the stem attachment too. Ripe gooseberries should come off the bush with a gentle twist—no yanking required! If you’re growing thorny varieties, wear gloves to avoid pricks. Another trick? Listen for a dull thud when you tap the berry; a hollow sound means it’s overripe.
Climate plays a role too. In cooler zones (USDA 3-5), gooseberries often ripen later—think mid to late July. Warmer areas (USDA 6-8) might see harvests as early as June. If you’re unsure, start checking berries 60-75 days after flowering, which is the typical window for most varieties.
For culinary gooseberries (the tart green ones), I harvest them a bit earlier when they’re still firm. These are perfect for jams or pies where you want that signature tang. Dessert varieties, like ‘Pixwell’ or ‘Captivator,’ taste best when fully ripe—wait until they’re soft and deeply colored for fresh eating.
Don’t forget to harvest in stages! Gooseberries don’t all ripen at once. I pick the largest, most colorful berries first, then return every 3-5 days for the rest. This extends your harvest window and prevents waste. Use sharp pruners or scissors to avoid tearing the plant’s delicate stems.
If birds are a problem in your garden, you might need to harvest slightly early. Cover bushes with netting if you notice feathered thieves eyeing your crop. Once picked, store gooseberries in the fridge for up to 2 weeks, or freeze them for longer preservation. Just rinse and dry them first!
One final tip: Taste changes as berries ripen. Early-picked gooseberries are tart and firm, ideal for cooking. Left longer, they become sweeter and softer, perfect for snacking. I like to do a mix—some early for jam, some late for fresh desserts. Experiment to find your favorite stage!
Remember, the more you harvest, the more your plant will produce. Regular picking encourages new fruit development, so don’t be shy about collecting those berries. With these signs in mind, you’ll never miss the perfect harvest window again. Happy picking! 🌿
Timing your gooseberry harvest depends heavily on the variety you’re growing and your local climate. Early-season types like ‘Pixwell’ often ripen in late June, while mid-season varieties such as ‘Invicta’ peak in July. Late-season gooseberries like ‘Hinnonmaki Red’ may not be ready until August.
Your USDA hardiness zone shifts these windows significantly. In cooler zones (3-5), expect harvests 2-3 weeks later than warmer areas (6-8). I’ve found that microclimates matter too—berries near south-facing walls often ripen 7-10 days earlier than those in shadier spots.
| Variety | Type | Zone 3-5 | Zone 6-8 |
|---|---|---|---|
| Pixwell | Early | Late July | Mid June |
| Invicta | Mid | Early Aug | Mid July |
| Hinnonmaki Red | Late | Late Aug | Early Aug |
| Captivator | Mid-Late | Mid Aug | Late July |
Pro Tip: First-year plants often produce 2 weeks later than established bushes. Track your first harvest date to predict future seasons!
For culinary varieties (green types), I start checking 60 days after flowering. These are typically ready when they’re firm and ½ inch wide, even if still green. Dessert varieties (red/purple) need 75-90 days to develop full sweetness—wait until they’re soft and deeply colored.
Watch your local last frost date too. Gooseberries planted in early spring (after last frost) will ripen about 75 days later. In my zone 6 garden, that means planting by April 15 leads to harvests starting late June. Warmer zones can plant earlier for even sooner berries.
Don’t forget that weather patterns affect timing. A cool, wet spring delays ripening by 1-2 weeks, while hot, dry summers speed it up. I keep a garden journal to track these variations year-to-year. This helps me adjust my harvest expectations based on seasonal conditions.
If you’re growing multiple varieties, label your plants and note their harvest windows. I use color-coded tags—red for early, yellow for mid, green for late—to quickly identify which bushes to check first. This system prevents missing the perfect harvest window for any variety.
Remember that bird pressure might force early harvesting. If you notice feathered visitors sampling your berries, consider picking slightly underripe and letting them finish indoors. They’ll continue ripening at room temperature over 2-3 days. This beats losing your crop to hungry wildlife!
For the sweetest flavor, harvest gooseberries in the early morning when sugars are most concentrated. Use sharp scissors to snip stems cleanly, leaving a small portion attached to the berry. This prevents damage to both fruit and plant, ensuring healthy production for years to come. 🌿
Even experienced gardeners can make mistakes when harvesting gooseberries. The most common error I see is picking too early—those tart, underripe berries might work for jam, but they lack the sweetness you want for fresh eating. Wait until they’ve reached their full color and size for best flavor.
Another frequent misstep is ignoring thorn protection. Many gooseberry varieties have sharp thorns that can scratch your hands. I always wear thick gardening gloves when harvesting to avoid painful pricks. Trust me, your hands will thank you later!
Improper storage is another issue that leads to wasted berries. Gooseberries keep best when stored unwashed in the refrigerator in a ventilated container. I use a paper towel-lined container to absorb excess moisture, which prevents mold growth. They’ll stay fresh for up to 2 weeks this way.
Many gardeners forget to check for pest damage before harvesting. Look for signs of aphids or gooseberry sawfly—small holes in leaves or berries. If you spot damage, harvest immediately and treat your plants with neem oil or insecticidal soap to prevent further infestation.
A mistake that affects future harvests is skipping post-harvest pruning. After picking, I always remove old, unproductive canes and thin out crowded areas. This improves air circulation and encourages new growth for next year’s crop. Aim to keep about 6-8 healthy canes per plant.
Finally, don’t make the error of harvesting all at once. Gooseberries ripen over several weeks, so I pick the largest, most colorful berries first, then return every 3-5 days for the rest. This staged approach gives you a longer harvest period and prevents berries from becoming overripe on the bush. 🌿
Start checking 60-75 days after flowering, then inspect every 3-5 days during peak season. Early varieties may ripen faster, while late-season types need more time. Morning checks work best when berries are plump from overnight hydration.
Yes, but it depends on your use. Culinary varieties (like ‘Invicta’) are often picked green for cooking—they’ll be tart but perfect for jams. For fresh eating, wait until they develop full color and slight softness. Green berries won’t sweeten further once picked.
Early morning is ideal when temperatures are cool and berries are crisp. Avoid midday heat which can make fruit soft and prone to bruising. If harvesting in evening, do it before dew forms to prevent moisture-related spoilage.
Overripe gooseberries become mushy, develop wrinkled skin, or fall off easily when touched. They may also attract more pests. If berries have a fermented smell, they’re past prime. Harvest immediately if you notice these signs.
No, store unwashed to prevent mold growth. Wash only before eating or cooking. If washing is necessary, use cold water and dry thoroughly with paper towels. Wet berries spoil 3-5 times faster in storage.
