
Beautiful Plants For Your Interior
Beautiful Plants For Your Interior
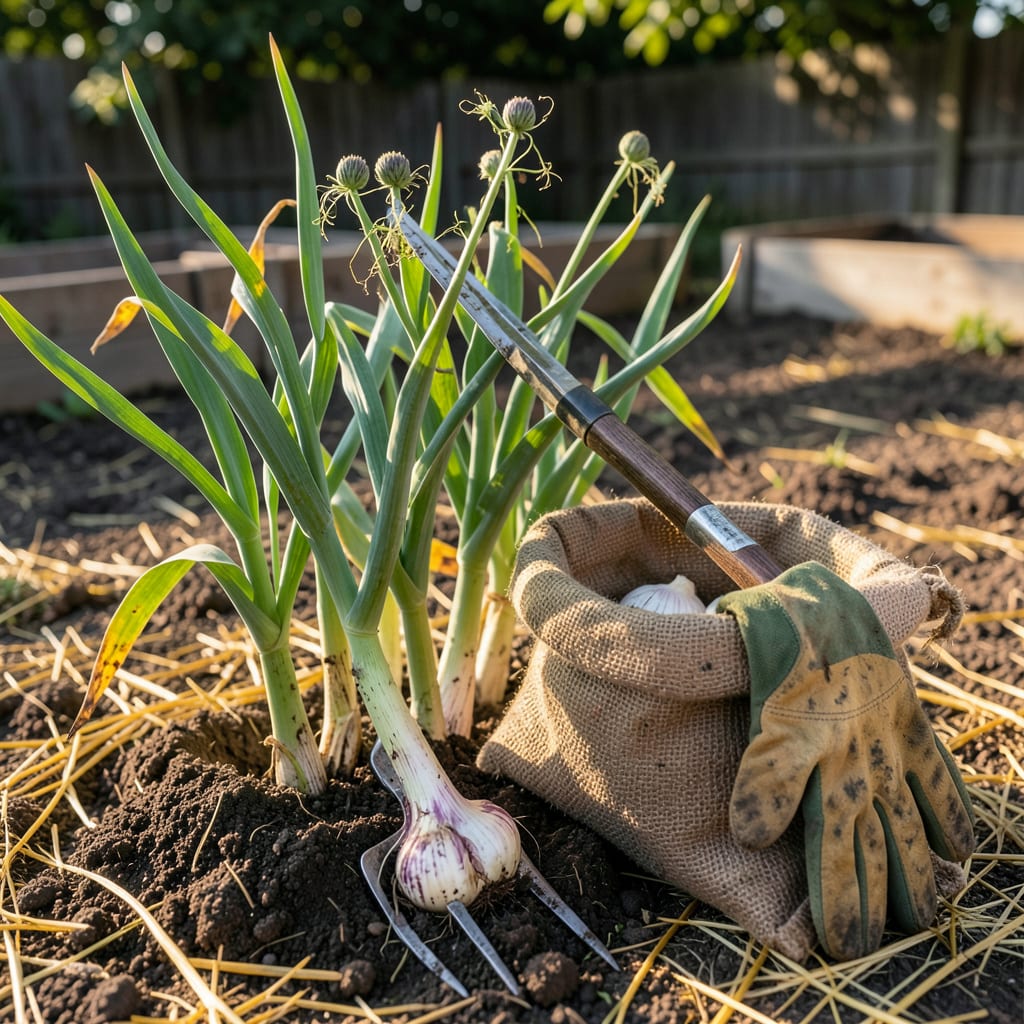
There’s nothing worse than digging up your 🧄 garlic too early—only to find undersized cloves that won’t last the winter. But wait too long, and you risk split bulbs or rot that ruins months of patience.
I’ve learned the hard way that timing is everything. The difference between perfect, flavor-packed bulbs and a disappointing harvest often comes down to just 7–10 days. Let me show you exactly how to nail that window—no guesswork required.


After months of patiently tending your garlic crop, the final weeks are the most critical. I’ve learned the hard way that harvesting just 5 days too early or late can drastically affect flavor and storage life. The secret? Watching for three key visual clues—not just the calendar.
Most gardeners assume garlic is ready when the leaves turn brown, but that’s only part of the story. The real magic happens when the lower leaves die back while the upper ones stay green. This balance ensures the bulbs have maximized their size without splitting or rotting in the ground.
| Harvest Sign | What to Look For | Action Needed |
|---|---|---|
| Leaf Dieback | 5–6 lower leaves brown; 3–4 upper leaves still green 🟡 | Harvest within 3–5 days |
| Bulb Firmness | Gently dig soil: bulb feels solid and plump (not soft) ✅ | Ready to lift |
| Skin Texture | Papery wrapper visible when brushed (not sticky or damp) 📏 | Optimal harvest window |
| Leaves Still Green | All leaves upright and vibrant 🟢 (no yellowing) | Wait 1–2 weeks |
| Bulb Splitting | Cloves separating in soil or wrapper cracking ❄️ | Harvest immediately (overdue!) |
If you’re growing hardneck garlic, watch for the scapes (those curly flower stems) to appear about 3–4 weeks before harvest. I always mark my calendar when I remove scapes—it’s my signal to start checking bulb firmness weekly. Softneck varieties skip this step, so focus on leaf dieback instead.
Here’s a trick I swear by: Use a hand trowel to gently scrape soil away from 2–3 test bulbs when leaves begin yellowing. If the cloves fill the wrapper and feel firm, it’s go time. If they’re still loose or the neck hasn’t tightened, give them 3 more days and check again.
Harvesting too early means smaller cloves that shrink during curing. Wait too long, and the bulbs may split in the ground, inviting rot or pests. I once lost an entire softneck crop to botrytis rot after a late-summer rain—because I’d delayed harvesting by just 10 days.
Timing also depends on your USDA zone. In cooler areas (Zones 3–5), garlic often needs the full 150–180 days. Warmer climates (Zones 7+) might see ready bulbs in 120–130 days. When in doubt, dig a test bulb—it’s the only sure way to know.
Once you’ve confirmed readiness, stop watering 2–3 days before harvesting. Dry soil makes lifting easier and reduces rot risk. Use a garden fork (not a shovel!) to loosen the earth 6 inches away from the bulb to avoid bruising. Brush off excess dirt, but don’t wash the bulbs—moisture sabotages curing.
Pro tip: If rain is forecasted and your garlic is 90% ready, harvest early. Wet soil can cause bulbs to suffocate or mold in as little as 24 hours. I keep a weather app alert set for the week my garlic typically matures—it’s saved my harvest more than once.
After lifting, move bulbs to a shady, breezy spot (like a covered porch) for 2–3 weeks to cure. Proper curing concentrates flavors and extends storage life to 6–12 months. Skip this step, and you’ll be lucky to get 2 months before cloves sprout or dry out.
Remember, garlic tells you when it’s ready—you just need to listen to the leaves and trust the bulb’s firmness. I’ve found that keeping a harvest journal with photos of leaf stages helps fine-tune timing year after year. Your patience will pay off in plump, pungent cloves that last until next season! 🌱
If you’ve ever wondered why your garlic harvest seems inconsistent, the answer often lies in the variety. Hardneck garlic and softneck garlic don’t just differ in flavor—they mature at different rates too. I’ve learned the hard way that treating them the same leads to disappointing results!
Hardneck varieties, like Rocambole or Purple Stripe, typically mature faster—about 90-120 days after planting. They send up a flowering scape in late spring, which is your first harvest clue. Softnecks, such as Silverskin or Artichoke, take longer—often 120-150 days—and lack scapes.
| Variety | Days to Maturity | Harvest Signs | Best For |
|---|---|---|---|
| Hardneck | 90-120 days | Scape curls, 5-6 brown leaves | Cold climates, bold flavor |
| Softneck | 120-150 days | 7-8 brown leaves, no scapes | Warmer zones, long storage |
For hardneck garlic, I start checking bulbs when the lower 3-4 leaves turn brown but the upper leaves stay green. The scape’s appearance is your 2-week warning—harvest usually follows shortly after. Softnecks need more patience; wait until 60-70% of leaves are brown before digging.
Climate plays a role too. In cooler zones (like USDA Zone 6), hardnecks often finish by early July, while softnecks may linger until late July. Southern gardeners might harvest 2-3 weeks earlier. Always adjust based on your local last frost date and spring temperatures.
Pro tip: If you’re growing both types, label your rows at planting! I once mixed them up and harvested my softnecks too early—the bulbs were undersized and didn’t store well. Now I use color-coded plant markers to track varieties separately.
Remember, soil moisture affects timing too. Garlic in well-drained soil matures faster than waterlogged plants. If heavy rains delay your harvest, extend the timeline by 5-7 days but watch for bulb splitting—a sign you’ve waited too long!
After harvesting, cure both types in a dry, shaded spot for 2-3 weeks. Hardnecks store for 4-6 months, while properly cured softnecks can last 8-12 months. That’s why timing matters—it directly impacts your garlic’s shelf life! 🌱
I’ve seen too many gardeners lose their garlic crop to simple but costly mistakes. The difference between a bountiful harvest and a disappointing one often comes down to timing and technique. Let’s tackle the five most common errors that sabotage garlic—so you can avoid them and enjoy plump, flavorful bulbs all year.
One of the biggest blunders? Harvesting too early. If you pull garlic when the leaves are still mostly green, the bulbs won’t have fully developed. This means smaller cloves and weaker flavor. On the flip side, waiting too long can cause the bulbs to split open in the ground, making them prone to rot. It’s all about catching that sweet spot when the lower leaves brown but the upper ones stay green.
Another critical mistake is harvesting after rain. Wet soil clings to bulbs, and excess moisture during curing invites mold. I always check the 10-day forecast before planning my harvest. If rain is coming, I’ll dig a few days early rather than risk soggy bulbs. Remember, garlic needs to dry out before curing, not after.
Improper curing is where many gardeners drop the ball. If you skip this step or rush it, your garlic won’t store well. I cure mine by hanging bundles in a shaded, well-ventilated area—like a garage or covered porch—for 2-3 weeks. The outer skins should turn papery, and the necks should tighten. This step locks in flavor and extends shelf life for months.
Finally, don’t overlook your tools and technique. A garden fork works better than a shovel for lifting bulbs without damage. I gently loosen the soil 6 inches away from the plant to avoid bruising. And never yank garlic by the stems—always dig carefully to keep the bulb intact. Small details like these make a huge difference in your harvest quality. 🌱
Look for 5-6 brown lower leaves while the upper leaves remain green. The bulbs should feel firm when gently squeezed, and the skins will appear papery. If most leaves are still green, wait a few more days.
Picking too soon results in underdeveloped bulbs with smaller cloves and milder flavor. The wrappers won’t be fully formed, reducing storage life to just a few weeks instead of months. Patience pays off!
Avoid harvesting in wet conditions—moisture clings to bulbs and promotes rot during curing. If rain is forecasted, dig 2-3 days early rather than risk soggy soil. Dry bulbs store far better.
Hang bulbs in a shaded, well-ventilated area for 2-3 weeks. The skins will tighten, and the necks will dry completely. Proper curing locks in flavor and extends shelf life for up to 6-10 months.
