
Beautiful Plants For Your Interior
Beautiful Plants For Your Interior
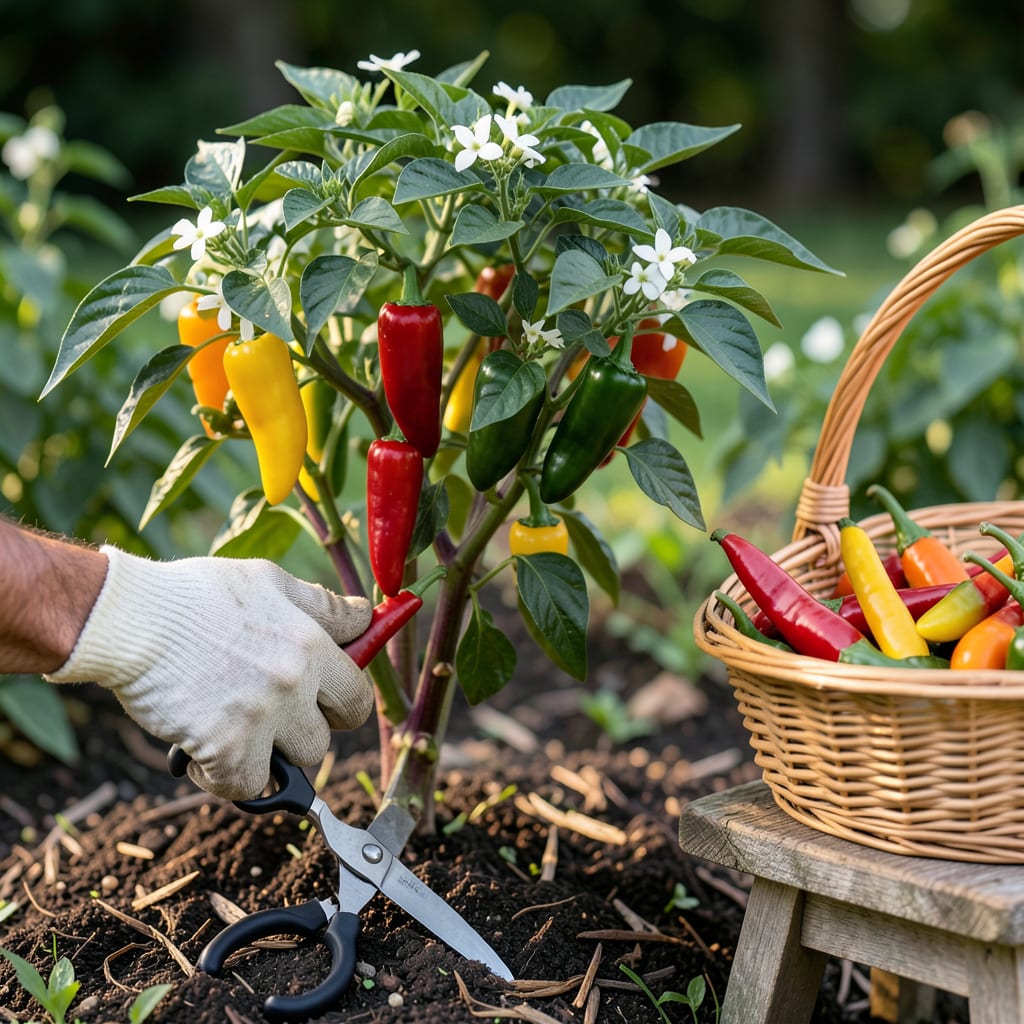
There’s nothing quite like the satisfaction of growing your own 🌶️ Chili Peppers—until you’re left wondering if they’re actually ready to pick. That moment of hesitation can make or break your harvest, turning potential flavor bombs into lackluster disappointments.
Timing is everything, and I’ve learned the hard way that color isn’t always the only clue. Whether you’re growing fiery habaneros or mild jalapeños, I’ll show you the exact signs to look for—so you can harvest at peak flavor, every single time.


Nothing beats the thrill of watching your chili peppers transform from tiny green buds to vibrant, plump pods. But knowing exactly when to pluck them from the plant? That’s where many gardeners second-guess themselves. I’ve learned that ripeness isn’t just about color—it’s a combination of visual cues, texture, and even timing.
First, let’s talk about what not to do: don’t rely solely on size. A jalapeño might reach its full 3-inch length while still unripe, just as a habanero can stay small but pack full flavor. Instead, I focus on a trio of signals—color depth, skin sheen, and stem ease—to guarantee perfect timing every harvest. 🌱
| Chili Variety | Ripeness Indicator | Days to Maturity | Harvest Tip |
|---|---|---|---|
| Jalapeño | Deep green → bright red; glossy skin | 70–80 | Pick firm, before wrinkles form |
| Habanero | Bright orange/red; sweet aroma | 90–100 | Wear gloves—capsaicin burns! |
| Cayenne | Deep red; slight give when squeezed | 70–85 | Harvest in clusters for efficiency |
| Thai Chili | Vibrant red; thin, wrinkled skin | 80–90 | Dry immediately for intense heat |
| Bell Pepper | Full size + color (green/yellow/red) | 60–90 | Use pruners to avoid stem damage |
The firmness test is my secret weapon. Gently press the pepper’s shoulder (near the stem) with your thumb. If it gives slightly—like a ripe avocado—it’s ready. Too soft? It’s overripe. Still hard? Give it 2–3 more days of sunshine. This trick works for every variety, from mild poblano to scorching ghost peppers.
Climate plays a huge role too. In cooler zones (like my USDA Zone 6 garden), peppers ripen slower, so I extend the season by covering plants with row fabric on chilly nights. Conversely, heatwaves can rush ripening—sometimes too fast. If temps spike above 90°F, I harvest a bit early to prevent sunburnt skins or bitter flavors.
Here’s a pro move: Harvest in the early morning. Peppers are crispest and most hydrated after a cool night, which means better texture and longer storage. I keep a pair of sharp micro-tip snips in my pocket to cleanly cut stems without tugging. For stubborn peppers, a gentle twist while supporting the branch prevents damage to the plant.
If you’re growing for heat, patience is key. Capsaicin (the compound that brings the fire) doubles as peppers ripen from green to red. But if you prefer milder flavors, pick them earlier. I love using green jalapeños for fresh salsa and saving the red ones for smoky dried chips. Experimenting with stages lets you tailor heat levels to your taste.
Don’t forget the stem test! A ripe pepper should detach with a light tug, leaving the stem intact. If it resists, it’s not ready. I’ve found that overripe peppers (wrinkled or soft) still work great for cooking but lose their crispness. For seed saving, let a few fully ripen and dry on the plant—they’ll be your best producers next season.
Regular harvesting is the gift that keeps giving. I pick peppers every 3–5 days at peak season, which signals the plant to produce more. Just leave 1–2 peppers per branch to mature fully—this keeps the plant balanced and productive. My record? A single cayenne plant that yielded over 50 peppers in one summer! ☀️
Finally, trust your senses. A ripe chili will often have a slightly sweet aroma at the stem end. If it smells grassy or bland, it needs more time. And remember: even if you pick a little early, most peppers will continue ripening indoors on a sunny windowsill. The key is observing, testing, and enjoying the process—your taste buds will thank you! 🌿
Timing is everything when harvesting chili peppers. The difference between a perfectly ripe pod and one that’s underwhelming often comes down to just a few days. I always check for color changes first—most varieties shift from green to vibrant red, yellow, or orange when ready.
But color isn’t the only clue. A ripe pepper should feel firm yet slightly yielding when gently squeezed, and the skin will look glossy and smooth. If it’s still hard as a rock or dull in appearance, give it more time. Size matters too—most chilies reach their full mature length before they’re truly ripe.
| Variety | Ripeness Color | Days to Maturity | Size at Harvest |
|---|---|---|---|
| Jalapeño | Deep green to red | 70-80 days | 3-4 inches |
| Habanero | Bright orange/red | 90-100 days | 1-2 inches |
| Cayenne | Deep red | 70-85 days | 4-6 inches |
| Bell Pepper | Green, red, or yellow | 60-90 days | 3-5 inches |
Don’t forget to consider your local climate. Cooler temperatures slow ripening, while hot, sunny days speed it up. If you’re in a shorter growing season, you might need to pick peppers slightly early and let them ripen indoors. I’ve had success with this trick for late-season habaneros.
For the best flavor, I recommend harvesting in the morning when peppers are crisp and hydrated. Use clean pruners or scissors to avoid damaging the plant. A gentle twist works too, but be careful not to snap branches—especially with heavier varieties like bell peppers.
If you’re growing for maximum heat, wait until peppers are fully colored. Capsaicin (the compound responsible for spiciness) increases as they ripen. But if you prefer milder flavors, pick them earlier. I love experimenting with different stages—green jalapeños are great for stuffing, while red ones pack more punch.
Pro tip: Regular harvesting encourages more production. The more you pick, the more your plant will produce. Just be sure to leave a few peppers on the plant to signal it to keep flowering. This balance keeps my chili plants productive well into fall.
Finally, always check the stem connection. A ripe pepper should detach with a light tug, leaving the stem intact. If it resists, it’s not ready. Trust me—patience pays off when you bite into that first perfectly ripe chili of the season! 🌱
Even experienced gardeners can slip up when harvesting chili peppers. One of the biggest mistakes I see? Picking too early out of excitement. Those green peppers might look ready, but they often lack the full flavor and heat they develop when fully ripe. Patience really does pay off here.
Another common blunder is yanking peppers off without support. This can damage both the fruit and the plant. Instead, I always use clean pruners or gently twist while supporting the branch. Remember, a healthy plant means more peppers later in the season! ✂️
Many gardeners don’t realize that harvesting time affects storage life. Peppers picked in the heat of day wilt faster than those harvested in cool morning hours. I always bring a basket and head out right after sunrise when the peppers are crisp and full of moisture.
A mistake I made early on was waiting too long for that “perfect” moment. Overripe peppers become soft, lose their vibrant color, and can even start to ferment on the plant. Now I check my plants every 2-3 days during peak season to catch them at just the right stage. 🌱
Post-harvest handling matters too! Never toss peppers in a pile—this causes bruising. Instead, I lay them in a single layer in a ventilated container. For long-term storage, keep them dry and around 50-55°F. And if you accidentally pick unripe peppers? Place them in a paper bag with a ripe banana to speed ripening.
Finally, don’t forget about your plant’s health after harvesting. I always water deeply and add a light balanced fertilizer (5-5-5) to help the plant recover. This keeps the production going strong. The biggest reward? Seeing new flowers appear just days after a good harvest! ☀️
Overripe peppers often appear wrinkled or soft to the touch. The color may also fade or become dull. If they detach too easily with almost no resistance, they’ve likely passed their prime.
Yes! Capsaicin (the compound that creates heat) increases as peppers mature. Green peppers are milder, while fully colored ones pack more punch. For maximum spice, wait until they reach their final color.
Early morning is ideal. Peppers are crispest and most hydrated after a cool night. Avoid harvesting in the afternoon heat, as peppers can wilt faster and lose firmness.
Green peppers work well for milder dishes. You can also place them in a paper bag with a ripe banana to speed up ripening indoors. They’ll continue maturing off the plant.
Check every 2-3 days at peak season. Chili peppers can ripen quickly, especially in warm weather. Regular harvesting also encourages the plant to produce more.
