
Beautiful Plants For Your Interior
Beautiful Plants For Your Interior
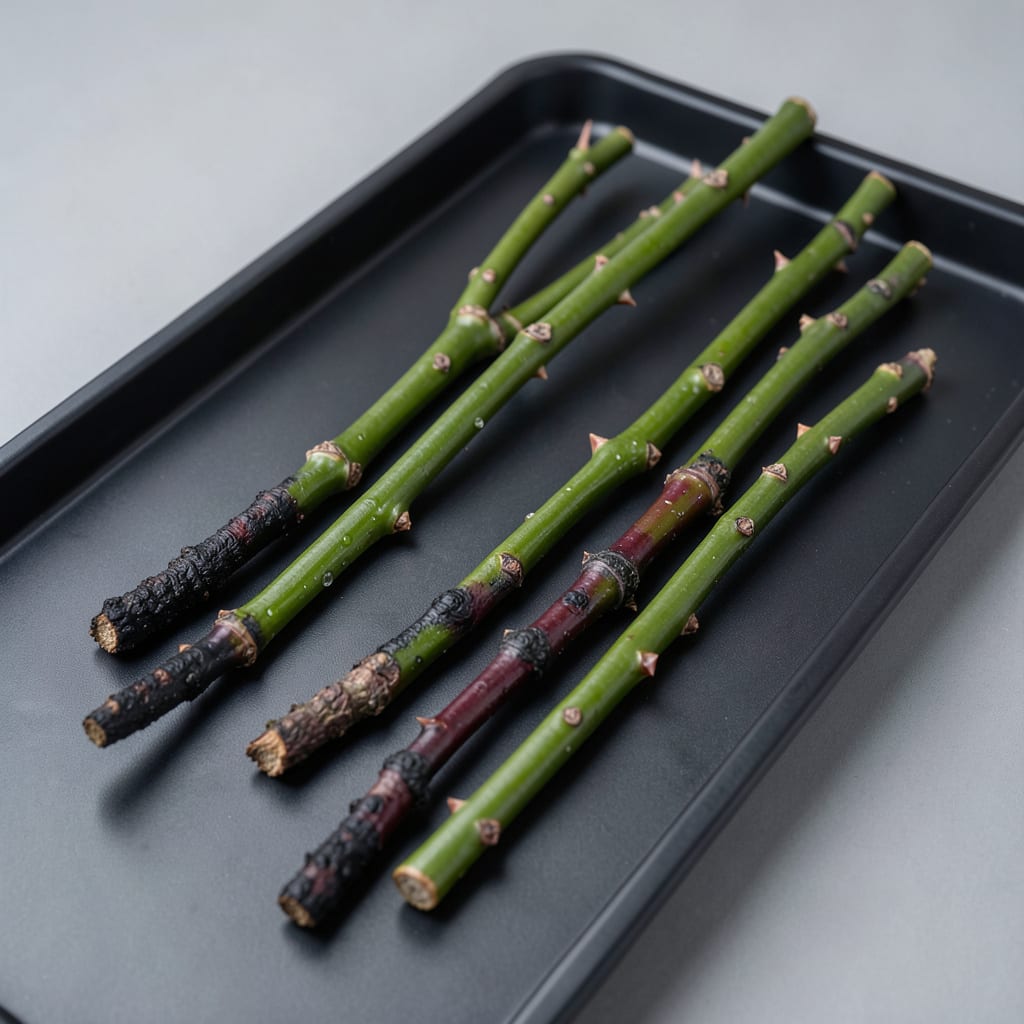
Spotted blackened thorns or odd discolorations on your roses? I’ve seen these warning signs wipe out entire bushes when ignored. Early detection makes all the difference between salvage and replacement.
You’ll learn to recognize the subtle differences between fungal spots, bacterial ooze, and environmental stress. With the right treatment at the first sign, your roses can bounce back stronger than before.
📚 In This Guide
Use this method to spot symptoms early and apply treatments before damage spreads to healthy canes.
Start by inspecting thorns along the entire length of each cane, focusing on color changes and texture irregularities. Healthy thorns appear uniformly colored and firm, while diseased ones often show dark brown or black discoloration at the base or along the shaft. I use a hand lens to check for subtle spotting or streaking that might indicate fungal infection.
Pay particular attention to thorns near the soil line, as these are most vulnerable to splash-borne pathogens. You’ll notice diseased thorns may appear swollen or have a cracked, blistered surface—these are classic signs of bacterial canker or anthracnose. Document suspicious thorns with clear photos for comparison over time.
Diseased thorns rarely appear in isolation. Look for corresponding sunken lesions or dark streaks on the cane beneath the affected thorn—this indicates the pathogen has spread internally. I run my fingernail along the cane to feel for raised or depressed areas that aren’t visible to the naked eye.
Advanced infections often produce white or tan pustules on the cane surface, particularly with rust diseases. If you see orange-yellow spores dusting the thorn base, you’re likely dealing with a rust variant that requires immediate copper fungicide application. Note the pattern: random spots suggest anthracnose, while linear streaks point to canker.
Thorn diseases frequently manifest in the plant’s upper growth before becoming obvious on the stems. Examine leaves directly above suspicious thorns for black spots with yellow halos (black spot disease) or purple-red blisters (rust). I check both leaf surfaces, as some pathogens develop differently on the underside.
Blossoms may show brown edges or water-soaked spots when thorn diseases progress. If buds fail to open or drop prematurely, inspect the thorns supporting those stems—they often harbor the initial infection. This step helps confirm whether you’re dealing with a localized thorn issue or a systemic plant problem.
For uncertain cases, collect 3-4 affected thorns using sterilized pruners, placing each in a separate sealed bag. I label samples with the cane location and date, as this helps track disease progression. Avoid samples from canes that have been treated with fungicides within the past 14 days, as this can mask symptoms.
Take samples to your local extension office or use a reliable online diagnostic tool that specializes in rose diseases. Include photos of the entire cane system along with close-ups of the thorns. Many diseases present similarly in early stages, so professional confirmation prevents misdirected treatment efforts.
Once identified, remove all affected canes 6 inches below the lowest visible symptom using sterilized pruners. I make cuts at a 45-degree angle to prevent water accumulation on the fresh wound. Immediately bag and dispose of all pruned material—never compost diseased plant matter.
Apply a copper-based fungicide to the entire plant, focusing on thorn clusters and cane junctions where moisture collects. Repeat applications every 7-10 days during wet weather, as this is when fungal spores are most active. For bacterial issues, alternate with a streptomycin spray for comprehensive coverage.
These practical observations will sharpen your diagnostic skills and prevent oversight.
Visual Inspection Technique: In Step 1, use a hand lens under bright natural light to catch early discoloration that’s invisible to the naked eye. I’ve found that morning light reveals subtle streaking better than artificial lighting, especially when checking thorns near the soil line where splash-borne pathogens first appear.
Secondary Symptom Correlation: When executing Step 2, don’t just look—feel. The difference between healthy and diseased canes is often tactile before it’s visible. Sunken lesions beneath affected thorns create tiny depressions you can detect by running your fingernail along the cane, which I do systematically from base to tip.
Documentation Strategy: For Step 4’s sample collection, always photograph thorns from multiple angles before bagging. I label each sample with cane position (e.g., “north side, 3rd cane from left”) and date, as this spatial tracking helps identify disease spread patterns over time. The 14-day fungicide window is critical—sampling too soon gives false negatives.
Treatment Precision: During Step 5, that 6-inch margin below visible symptoms isn’t arbitrary. Pathogens often extend further than surface symptoms indicate, and the 45-degree cut angle prevents water pooling that could reintroduce spores. I sterilize pruners between each cut with rubbing alcohol to avoid cross-contamination.
Early signs often include dark spots, discoloration, or unusual growths on thorns. Look for blackened, swollen, or oozing areas, which may indicate fungal or bacterial infections.
Prune infected thorns with sterilized shears and apply fungicide or bactericide. Remove affected plant parts to prevent spread, and ensure good air circulation around the rose bush.
Yes, some diseases like black spot or powdery mildew can spread to nearby plants. Isolate infected roses and avoid overhead watering to reduce the risk of contamination.
Check your roses early in the morning or late afternoon when leaves are dry. Regular inspections during the growing season help catch issues before they worsen.
Yes! Neem oil, baking soda sprays, or copper-based treatments can help control mild infections. Always test a small area first to avoid damaging the plant.
