
Beautiful Plants For Your Interior
Beautiful Plants For Your Interior
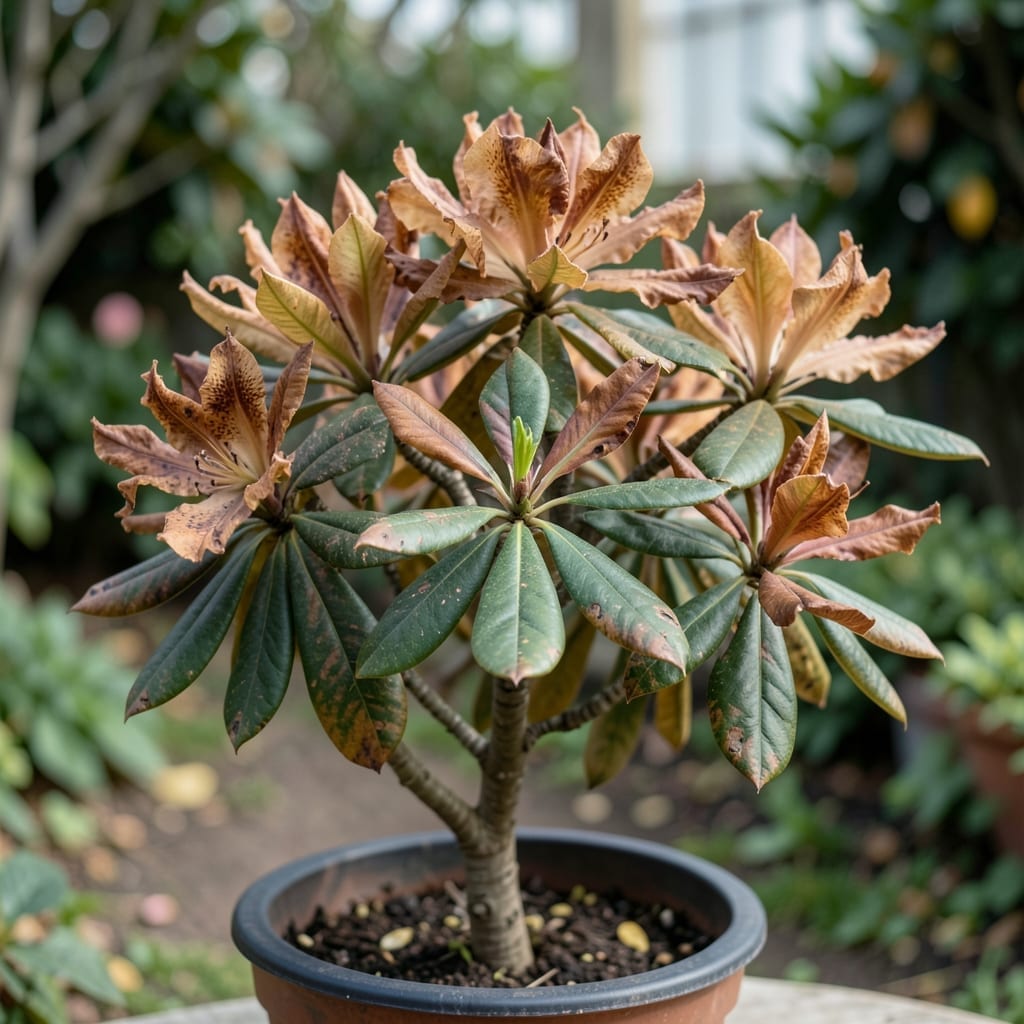
Brown leaves on your rhododendron usually mean one of three things: too much water, too little, or a sneaky fungus moving in.
I’ve rescued dozens by checking soil moisture first, then looking for spots or patterns on the leaves. The fix is often simpler than you’d think—just adjust care or apply the right treatment at the right time.
Short list to diagnose and fix brown leaves on rhododendrons.
| Ingredient | Amount | Notes |
|---|---|---|
| Neem Oil 🌿 | 1 quart | Cold-pressed for fungicide |
| Copper Fungicide 🧪 | 1 piece | Liquid concentrate formula |
| Pruning Shears ✂️ | 1 piece | Sterilize between cuts |
| Mulch 🪵 | 2 gallons | Pine bark or wood chips |
| pH Test Kit 🌡️ | 1 piece | Soil acidity checker |
| Watering Can 💧 | 1 piece | With adjustable rose |
| Garden Gloves 🧤 | 1 piece | Waterproof for handling chemicals |
[recipe_ingredient_scaler]
Neem oil and copper fungicide are your go-tos for fungal issues (the good stuff, not the cheap knockoffs). Home Depot or Lowe’s carry both—look for cold-pressed neem and liquid copper concentrate. A pH test kit from any garden center confirms if soil acidity is the culprit.
No neem oil? Horticultural oil works similarly but check label for rhododendron safety. Pine bark mulch is ideal (or whatever organic chips you’ve got), but avoid cedar—it can inhibit growth. Pruning shears must be sharp and sterilized to prevent spreading disease.
Store neem oil in a cool, dark place—it degrades in heat. Copper fungicide lasts years unopened. I keep extra mulch in a sealed bin to prevent moisture from ruining the batch before use.
Here’s the method I use to diagnose and treat brown leaves on these shrubs.
Use the pH test kit to check your soil acidity. Rhododendrons need 4.5-5.5 pH—any higher and they can’t absorb iron, causing leaves to turn brown between veins. Collect soil samples from 4-6 inches deep near the drip line, not right at the trunk.
If the reading is above 6.0, add elemental sulfur or aluminum sulfate to lower it. If it’s too acidic, lime will raise it. Retest after 2-3 weeks to confirm the adjustment worked before assuming the problem is solved.
Put on the garden gloves and mix the copper fungicide according to label instructions. Leaf spot fungi often cause brown patches with yellow halos. Spray until the liquid just begins to drip from the leaves, covering both top and underside surfaces thoroughly.
Reapply every 7-10 days during wet weather or as the label directs. I always spray in the early morning so leaves dry quickly in the sun, which prevents the fungicide from washing away or causing leaf burn.
Using the pruning shears, remove any brown or spotted leaves and branches. Cut back to healthy green wood—you’ll see the difference clearly where the tissue changes color. Between each cut, wipe the blades with rubbing alcohol to prevent spreading disease.
Dispose of the trimmings in the trash, not the compost pile. Disease organisms can survive in compost and reinfect your plants later. After pruning, wash your hands and tools with soap and water to remove any remaining spores.
Mix 1 quart Neem Oil with water and a drop of dish soap as an emulsifier. This creates a protective barrier against fungal spores and deters pests that can stress the plant. Spray the solution evenly over the foliage, focusing on new growth where it’s most vulnerable.
Apply in the late afternoon to avoid leaf burn from sun exposure. Neem oil works best as a preventative, so I reapply every 2-3 weeks throughout the growing season or after heavy rains that might wash it off.
Spread the 2 gallons Mulch in a 2-3 inch layer around the base of the plant, keeping it 3 inches away from the trunk to prevent rot. Pine bark or wood chips work well to retain moisture and regulate soil temperature.
Use the watering can to apply water directly to the soil, not the leaves. Water deeply 1-2 times per week depending on rainfall, ensuring the top 6 inches of soil stays evenly moist but not soggy. Overhead watering can spread fungal spores, and inconsistent moisture stresses the plant.
While rhododendron diseases brown leaves don’t directly impact your diet, maintaining garden health can be part of a holistic lifestyle. For keto enthusiasts, focus on low-carb, nutrient-rich foods to keep energy levels high while tending to your plants. Think leafy greens, nuts, and healthy fats—perfect for fueling your gardening sessions! 🥗💪
If gluten is a concern, stick to naturally gluten-free foods like fruits, vegetables, and lean proteins. When treating plant diseases, ensure any organic sprays or fertilizers are certified gluten-free to avoid cross-contamination in your garden workspace.
For those with food allergies, avoid common triggers like nuts or dairy when preparing garden snacks. If using compost or mulch, check for allergen-free materials to prevent reactions while working with your rhododendrons. Safety first! 🌡️
Vegetarians can easily adapt their diet while managing rhododendron diseases brown leaves. Opt for plant-based proteins like lentils or tofu to stay energized. In the garden, use vegan-friendly fertilizers to align with your dietary values.
Reducing sodium intake? Choose fresh, whole foods over processed options. For your rhododendrons, avoid high-salt fertilizers, as excess sodium can harm soil health and plant vitality. Balance is key! 📊