
Beautiful Plants For Your Interior
Beautiful Plants For Your Interior
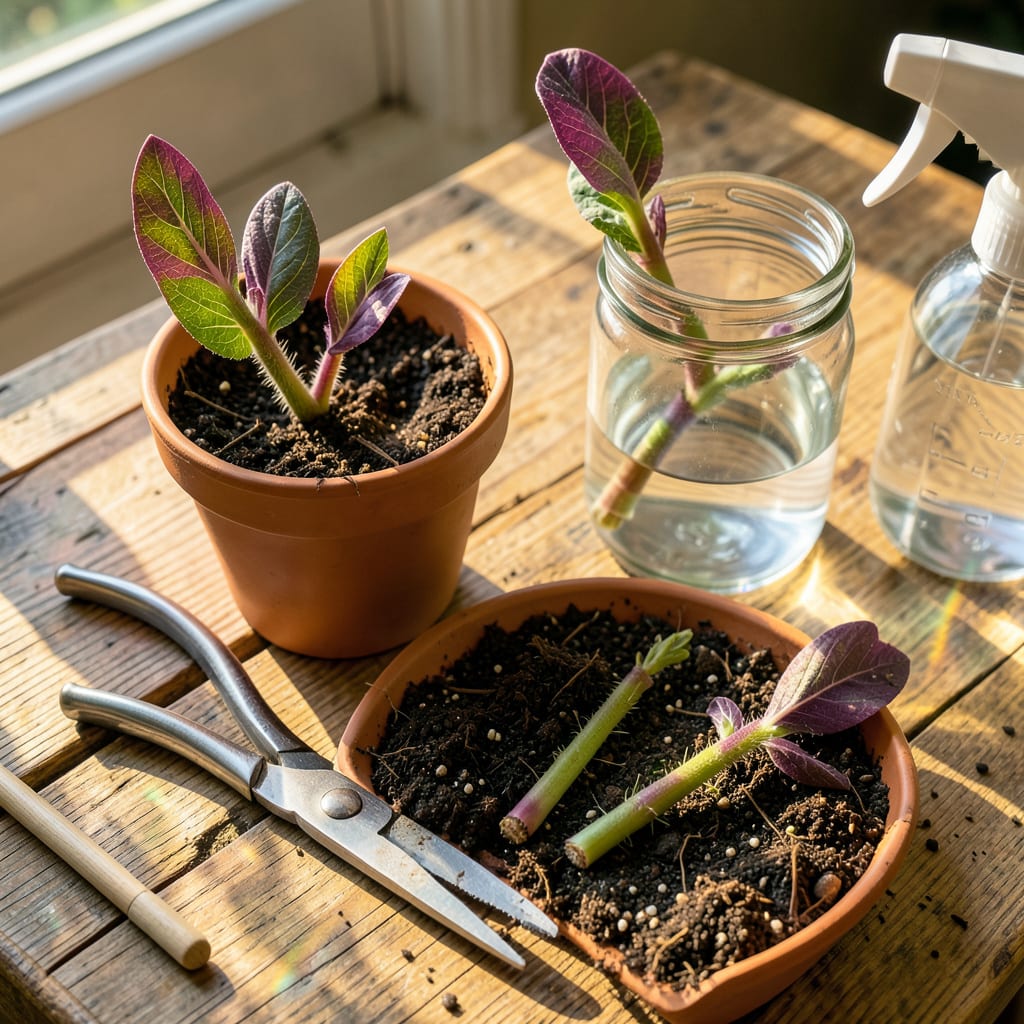
That trailing purple-and-silver vine you can’t stop admiring? It’s easier to multiply than you think. Wandering Jew spreads like wildfire in the right conditions—once you learn the simple trick to transplanting cuttings, you’ll never buy another plant again. I’ve turned single 4-inch stems into entire hanging baskets in 6 weeks, and the process is practically foolproof.
Here’s what makes this plant perfect for beginners: it roots eagerly in water or soil, forgives minor mistakes, and bounces back fast. You’ll get thicker growth, more vibrant colors, and the satisfaction of watching cuttings transform into full, trailing plants. The best part? One successful transplant means endless free plants for your home—or to share with friends.
📚 In This Guide
This is the method I swear by for stress-free transplanting—your cuttings will thrive with minimal fuss.
Choose 4-6 inch stem sections with at least 3-4 leaf nodes (those little bumps where leaves emerge). I always look for vibrant, pest-free stems with firm texture—avoid anything mushy or discolored. The top leaves should be bright green or purple (depending on variety), never yellowed or crispy.
Use clean, sharp scissors to make a 45-degree angle cut just below a leaf node. This angled cut increases surface area for water absorption and prevents the stem from sitting flat in the medium. Remove the bottom 1-2 leaves to expose nodes—these will develop roots. Leave the top leaves intact for photosynthesis.
Fill a small glass or jar with 2-3 inches of room-temperature water. I prefer filtered or distilled water to avoid chlorine stress, but tap water left out overnight works too. Place the cuttings in the water so the bare nodes are submerged but the remaining leaves stay dry. You’ll see tiny white root bumps forming at the nodes within 5-7 days.
Change the water every 3-4 days to prevent bacterial growth. Keep the jar in bright, indirect light—a north-facing windowsill or under fluorescent lights works perfectly. Roots should reach 1-2 inches long before transplanting. If roots appear brown or slimy, start over with fresh cuttings and clean water.
Select a well-draining potting mix—either a 50/50 blend of peat moss and perlite or a commercial houseplant mix with added perlite. I avoid heavy garden soils that compact and suffocate tender new roots. Fill your container (with drainage holes!) to about 1 inch below the rim to allow for watering.
Moisten the mix thoroughly until water runs from the drainage holes, then let it drain completely. The medium should feel like a damp sponge—slightly moist but never soggy. Create planting holes with your finger or a pencil, spacing them 3-4 inches apart if transplanting multiple cuttings per container.
Gently transfer each cutting to its planting hole, ensuring the roots spread naturally downward. The soil line should cover the original waterline on the stem—burying too deep can cause rot. Press the mix lightly around the base to eliminate air pockets while keeping the medium loose enough for root expansion.
Place the container in bright, indirect light for the first week—no direct sun until new growth appears. Maintain consistent moisture by watering when the top inch of soil feels dry. You’ll know the transplant succeeded when you see new leaf growth within 10-14 days. This is when you can gradually introduce more light.
After years of propagating these vibrant plants, I’ve learned that small details make all the difference between thriving cuttings and disappointing failures.
Cutting Selection Wisdom: When choosing your 4-6 inch stem sections in Step 1, look for nodes that already show tiny brown bumps—these are latent root initials that will develop faster. I’ve found that stems with purple undersides (common in many varieties) often root more vigorously than all-green stems. Avoid any cuttings with flowers or flower buds, as they’ll divert energy from root development.
Water Quality Insight: The 2-3 inches of water in Step 2 should ideally be slightly acidic (pH 6.0-6.5), which mimics the plant’s natural environment. If using tap water, let it sit uncovered for 24 hours to allow chlorine to evaporate completely. For even better results, add a crushed aspirin tablet to the water—its salicylic acid acts as a natural rooting hormone and prevents bacterial growth between your 3-4 day water changes.
Transplant Timing Secret: Don’t rush the 1-2 inch root development mentioned in Step 2. I wait until roots show white, fuzzy lateral hairs—this indicates they’re ready to absorb nutrients from soil. Also, transplant in the evening when the plant’s metabolic activity is lower; this reduces transplant shock and gives roots overnight to adjust to their new medium.
Acclimation Technique: During the 10-14 day acclimation period in Step 4, create a humidity dome using a clear plastic bag supported by stakes. This maintains 70-80% humidity while allowing air circulation. Remove the dome for 1 hour daily to prevent fungal issues, gradually increasing this time as new leaves emerge. The top inch soil dryness rule is crucial—use a wooden skewer to test moisture at the root level, not just the surface.
Yes! While water rooting is popular, you can plant cuttings directly in moist soil. Keep the soil consistently damp (not soggy) and provide bright, indirect light. Success rates improve if you dip the cut ends in rooting hormone first or use a well-draining mix like perlite + potting soil.
In water, roots typically appear in 1–3 weeks; in soil, it may take 2–4 weeks. Speed depends on warmth (70–75°F is ideal), humidity, and light. Avoid disturbing the cuttings—patience is key! Once roots reach 1–2 inches long, they’re ready for permanent planting.
Common causes: Overwatering (leads to rot), underwatering (dries out tender roots), or too much direct sun (scorches leaves). Check soil moisture—it should feel like a wrung-out sponge. Trim any mushy stems and move the plant to brighter indirect light.
Spring or early summer is ideal—warm temps and longer daylight boost root growth. Avoid winter (slow growth) or extreme heat (stresses cuttings). If transplanting indoors year-round, maintain consistent warmth and humidity for best results.
A stem node (the bump where leaves grow) is essential—roots sprout from here! A single leaf won’t grow into a new plant, but a node with 1–2 leaves attached can. For faster results, use 3–4-inch stem cuttings with at least 2–3 nodes.
