
Beautiful Plants For Your Interior
Beautiful Plants For Your Interior
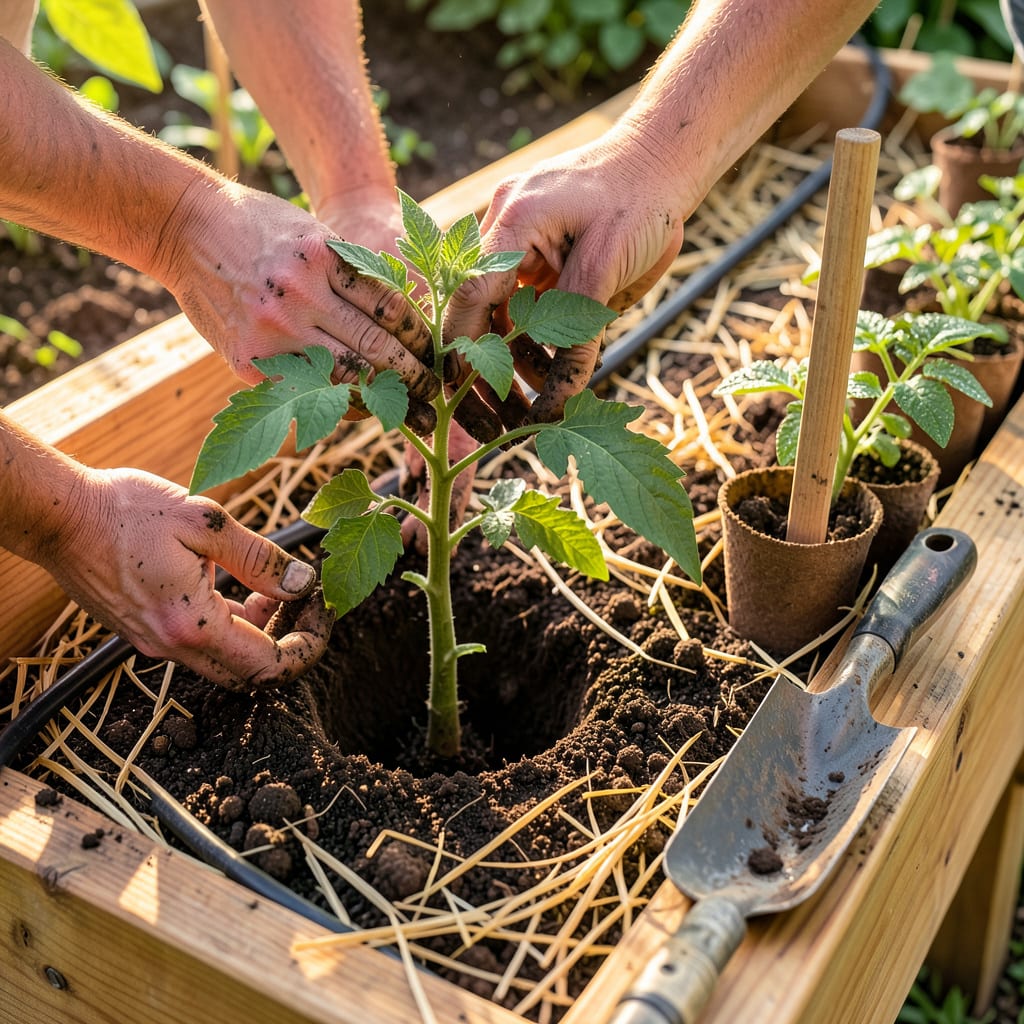
That moment when you move tomato seedlings from cozy pots to the big, wild garden always feels like sending kids off to college. I’ve learned the hard way that how you handle those first 24 hours determines whether they thrive or sulk for weeks. The difference between a stressed transplant and one that takes off? A few simple—but critical—steps most gardeners skip.
Timing and technique matter more than luck here. Plant too shallow, and you get weak stems. Wait too long after frost, and roots struggle in hot soil. My method—burying stems deep, watering with a seaweed boost, and shielding from midday sun—cuts transplant shock nearly in half. You’ll see new growth within days, not weeks, and those first flower clusters will prove you nailed it.
📚 In This Guide
Moving your tomato seedlings to their permanent home doesn’t have to be stressful—follow these simple steps for happy, productive plants.
Transplant your tomatoes after the last frost date when soil temperatures reach at least 60°F. I always check the 10-day forecast first—you want consistently warm nights above 50°F. Choose a sunny location that gets 8+ hours of direct sunlight daily.
Prepare the planting holes the day before transplanting. Dig each hole about 12 inches deep and 12-18 inches wide—twice as wide as the root ball. Mix a handful of compost into the bottom of each hole to give your plants a nutrient boost. Water the holes thoroughly and let them drain overnight.
One week before transplanting, start hardening off your seedlings by placing them outside in a shaded, protected area for 1-2 hours the first day. Gradually increase their outdoor time by 1-2 hours daily, exposing them to more direct sunlight as the week progresses.
Watch your seedlings closely during this process. If they wilt or develop pale leaves, they’re getting too much sun too quickly. I’ve found that late afternoon is the gentlest time for this transition. By day seven, your seedlings should tolerate a full day outside without stress.
Carefully remove each seedling from its container by gently squeezing the sides and supporting the stem between your fingers. If the roots are circling, loosen them slightly with your fingers. Place the seedling in the prepared hole, burying it deeper than it was in the pot—up to the first set of true leaves.
This deep planting encourages additional root growth along the buried stem, creating a stronger plant. Fill the hole with soil, pressing gently to eliminate air pockets. Water immediately with 1-2 quarts of water per plant, allowing it to soak in slowly. I like to create a small soil berm around each plant to help direct water to the roots.
Right after transplanting, protect your tomatoes from wind and intense sun for the first 3-5 days. I use individual plant protectors made from clear plastic bottles with the bottoms removed, or you can create temporary shade with cardboard. Remove these protectors during the day if temperatures exceed 80°F.
Install your support system (cages, stakes, or trellises) immediately after planting. Tomato stems are brittle and can be damaged if you wait until the plant is larger. For indeterminate varieties, I prefer 6-foot tall stakes driven 12 inches deep into the soil, about 4 inches from the stem. Secure the main stem loosely with soft plant ties.
Check your transplanted tomatoes daily for the first week. The soil should stay consistently moist but not waterlogged—water when the top 1 inch of soil feels dry. I water at the base of the plant in the early morning to allow foliage to dry before evening.
Watch for signs of transplant shock like wilting or yellowing lower leaves. If you see this, provide temporary shade and ensure consistent moisture. After about 7-10 days, your plants should show new growth, indicating they’ve successfully established in their new home. At this point, you can begin your regular fertilization schedule.
Transplanting tomatoes successfully comes down to a few key details that make all the difference between struggling plants and thriving ones.
Timing is Everything: The soil temperature requirement of 60°F isn’t just a suggestion—it’s critical for root development. I’ve learned the hard way that planting in cooler soil leads to stunted growth and poor fruit production. Use a soil thermometer to verify temperatures at planting depth, not just surface level. The 50°F nighttime minimum is equally important, as cold nights can shock young plants.
Hardening Off Strategy: During the 1-2 hour initial exposure in Step 2, pay special attention to wind protection. Even gentle breezes can desiccate tender seedlings. I place my trays against a south-facing wall or fence to block wind while still allowing indirect light. If you notice leaves curling upward (not wilting), that’s often a wind response rather than too much sun.
Deep Planting Technique: When burying seedlings up to their first set of true leaves in Step 3, remove any leaves that will be underground. These can rot and invite disease. The buried stem will develop additional roots, but only if it has direct soil contact—press the soil firmly around the stem. I’ve found that creating a slight depression around the plant (like a shallow bowl) helps direct water to these new root zones during the critical first week.
Post-Transplant Care: The 3-5 day protection period in Step 4 is when most failures occur. Check plants twice daily—morning and late afternoon—for wilting. If you see drooping, don’t immediately add water. First, check if the soil is actually dry 1 inch down. More often than not, wilting in the first 48 hours is transplant shock, not thirst. A light misting of the leaves (not soil) can help reduce transpiration stress without overwatering.
Transplant tomatoes after the last frost when soil temps hit 60°F+ (use a thermometer!). For indoor starts, move them outside 6-8 weeks after sowing (or when they’re 6-8″ tall). Evening temps should stay above 50°F—cold snaps stunt growth!
Yes! Cloudy days (or late afternoon) are ideal—less sun stress means quicker recovery. Avoid scorching midday sun. If it’s bright, shade seedlings with cardboard or row covers for 2-3 days post-transplant to prevent wilting.
Leggy seedlings can thrive! Bury the stem deeper (up to the first leaves) when transplanting—roots will sprout along the buried stem. Avoid staking too early; let the plant strengthen first. For extreme legginess, trim the top and root the cutting.
No! Wait 1-2 weeks to avoid burning tender roots. Use a balanced (10-10-10) or phosphorus-heavy (5-10-5) fertilizer after plants acclimate. Compost or worm castings mixed into the hole at planting gives a gentle boost.
Start 7-10 days before transplanting: place seedlings outside in shade for 2 hours/day, gradually increasing sun/wind exposure. Skip this, and leaves may crisp! Use a cold frame or cloche for windy areas. Pro tip: Mist leaves to reduce transplant shock.
