
Beautiful Plants For Your Interior
Beautiful Plants For Your Interior
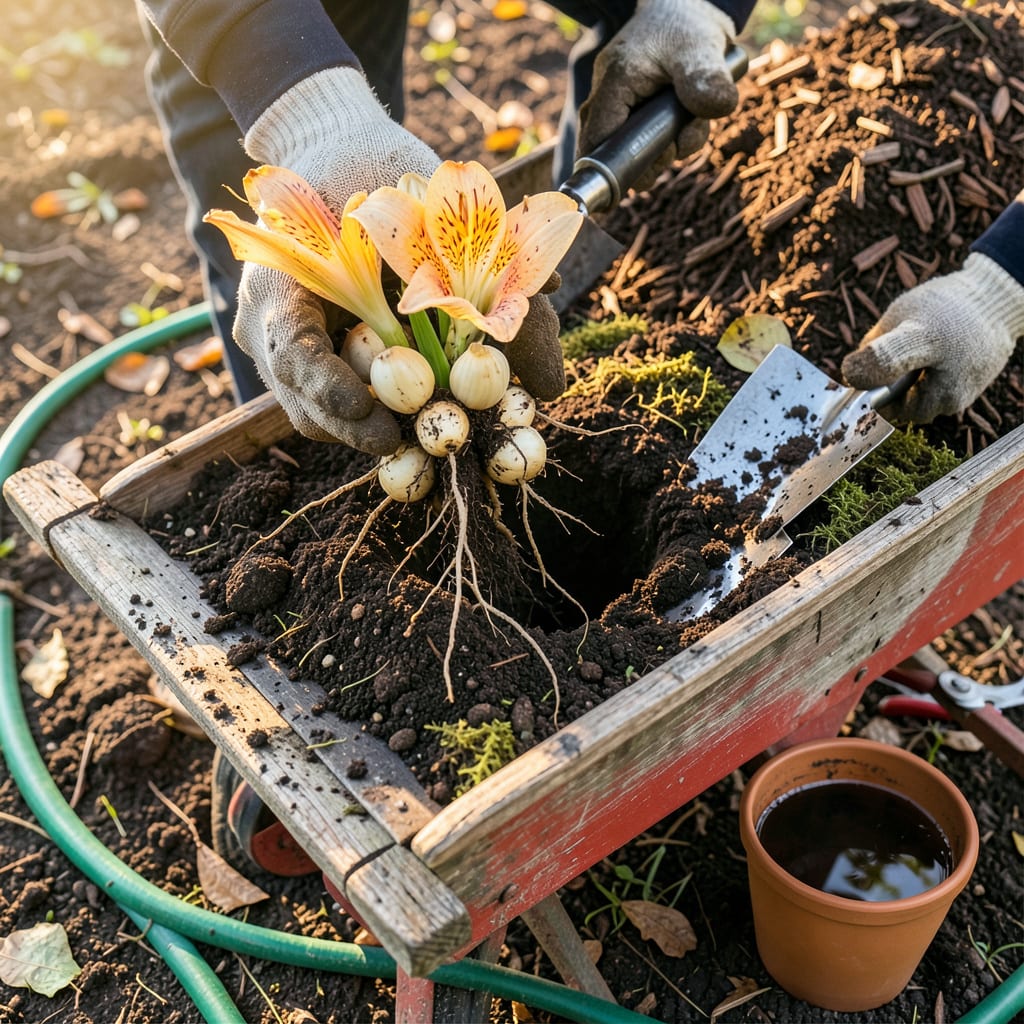
Moving tiger lilies feels intimidating until you realize how forgiving they actually are. I’ve relocated clumps in early fall with nothing but a garden fork and a bucket of water, and they still rewarded me with dramatic orange blooms the next summer. The secret? Timing and gentle handling—these bulbs bounce back faster than you’d expect when you work with their natural rhythm.
You’ll know it’s time when the foliage yellows after blooming or when clumps get so dense they choke themselves out. The process takes less than an hour, and the payoff is years of bigger flowers and healthier plants. No green thumb required—just follow the bulb’s lead and let it settle into its new home before winter.
📚 In This Guide
This method ensures your tiger lilies thrive in their new home with minimal stress and maximum bloom potential.
Early fall is ideal for transplanting tiger lilies, about 4-6 weeks before your first frost. This timing lets roots establish before winter while avoiding summer heat stress. I always pick a day when the soil is slightly moist but not soggy—digging is easier and roots suffer less damage.
Select a location with full sun to partial shade (at least 6 hours of direct sunlight daily). Work the soil to a depth of 12 inches, removing weeds and breaking up clumps. Mix in 2-3 inches of compost to improve drainage and fertility. You’ll know the site is ready when the amended soil feels loose and crumbly in your hands.
Use a garden fork to loosen the soil around the lily clump, starting about 6 inches away from the stems. Work your way around the plant in a circle, then gently lift the entire clump from below. The goal is to keep as much of the root system intact as possible—tiger lilies recover faster with minimal root disturbance.
Shake off excess soil to expose the bulbs, which look like small, scaly onions. You’ll see individual bulbs connected by stems. Gently separate them by hand, pulling apart where they naturally divide. Discard any bulbs that feel soft or mushy—these won’t survive transplanting.
Dig holes that are 4-6 inches deep—deep enough to protect the bulbs but not so deep they struggle to emerge. Space the holes 12-18 inches apart to give each plant room to mature. Place one bulb in each hole with the pointed end facing upward (this is where new growth will emerge).
Backfill with soil, pressing gently to eliminate air pockets. Water thoroughly until the soil is moist but not waterlogged. You’ll see the soil settle slightly after watering—this is normal. Add a 1-inch layer of mulch around the plants to retain moisture and suppress weeds, but keep it 2 inches away from the stems to prevent rot.
Water the newly transplanted lilies every 3-4 days for the first 2 weeks, unless rain provides at least 1 inch of water. The goal is to keep the soil consistently moist but never soggy. You’ll know you’re watering correctly when the top 1-2 inches of soil feels dry to the touch before the next watering.
Avoid fertilizing immediately after transplanting—wait until you see new growth in spring. If leaves yellow or wilt within the first week, provide temporary shade with a lightweight row cover. This protects the plants while they adjust to their new location. Most tiger lilies show signs of recovery within 10-14 days.
Transplanting tiger lilies successfully comes down to timing and technique. Here’s what I’ve learned from years of moving these vibrant perennials.
Timing is Everything: The 4-6 week window before your first frost mentioned in Step 1 isn’t arbitrary—it gives roots exactly enough time to establish without facing winter stress. I’ve found that transplanting too early in summer leads to heat shock, while waiting until after frost risks poor root development. Check your local frost dates and count backward to hit this sweet spot perfectly.
Root Preservation Technique: When digging up clumps in Step 2, I use this trick: slide the garden fork under the clump at a 45-degree angle to lift from below rather than pulling from above. This preserves more feeder roots that are crucial for quick recovery. The 6-inch distance from stems mentioned in the instructions is perfect—it captures the entire root system without unnecessary soil disturbance.
Depth and Spacing Precision: The 4-6 inch planting depth in Step 3 might seem shallow, but it’s critical for tiger lilies. Planting too deep (over 6 inches) can prevent stems from emerging in spring. I use a ruler to check my first hole, then use that as a guide for consistency. The 12-18 inch spacing might look excessive initially, but these plants multiply quickly—you’ll appreciate the room in just 2-3 years.
Watering Wisdom: During that first 2-week period in Step 4, I check soil moisture by inserting my finger to the second knuckle. If it feels dry at that depth, it’s time to water—even if it’s only been 2 days since the last watering. The “1 inch of rain” guideline is spot on; I place a rain gauge near my lilies to track this accurately. Overwatering is just as dangerous as underwatering during this critical establishment period.
The ideal time is early fall (September-October) or early spring (March-April) when the plant is dormant. Avoid transplanting during active blooming (summer) or freezing winter months. Cooler temps reduce stress and help roots establish before extreme weather.
It’s not recommended—transplanting during blooming can shock the plant, causing wilted flowers or stunted growth. If absolutely necessary, trim back flowers/stems first to redirect energy to root recovery. Water deeply afterward to minimize stress.
Plant bulbs 4–6 inches deep with the pointed end facing up. Space them 12–18 inches apart to allow for growth. Deeper planting protects bulbs from temperature swings, while proper spacing prevents overcrowding (which reduces blooms).
Common causes include:
For minimal disruption, try “lift-and-divide”:
