
Beautiful Plants For Your Interior
Beautiful Plants For Your Interior
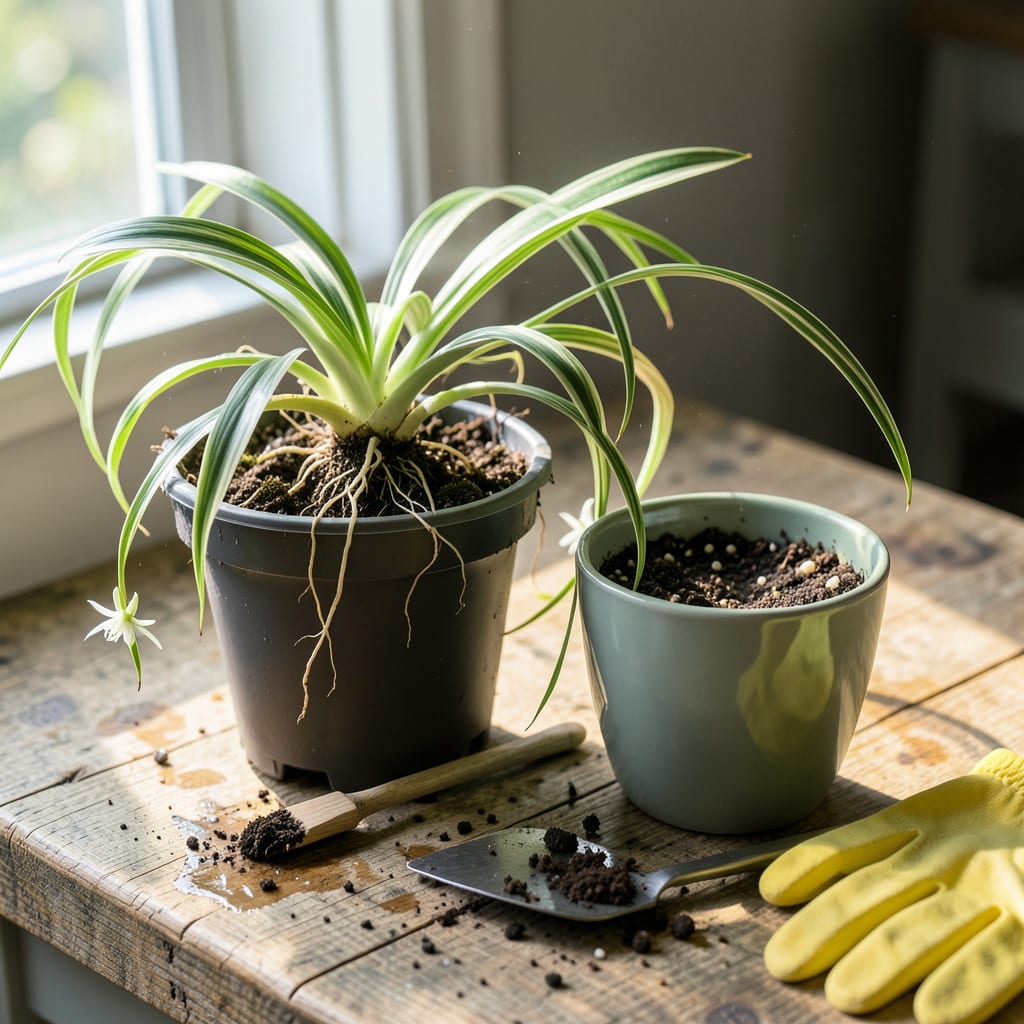
That spider plant hanging in your window? It’s probably begging for more room. I’ve lost count of how many I’ve rescued from sad, root-bound pots—once you see roots circling the bottom or popping out of drainage holes, it’s time. Transplanting isn’t just about survival; it’s how you turn a struggling plant into one that grows faster, produces more pups, and looks downright lush.
The best part? This takes 20 minutes and zero fancy tools. No green thumb required—just a bigger pot, fresh soil, and the right technique to avoid shock. Do it right, and your spider plant will reward you with thicker foliage and those cute baby pups you can propagate. Timing matters too: spring or early summer means less stress, more growth.
📚 In This Guide
Here’s my tried-and-true method for moving spider plants without shock—works every time, even for beginners.
Choose a pot that’s 2-3 inches wider than the current one, with drainage holes. I prefer plastic or glazed ceramic because they retain moisture better than unglazed terra cotta, which can dry out spider plants too quickly. Fill the new container about one-third full with fresh, well-draining potting mix.
Water the soil lightly before adding the plant—this prevents dry pockets that can stress roots. The mix should feel evenly moist but not soggy. I like to add a handful of perlite to the bottom layer for extra drainage, which spider plants appreciate.
Water your spider plant thoroughly 1-2 hours before transplanting. This helps the root ball hold together and reduces transplant shock. Turn the pot sideways, then gently squeeze the sides while supporting the base of the plant. If it resists, run a butter knife around the inner edge to loosen it.
Once free, inspect the roots. Healthy spider plant roots are firm and white or light tan. If you see dark, mushy roots, trim them away with clean scissors. Don’t worry about disturbing the root ball too much—spider plants are surprisingly resilient.
Place the root ball in the center of the new pot, ensuring the top of the root ball sits about 1 inch below the rim. This gives you space to water without overflow. Add soil around the sides, pressing gently to eliminate air pockets. The plant should sit at the same depth as before—burying the stem too deep can cause rot.
After filling, water lightly to settle the soil. You’ll notice the level drops slightly—that’s normal. Add more mix if needed, but don’t pack it down too firmly. Spider plants prefer their soil loose enough for roots to breathe.
Move your newly transplanted spider plant to bright, indirect light for the first 3-5 days. Avoid direct sun, which can stress the plant while it adjusts. Keep the soil consistently moist but not waterlogged during this recovery period. I check daily by sticking my finger 1 inch deep—if it feels dry, it’s time to water.
Watch for new growth—this is your sign the transplant was successful. You’ll typically see fresh leaves within 1-2 weeks. If leaves yellow or droop, don’t panic. This is normal transplant stress and usually resolves within a week with proper care.
After the initial adjustment period, return to your regular care schedule. Water when the top 2 inches of soil feel dry, and fertilize lightly every 4-6 weeks during growing season. Spider plants thrive in 60-75°F temperatures and appreciate occasional misting to boost humidity.
You’ll know your transplant was successful when you see vigorous new growth and possibly baby spiderettes forming. These resilient plants often reward good care with rapid recovery and lush foliage. Within a month, you won’t even remember it was transplanted!
Transplanting spider plants is simpler than you think—here’s what I’ve learned from years of repotting these resilient beauties.
Pre-Watering Secret: Don’t skip the 1-2 hours of thorough watering before transplanting mentioned in Step 2. This is crucial because a well-hydrated root ball holds together better when you remove the plant from its pot. I’ve found that plants watered for the full 2 hours experience significantly less shock than those only watered for 30 minutes. The roots become more pliable and less likely to break during the move.
Root Inspection Tip: When examining the roots after removal, pay special attention to the color and texture. Healthy roots should be firm and white or light tan as mentioned in Step 2. If you find dark, mushy sections, trim them away immediately—they’re already dead and will only rot further. I use clean scissors dipped in rubbing alcohol to prevent spreading any potential infections to the healthy roots.
Soil Settling Technique: After positioning your plant in Step 3, here’s what most people miss: the soil will naturally settle and compact over the first few days. That’s why I always leave the soil level about ½ inch below the rim initially. This gives me room to add more mix later without overfilling. Press the soil gently but don’t compact it—spider plants thrive when their roots can breathe through loose, aerated soil.
Recovery Period Wisdom: The 3-5 days of bright, indirect light mentioned in Step 4 isn’t just suggestion—it’s critical for recovery. I’ve experimented with different light conditions during this period and found that plants kept in indirect light bounce back twice as fast as those exposed to direct sun. Think of this as your plant’s hospital stay: gentle conditions lead to faster healing. Keep the soil consistently moist during this time, but never soggy—root rot is the number one killer of newly transplanted spider plants.
Spring or early summer is ideal , when plants are actively growing. Avoid transplanting during winter dormancy or extreme heat. If your plant is root-bound (roots circling the pot), transplant ASAP—just avoid doing it while it’s flowering to reduce stress.
Yes! But for best results, root them in water first (1–2 weeks) until roots reach 1–2 inches long. If planting directly into soil, keep the mix moist (not soggy) and provide bright, indirect light to help them establish faster.
Gently squeeze the pot’s sides to loosen the root ball, then tip it sideways while supporting the base. If stuck, run a knife around the inner edges to free it. Avoid pulling stems—this can damage the plant!
Don’t panic! Transplant shock is normal. Keep soil lightly moist, avoid direct sun for 3–5 days, and mist leaves to boost humidity. If wilting persists beyond a week, check for overwatering or root damage.
No—wait 4–6 weeks! Fresh soil has nutrients, and fertilizer can burn tender new roots. Once settled, use a balanced liquid fertilizer (10-10-10) diluted to half-strength every 4–6 weeks during growing season.
