
Beautiful Plants For Your Interior
Beautiful Plants For Your Interior
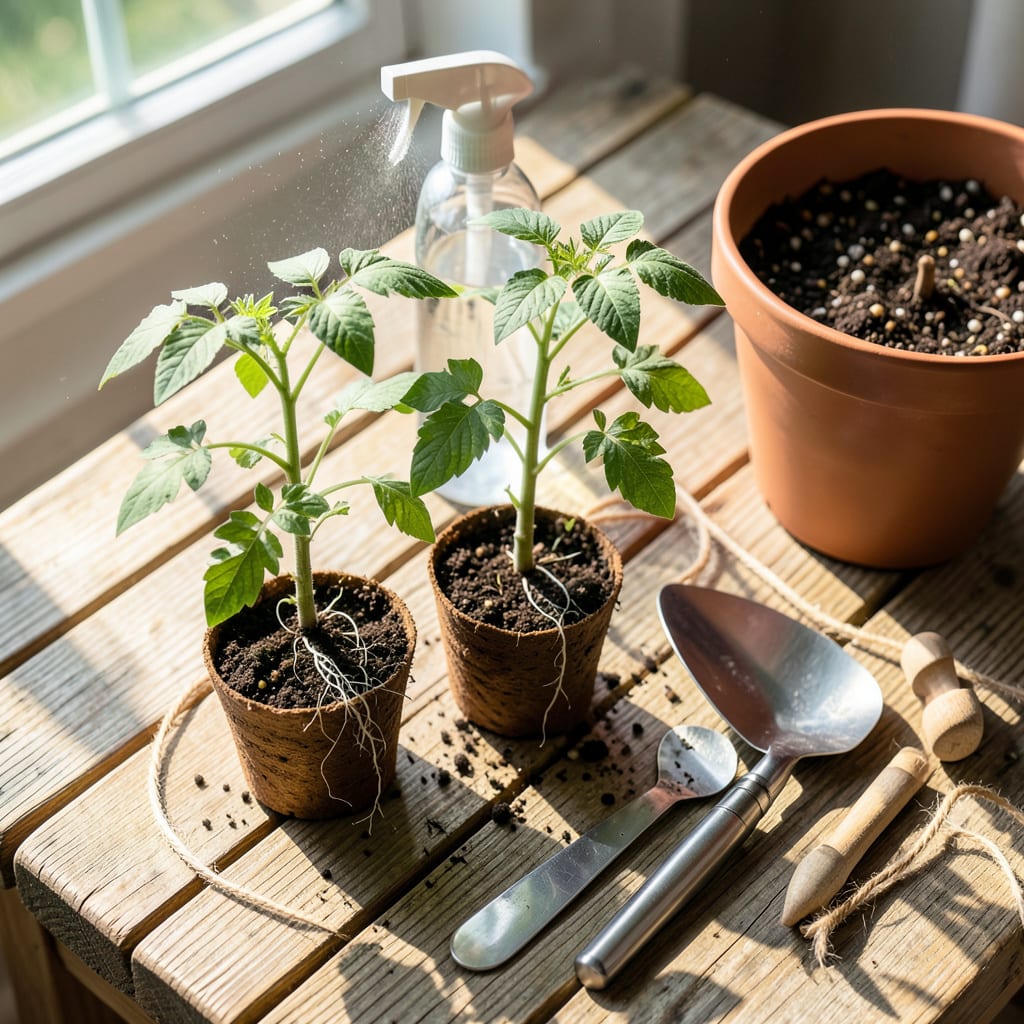
That first moment when tiny seedlings need a bigger home always makes me pause. I’ve lost more than a few to transplant shock over the years, but once I nailed the timing—waiting for those true leaves to appear—and mastered the gentle handling, my success rate skyrocketed. The difference between a struggling seedling and one that thrives often comes down to this single move.
Here’s the thing: it’s not about speed, but about setting them up right. A little prep—proper soil mix, the right container size, and a careful touch—means your seedlings won’t just survive the transition, they’ll take off. No wilting, no setbacks, just stronger roots and faster growth. And yes, I’ll walk you through every step so you avoid the mistakes I made early on.
📚 In This Guide
Moving your delicate seedlings doesn’t have to be stressful—follow this method for a smooth transition with zero transplant shock.
Wait until seedlings develop 2-3 sets of true leaves (not just the initial cotyledons). This usually happens 3-4 weeks after germination, when roots are established but not yet root-bound. I check by gently sliding a seedling from its container—healthy roots should be white and fill about half the soil volume.
Never transplant when seedlings are wet or wilted. Early morning works best because plants are naturally turgid (full of water) and recover faster. If you must transplant later in the day, mist the foliage lightly 2 hours beforehand to reduce stress.
Fill your new containers (I use 3-4 inch pots for most seedlings) with pre-moistened potting mix. The soil should hold together when squeezed but crumble easily—this ensures roots get both moisture and oxygen. Leave 1 inch of space at the top to prevent water runoff.
Create a planting hole slightly deeper than the seedling’s current root ball. For tomatoes or peppers, I make it ½ inch extra deep to bury part of the stem—this encourages stronger root growth. Gently firm the soil at the hole’s base so the seedling sits stable, not sinking later.
Water seedlings 1 hour before transplanting to help roots hold together. Slide a butter knife or plant label around the seedling’s edge to loosen it, then lift by the leaves only—never the stem. The stem crushes easily, but leaves can handle gentle pressure.
Place the seedling in its new hole at the same depth it grew before (except tomatoes/peppers—bury those ½ inch deeper). Fill around the roots with soil, pressing lightly to eliminate air pockets. I tap the pot’s sides to help soil settle naturally without compacting it too firmly.
Water immediately after transplanting until you see moisture emerge from the drainage holes. Then move seedlings to bright, indirect light for 24-48 hours—this reduces stress while roots re-establish. A sheer curtain works perfectly to filter intense sun.
Maintain 65-70°F soil temperature and avoid fertilizing for 5-7 days. You’ll know seedlings have recovered when new growth appears (usually within a week). Until then, keep soil consistently moist but never soggy—overwatering suffocates recovering roots.
Check seedlings daily for the first week. Wilting in the afternoon is normal initially, but if leaves stay droopy overnight, increase humidity by placing a clear plastic bag loosely over the pot for 24 hours. Remove it once leaves perk up.
After 7-10 days, resume normal care. You’ll notice faster growth as roots explore their new space. I always mark the transplant date on my calendar—it helps track progress and reminds me when to expect that first growth spurt.
Transplanting seedlings successfully comes down to timing, technique, and recovery care. Here’s what I’ve learned from years of trial and error to ensure your seedlings thrive after the move.
Timing Secret: The 3-4 weeks after germination window mentioned in Step 1 is crucial because that’s when seedlings develop their first strong root systems. I always check for white, healthy roots filling about half the container—this visual cue is more reliable than counting days. Transplanting too early causes shock, while waiting too long risks root-binding, which stunts growth.
Soil Preparation Tip: In Step 2, when testing soil moisture by squeezing, you want it to hold shape but crumble with light pressure. Here’s what nobody tells you—pre-moistening the soil the day before transplanting gives excess water time to drain, preventing soggy conditions that suffocate new roots. I use room temperature water to avoid temperature shock to the roots.
Handling Technique: The instruction in Step 3 to lift seedlings by the leaves is non-negotiable. I learned this the hard way after crushing stems on my first few attempts. Use your dominant hand to support the root ball from below while gently pinching a leaf between your fingers. For particularly delicate seedlings like petunias, I use a small spoon to scoop them out intact.
Recovery Environment: During the 24-48 hours of indirect light in Step 4, resist the urge to check on seedlings constantly. Every time you move them, you disrupt root establishment. I set up a dedicated recovery station with consistent conditions—no drafts, no temperature fluctuations. A simple cardboard box with ventilation holes works perfectly for maintaining that ideal 65-70°F range.
Transplant seedlings when they have 2-4 true leaves (not just the initial seed leaves) and roots are visible at the drainage holes. This usually takes 2-4 weeks after germination, depending on the plant. Avoid waiting too long—overcrowded seedlings compete for nutrients and weaken.
For tender plants (like tomatoes or peppers), harden off seedlings in pots for 7-10 days before moving them outside. Hardy plants (e.g., lettuce, kale) can often be transplanted directly if soil temps are warm enough (60°F+). Check your USDA zone for local timing!
Don’t panic! Transplant shock is normal. Wilting for 24-48 hours is common—keep soil moist (not soggy) and avoid direct sun. If leaves stay crispy after 3 days, check for root damage or overwatering. A diluted seaweed fertilizer can help recovery.
Try biodegradable pots (peat, coconut coir, or cowpots) to plant seedlings pot and all—no root disturbance! For lazy gardeners, soil blocks or direct sowing (for fast growers like beans) skip transplanting entirely. Just ensure soil is warm enough first.
Most seedlings bounce back in 3-7 days with proper care. Signs of recovery: perky leaves, new growth, or deeper green color. Slow recovery? Check for overwatering, pests, or nutrient deficits. Patience is key—some plants (like peppers) sulk longer than others!
