
Beautiful Plants For Your Interior
Beautiful Plants For Your Interior
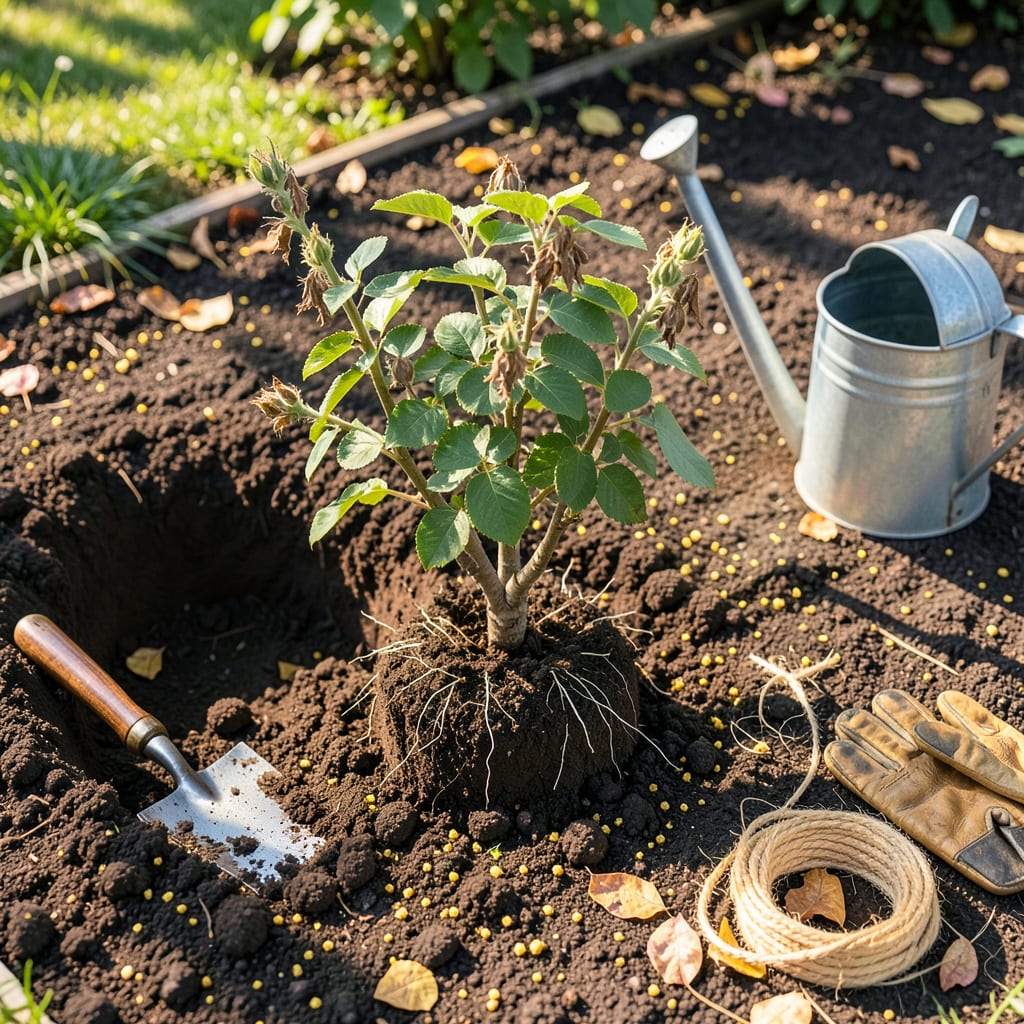
Moving a Rose of Sharon feels intimidating until you realize it’s tougher than it looks. I’ve transplanted mine three times—once in full bloom, which I don’t recommend—and they’ve bounced back every time with the right approach. The key is timing: early spring or fall when the plant is dormant but the soil is workable.
You’ll end up with a stronger, better-placed shrub that rewards you with more blooms next season. The process takes about an hour start to finish, and I’ll walk you through each step—from digging up that root ball to the first deep watering. No green thumb required, just a shovel and some confidence.
📚 In This Guide
Moving an established Rose of Sharon takes careful timing and technique—but the results are worth the effort.
Late winter or early spring, while the plant remains dormant but before new growth begins, is ideal. I aim for 4-6 weeks before your last frost date when the soil is workable but the shrub hasn’t broken dormancy. Transplanting during active growth stresses the plant and reduces survival rates.
Avoid fall transplanting unless absolutely necessary—Rose of Sharon needs time to establish roots before winter. If you must move it in autumn, do so at least 6 weeks before your first frost to allow root recovery. Check the forecast for extended dry spells; you’ll need to water consistently after moving.
Select a location with full sun to partial shade (at least 6 hours of direct sunlight daily) and well-draining soil. Dig a hole twice as wide as the root ball but no deeper—planting too deep suffocates roots. I amend the backfill soil with 20-30% compost to improve drainage and nutrient availability.
Test the hole’s depth by placing the root ball inside before lifting the plant. The soil line on the stem should sit 1-2 inches above ground level to account for settling. If your soil is heavy clay, mix in perlite or coarse sand to prevent waterlogging, which Rose of Sharon despises.
Water the shrub deeply 24 hours before transplanting to hydrate roots and reduce shock. Use a sharp spade to cut a 12-18 inch diameter root ball around the base, digging straight down to minimize root damage. For mature shrubs, this may require two people—Rose of Sharon develops extensive root systems.
Lift the plant by the root ball, not the stems, and immediately place it in the prepared hole. If transporting, wrap the root ball in burlap to retain moisture. Position the shrub so it sits at the same depth as before, then backfill with amended soil, tamping gently to eliminate air pockets. Water thoroughly to settle the soil.
After transplanting, water deeply until the soil is saturated to a depth of 12 inches. Apply 2-3 inches of organic mulch (shredded bark or wood chips) around the base, keeping it 3 inches away from the stem to prevent rot. Mulch conserves moisture and regulates soil temperature during the critical establishment phase.
For the first 2 weeks, water every 2-3 days unless rain provides 1 inch of moisture weekly. Check soil moisture by digging 2 inches deep—it should feel damp but not soggy. Reduce frequency to weekly once new growth appears, signaling root establishment.
Remove one-third of the oldest stems immediately after transplanting to reduce water demand on the roots. Use clean, sharp pruners to make cuts at a 45-degree angle just above a bud. This encourages bushier regrowth while minimizing stress on the plant.
Watch for signs of transplant shock: wilting, yellowing leaves, or stunted growth. If these occur, provide temporary shade with burlap for 3-5 days and increase water slightly. Avoid fertilizing until you see new growth—typically 4-6 weeks post-transplant—to prevent burning tender new roots.
Transplanting an established shrub can feel intimidating, but these insights will help you avoid common pitfalls and ensure your Rose of Sharon thrives in its new location.
Timing Precision: The 4-6 week window before your last frost date in Step 1 isn’t arbitrary—it’s when the plant’s energy is focused on root development rather than foliage. I’ve found that transplanting exactly 5 weeks before the last frost gives the roots enough time to establish without risking new growth too early. If you’re unsure about your local frost dates, check with your county extension office for hyper-local data that’s more accurate than general zone maps.
Root Ball Technique: When cutting that 12-18 inch diameter root ball in Step 3, here’s what most guides don’t tell you: make your first cuts in a circular pattern about 6 inches out from the trunk, then work your way outward. This gradual approach helps you feel where major roots are located so you can adjust your final circle size. For particularly large specimens, I’ve successfully used a sharp handsaw to cut through thicker roots cleanly rather than tearing them with a spade.
Soil Preparation Insight: The instruction to amend with 20-30% compost in Step 2 is crucial, but here’s the professional trick: mix the compost with the native soil in a wheelbarrow before backfilling rather than just tossing it in the hole. This creates a more uniform medium that won’t create a “bathtub effect” where water pools around the roots. For clay-heavy soils, I recommend adding perlite at a 10% ratio to the compost-soil mix—it dramatically improves drainage without breaking down over time like organic matter.
Post-Transplant Monitoring: During those critical first 2 weeks mentioned in Step 4, don’t just check soil moisture—observe the plant at different times of day. Wilting in the afternoon heat is normal, but if leaves remain limp in the morning, that’s your signal to increase water. I’ve saved several struggling transplants by setting up a temporary drip irrigation system (just a perforated 5-gallon bucket with a slow drip) for consistent moisture during this period.
Early spring or late fall (after blooming) is ideal! These seasons give roots time to establish before summer heat or winter frost. Avoid transplanting during peak flowering—it stresses the plant. In warm climates, fall planting works best for spring growth.
You can transplant mature plants (up to 10+ feet tall), but it’s trickier! Prune back ⅓ of the foliage to reduce shock, and water deeply for weeks afterward. Smaller plants (3–5 feet) adapt faster. For huge specimens, consider hiring a pro to avoid root damage.
Watch for wilting leaves, yellowing, or leaf drop—classic stress signs. Check soil moisture (too dry or soggy?) and ensure it’s getting 6+ hours of sun. If growth stalls after 4–6 weeks, trim dead branches and fertilize lightly with a balanced 10-10-10 mix.
Water deeply 2–3 times weekly for the first month (drought stress is the #1 killer!). Mulch 2–3 inches around the base (keep it away from the stem) to retain moisture. Avoid heavy fertilizers initially—let roots focus on settling in, not rapid growth.
Yes! Choose a large container (20+ gallons) with drainage holes and dwarf varieties like ‘Lil’ Kim’ or ‘Aphrodite’. Use potting mix with compost, and repot every 2–3 years. Potted plants need more frequent watering and winter protection in cold zones.
