
Beautiful Plants For Your Interior
Beautiful Plants For Your Interior
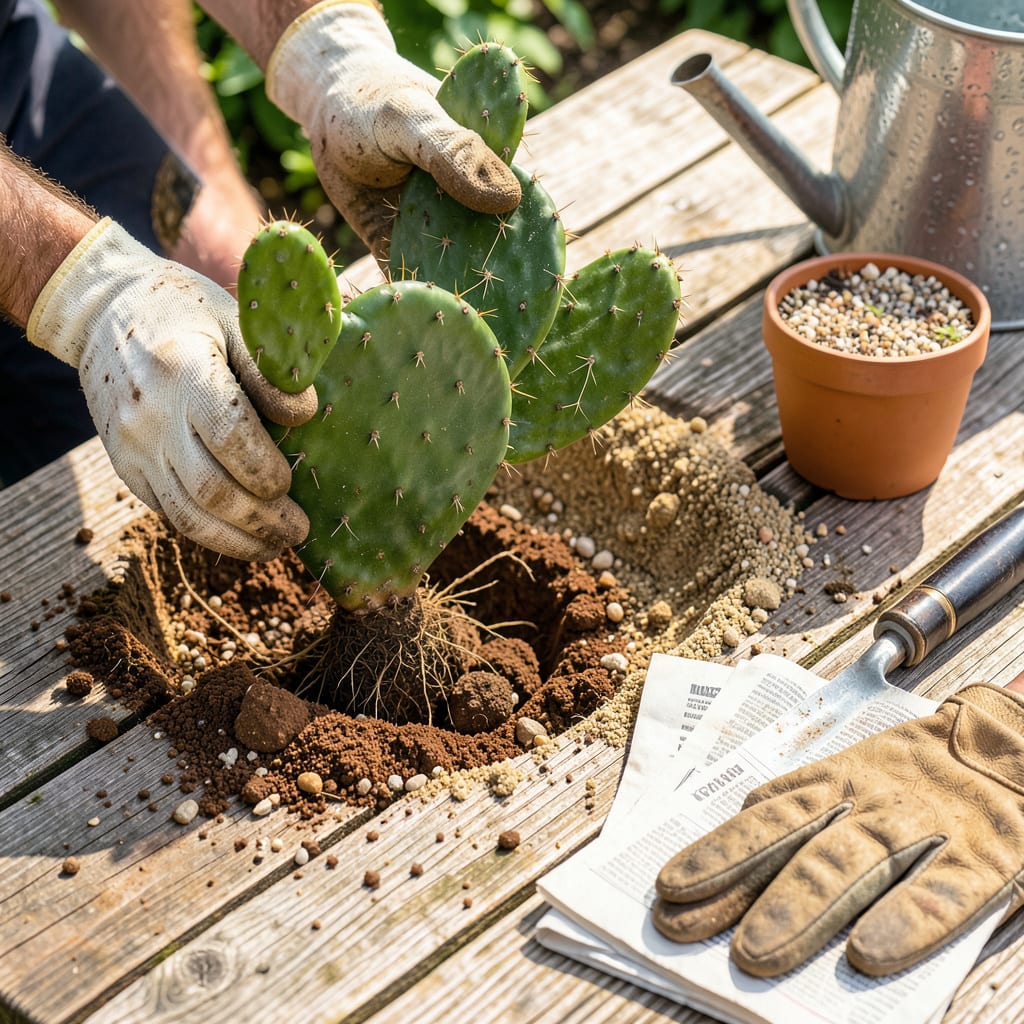
I used to think moving a prickly pear meant battle scars and dead plants. Three successful transplants later, I’ve learned it’s more about strategy than suffering. The key? Timing it right—late winter or early spring when the cactus is dormant but the soil is workable. No rushing, no second-guessing, just a clean move that lets the plant wake up in its new home like it owns the place.
You’ll need thick gloves (the kind that laugh at spines), a sturdy shovel, and a piece of newspaper to wrap around the pads—trust me, it’s the only way to handle them without turning your hands into pincushions. The real magic happens underground: disturb the roots as little as possible, and give it dry, gritty soil that drains faster than your patience after a failed attempt. Within weeks, you’ll see new growth proving the move was worth it.
📚 In This Guide
Moving prickly pear doesn’t have to be intimidating—follow these careful steps and your plants will thrive in their new home.
Transplant in early spring or early fall when temperatures stay between 60-80°F. This gives roots time to establish before summer heat or winter cold. I always check the forecast for a stretch of mild weather—sudden temperature swings stress the plant.
Water the cactus deeply 3-5 days before moving so roots are hydrated but soil isn’t soggy. You’ll know it’s ready when the soil feels dry to the touch but the pads still feel plump. Never transplant when the plant is bone-dry or waterlogged—both conditions lead to shock.
Wear thick leather gloves and use folded newspaper or tongs to handle the pads. The spines aren’t just on the edges—tiny, nearly invisible glochids cover the surface and will irritate skin. I wrap the pads in an old towel for extra protection during the move.
Dig a wide circle around the base, at least 12 inches from the plant to avoid cutting roots. Work the shovel under the root ball gently until you can lift the entire plant. For large specimens, you may need a second person to help support the weight while you sever any stubborn roots.
Choose a spot with full sun (at least 6-8 hours daily) and well-draining soil. Prickly pear rots in wet conditions, so avoid low spots where water pools. I improve heavy clay by mixing in 50% coarse sand or gravel to the top 12 inches of soil.
Dig a hole exactly the same depth as the root ball but twice as wide. This gives roots room to spread without sinking the plant too deep. Test the depth by setting the plant in the hole—the soil line should match where it was previously. Too deep invites rot; too shallow exposes roots to drying.
Place the cactus in the hole and backfill with native soil, gently firming it around the roots. Don’t add fertilizer or amendments now—they can burn recovering roots. I create a small berm (raised ring) of soil around the edge to help direct water to the roots during the first few waterings.
Insert three sturdy stakes around the plant and loosely tie the pads with soft cloth strips. This prevents the top-heavy plant from tipping in wind while roots re-establish. Leave the supports in place for 4-6 weeks, checking weekly that ties aren’t cutting into growing pads.
Don’t water for the first week—this forces roots to seek moisture and establish. After that, water deeply but infrequently: every 2-3 weeks for the first month, then taper to normal care. You’ll see new pad growth within 4-8 weeks, which signals successful establishment.
Watch for wilting or yellowing—this indicates stress. If pads wrinkle slightly, that’s normal as the plant adjusts. But if they become soft or mushy, you’re overwatering. I lost my first prickly pear to kindness (too much water), so now I err on the dry side during recovery.
Transplanting prickly pear successfully comes down to timing, technique, and post-move care. Here’s what I’ve learned from years of trial and error.
Timing is Everything: The 60-80°F temperature window mentioned in Step 1 isn’t just a suggestion—it’s critical for root establishment. I’ve found that early morning transplants work best, as the cooler hours reduce stress on the plant during those first crucial hours in its new location. Avoid transplanting if nighttime temperatures are expected to drop below 50°F within the first week.
Root Ball Protection: When digging that 12-inch circle around the base in Step 2, work slowly and methodically. I lost my first prickly pear by rushing this step and severing major roots. For large plants, slide a tarp under the root ball before lifting—this prevents soil from crumbling away during the move. Keep the root ball intact; exposed roots dry out within minutes in direct sun.
Soil Preparation Secret: The 50% sand/gravel mix recommended in Step 3 isn’t just for drainage—it mimics the cactus’s natural habitat. I’ve had best results using coarse builder’s sand rather than play sand, as the larger particles create better air pockets. Test your amended soil by squeezing a handful: it should crumble easily when dry and drain completely within 10 minutes when wet.
Support System Wisdom: Those three stakes in Step 4 aren’t optional for large specimens. I use bamboo stakes wrapped with old t-shirts where they contact the pads—this prevents the ties from cutting into the cactus as it grows. Check the ties weekly during those 4-6 weeks; I’ve seen pads permanently scarred from tight cloth strips during rapid growth spurts.
For best results, transplant in late spring or early summer when temperatures are warm (70°F+). Avoid winter or extreme heat—cold shocks roots, while scorching sun stresses the plant. If moving potted cacti indoors, early fall works too!
Wear thick leather gloves (or double-layered gardening gloves) and use tongs or folded newspaper to grip the pads. For large cacti, wrap the plant in a towel before lifting. Pro tip: long sleeves protect arms from loose spines!
Let cut pads callus (dry out) for 3–7 days before planting in fast-draining soil (50% perlite/sand). Water lightly once, then wait until soil is bone-dry to water again. Warmth speeds rooting—place in partial sun (not direct heat).
Yellowing usually means overwatering or poor drainage. Stop watering immediately and check for root rot (mushy, black roots). If roots are healthy, move to brighter light. If rotten, trim affected roots and replant in fresh, dry soil.
Choose a plump, unblemished pad from the grocery store. Let it callus for 1–2 weeks, then plant in cactus mix. Store-bought pads root just like cuttings—just skip the transplant shock step!
