
Beautiful Plants For Your Interior
Beautiful Plants For Your Interior
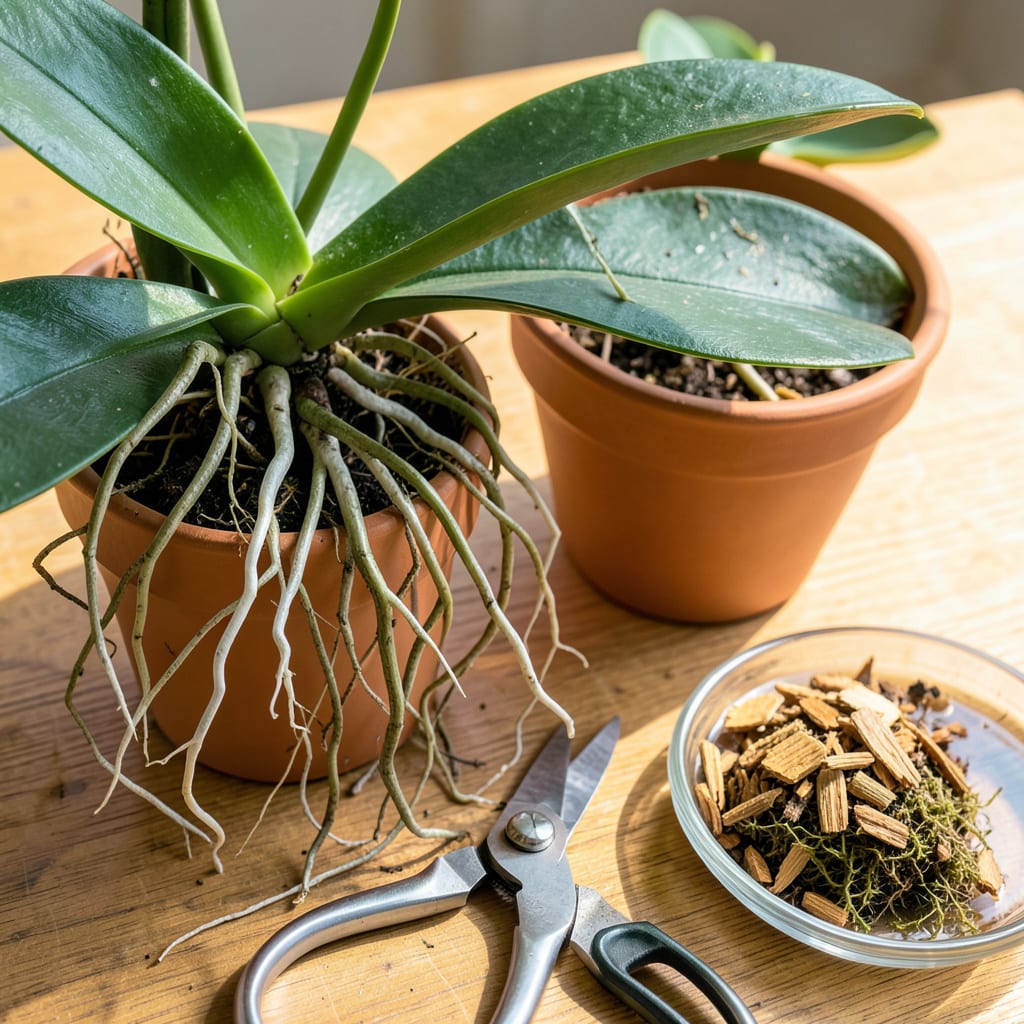
That moment when roots start escaping the pot isn’t just growth—it’s a cry for help. I’ve learned the hard way that orchids don’t just tolerate being rootbound; they suffer silently until their blooms fade and leaves yellow. The right transplant at the right time can turn a struggling plant into one that rewards you with bigger, more frequent flowers for years.
Here’s the thing—most people wait too long or rush the process with the wrong tools. You only need three supplies, 20 minutes, and the confidence to handle those roots like they’re meant to spread. Do it right in early spring, and you’ll see new growth within weeks instead of watching your orchid decline another season.
📚 In This Guide
Moving your orchid to a larger home doesn’t have to be intimidating—here’s how to do it without stressing your plant.
The best time to transplant is 1-2 months after blooming when the plant is in active growth but not flowering. You’ll see new roots emerging—silver-green tips are the perfect signal. Gather your materials: a clean pot 1-2 inches larger than the current one, fresh orchid bark mix, and sterilized scissors or pruners.
Work on a clean surface with good lighting. I like to lay out newspaper or a tray to contain the mess—orchid bark can be surprisingly scattered. Soak the new bark mix in lukewarm water for 30 minutes before using; this prevents it from drawing moisture away from roots immediately after repotting.
Gently squeeze the sides of the current pot to loosen the root ball, then turn it upside down while supporting the plant. If it resists, run a butter knife around the inner edge to free stubborn roots. The root system should come out intact—don’t pull if it’s stuck.
Rinse the roots under tepid water to remove old medium. Healthy roots are firm and silvery-green when dry, plump and green when wet. Trim any black, mushy, or hollow roots with sterilized scissors—these are dead and will rot. Leave healthy roots even if they’re growing outside the pot; they’ll adapt to the new container.
Place a 1-inch layer of pre-soaked bark mix in the bottom of the new pot. Position the orchid so its base sits just below the rim—you want the oldest leaves (usually the bottom ones) to rest slightly above the medium. This prevents crown rot, which happens when water pools at the plant’s center.
Hold the plant steady while adding bark around the roots. Don’t pack it tightly—orchid roots need air circulation. Gently tap the pot to settle the medium, then add more until the roots are covered but the crown remains exposed. The plant should sit firmly but not be compressed.
Water the orchid immediately after repotting until water runs freely from the drainage holes. This helps the bark settle around the roots and removes air pockets. Let it drain completely—never leave the pot sitting in water. The first watering is critical; you’ll see the bark plump up as it absorbs moisture.
Place the orchid in bright, indirect light (east or north windows work well) and avoid direct sun for 7-10 days. Don’t fertilize for 2-3 weeks—the roots need time to heal. You’ll notice new root growth (bright green tips) within a few weeks, which means your orchid has successfully adjusted to its new pot.
Transplanting orchids becomes much easier when you know these key details that most guides overlook.
Timing is Everything: The 1-2 months after blooming window mentioned in Step 1 isn’t arbitrary—it’s when orchids channel energy into root growth rather than flowers. I’ve found that waiting until you see those silver-green root tips (about the size of a pencil tip) gives you the best results. If you repot during active blooming, you risk shocking the plant and losing flowers prematurely.
Root Inspection Secret: When examining roots in Step 2, don’t just look for black or mushy sections—pay attention to texture. Healthy roots should feel firm, almost like rubber bands. If any roots feel squishy (even if they look okay) or slide off when gently squeezed, they need to be trimmed. I use sterilized scissors dipped in rubbing alcohol between cuts to prevent spreading any potential infections.
Positioning Precision: The 1-inch layer of bark at the bottom of the new pot in Step 3 serves two critical purposes: it improves drainage and elevates the plant so water doesn’t pool at the base. I’ve ruined orchids by skipping this step—water collected at the crown, leading to rot. Make sure this layer is evenly distributed; I use a small spoon to level it before placing the orchid.
Post-Repotting Care: The 7-10 days of indirect light and 2-3 weeks without fertilizer in Step 4 aren’t suggestions—they’re essential for recovery. I place my orchids in an east-facing window where they get gentle morning sun. If you notice the leaves looking slightly limp after repotting, don’t panic—this is normal. The roots are adjusting to their new environment, and the plant will perk up within a week if you maintain consistent moisture.
It’s best to avoid repotting while your orchid is in bloom—wait until the flowers fade. Transplanting during blooming can stress the plant, causing buds to drop. If absolutely necessary, do it gently and keep humidity high to minimize shock. Post-bloom is the safest time!
How do I know if my orchid really needs a bigger pot?
Check for these signs: roots circling the pot’s edges, crowded growth, or roots spilling over the rim. If the potting mix breaks down (smells sour or stays soggy), it’s time. A good rule? Repot every 1–2 years or when roots outgrow the container.
Spring or early summer—when orchids enter active growth—is ideal. Avoid repotting in winter (dormancy) or extreme heat. If your orchid’s roots are rotting, though, act immediately regardless of season. Healthy timing = happier roots!
No! Orchids need fast-draining mixes like bark, sphagnum moss, or coconut husk chips. Regular soil suffocates roots and causes rot. For beginners, pre-mixed orchid potting media (labeled “epiphytic”) is the easiest choice.
Wilting is often from overwatering or root damage. Wait 5–7 days before watering post-repot to let roots heal. Check for loose mix (roots need stability) or sunburn (keep it in indirect light). If leaves stay limp, trim any mushy roots and repot again.
