
Beautiful Plants For Your Interior
Beautiful Plants For Your Interior
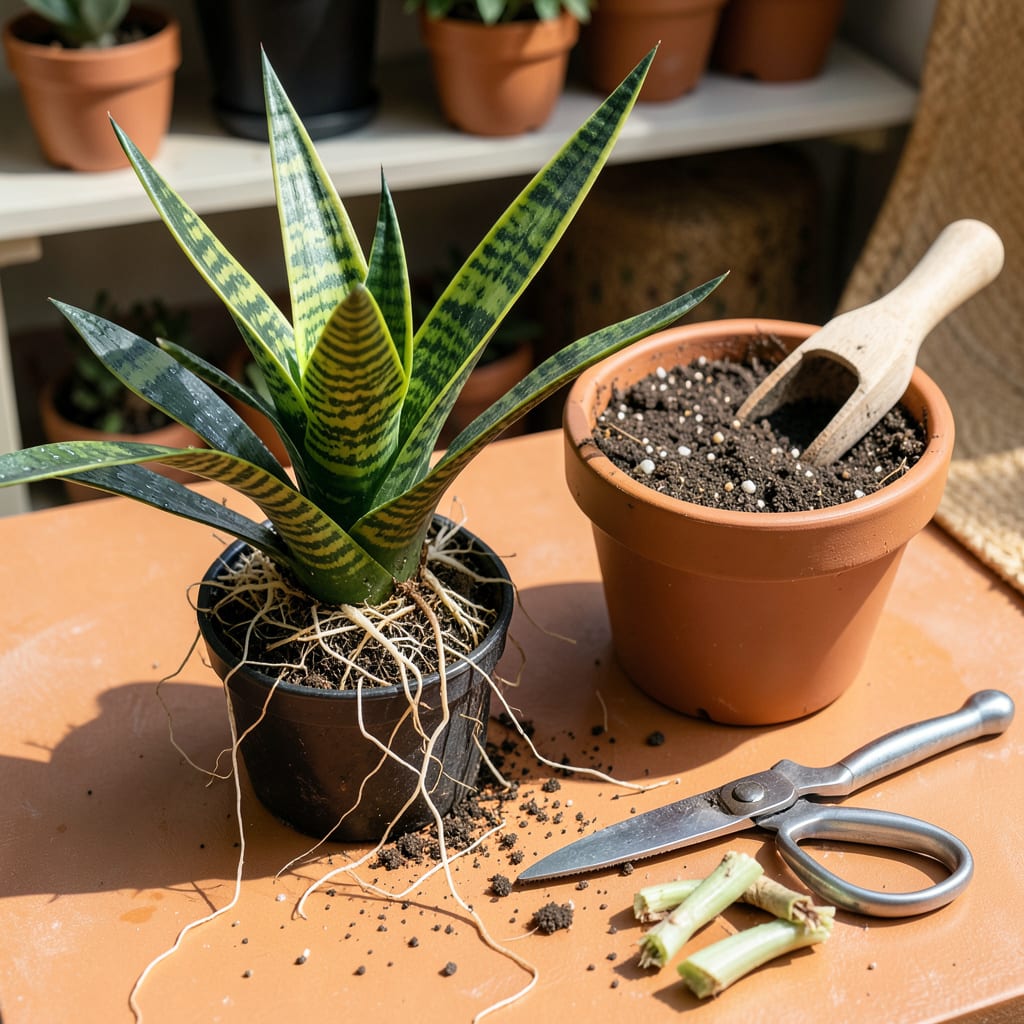
That snake plant you’ve been neglecting? It’s probably begging for a bigger home. Transplanting a mother-in-law’s tongue isn’t just about growth—it’s about giving this tough plant room to show off its full potential. I’ve moved dozens of these indestructible beauties, and the right technique makes all the difference between “surviving” and “thriving.”
You’ll need just three things: a sturdy new pot (only 2 inches wider than the current one), fresh cactus mix, and 10 minutes. The real secret? Handling those thick roots with respect—they store water and hate being manhandled. Do this right, and your plant will reward you with faster growth and those dramatic upright leaves we all love.
📚 In This Guide
This resilient plant forgives many mistakes—but follow these steps and you’ll ensure it thrives in its new home.
Begin by selecting a container that’s 2-3 inches wider than the current pot. Mother-in-law’s tongue (Sansevieria) prefers being slightly root-bound, so don’t oversize. I always choose unglazed terracotta for its breathability—critical for preventing root rot in this drought-tolerant species.
Water the plant 2-3 days before transplanting to hydrate the roots and reduce transplant shock. The soil should feel moist but not soggy when you squeeze it. Gently loosen the root ball by running a clean knife around the inside of the current pot if the plant resists removal.
Carefully slide the plant from its pot by tipping it sideways and supporting the base of the leaves. The root system should appear firm and white—dark, mushy roots indicate overwatering. If you encounter circular root growth (a sign of being pot-bound), make three vertical cuts through the root ball with a clean knife.
This may seem aggressive, but it stimulates new root growth. For severely congested plants, I’ll even separate the rhizomes into individual plants—each section with at least one healthy leaf cluster will establish independently. Shake off old soil gently but don’t wash the roots, which can introduce excess moisture.
Use a well-draining cactus/succulent mix—never standard potting soil. I create my blend with 60% cactus mix and 40% perlite for optimal drainage. Place enough mix in the new container so the plant sits at the same depth as before; burying the rhizome too deep causes rot.
Position the plant centrally, then backfill with your soil mixture. Press lightly to eliminate air pockets, but don’t compact—these roots need oxygen. Leave 1 inch of space between the soil surface and pot rim to accommodate watering without overflow. The plant should feel stable when you tug gently on the leaves.
Wait 5-7 days before watering to allow any damaged roots to callous. When you do water, soak thoroughly until it runs from the drainage holes, then empty the saucer immediately. Place the plant in bright, indirect light for the first two weeks—direct sun on stressed roots can scorch leaves.
Resist fertilizing for 4-6 weeks post-transplant. The fresh soil contains sufficient nutrients, and fertilizing too soon burns recovering roots. You’ll know the plant has adjusted when you see new leaf growth emerging from the center—typically within 6-8 weeks for healthy specimens.
Even this hardy plant benefits from careful handling—here’s what I’ve learned through trial and error.
Root Preparation Insight: The three vertical cuts mentioned in Step 2 aren’t just for show—they’re crucial for breaking up circular root patterns that develop in confined pots. I’ve found that making these cuts at 120-degree angles (like slicing a pie into three sections) gives the best results. This encourages outward root growth rather than continuing the circular pattern that can eventually strangle the plant.
Soil Mix Precision: While the 60% cactus mix and 40% perlite ratio in Step 3 works beautifully, I’ve discovered that adding a handful of coarse horticultural sand improves drainage even further. The key is using coarse sand (not beach sand) to prevent compaction. When testing your mix, it should feel gritty and loose—if you can form a ball that holds together, it’s still too dense for Sansevieria.
Post-Transplant Observation: During the 5-7 day waiting period before watering in Step 4, watch for subtle signs of stress. Slight leaf curling is normal, but if you notice yellowing at the base of leaves, it indicates the roots were damaged more than expected. In this case, extend the waiting period to 10 days before watering—trust me, patience here prevents root rot that can take months to manifest.
Container Selection Nuance: The 2-3 inch size increase recommended in Step 1 is perfect, but material matters more than you might think. Unglazed terracotta is ideal because it wicks away excess moisture, but if you must use plastic, drill additional drainage holes. I once lost a mature plant to root rot in a decorative plastic pot with only one small drainage hole—lesson learned the hard way.
Transplant every 2-3 years or when roots crowd the pot (visible through drainage holes). Younger plants may need annual repotting for faster growth. Spring or early summer is ideal—avoid winter when growth slows. Overpotting? Stick to a container just 1-2 inches larger in diameter.
It’s risky! Cold stress slows recovery, increasing rot or shock risk. If absolutely necessary, keep the plant in warm, bright light (65–75°F) and water sparingly for 4–6 weeks post-transplant. Wait for spring if possible—your plant will thank you!
Drooping usually means shock (too much water, root damage, or temperature swings). Hold off on watering for 5–7 days, ensure bright indirect light, and trim any mushy roots if overwatered. Most plants bounce back in 2–4 weeks—patience is key!
Yes! If your plant is overgrown, propagate by leaf cuttings or division instead. Snip a healthy leaf, let it callous for 24 hours, then plant in soil. For division, separate pups (baby plants) from the mother plant—both methods save you from repotting hassles!
Using dense, moisture-retentive soil (like garden dirt or peat-heavy mixes). Mother-in-law’s tongue hates soggy roots! Opt for a well-draining cactus/succulent mix (add perlite or sand for extra airflow). Pro tip: Never reuse old soil—fresh mix prevents pests and disease.
