
Beautiful Plants For Your Interior
Beautiful Plants For Your Interior
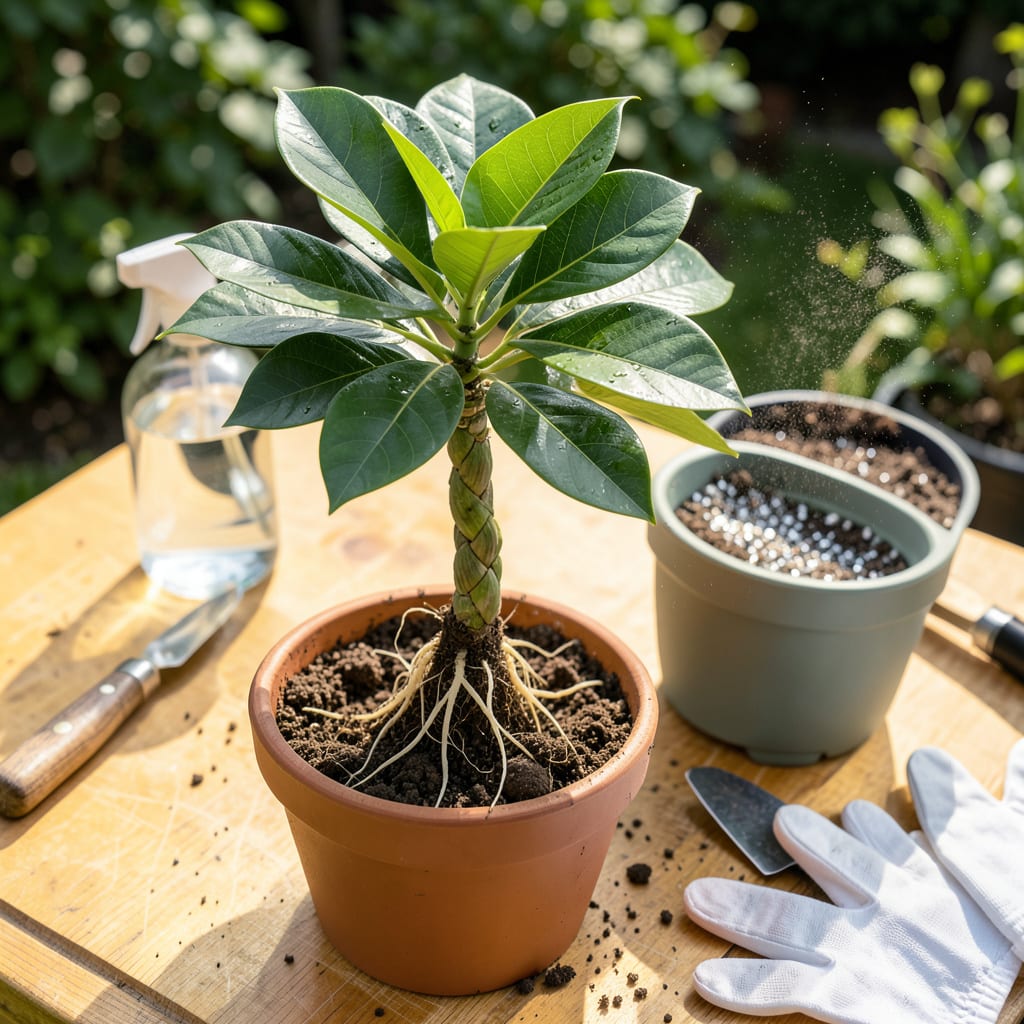
That moment when your money tree’s roots start peeking through the drainage holes? It’s not just growth—it’s a cry for more space. I’ve transplanted dozens of these resilient plants, and the difference between a struggling tree and one that explodes with new leaves comes down to timing and technique. The right pot size, fresh soil, and gentle handling turn what feels like a risky move into your plant’s best growth spurt yet.
You’ll know it’s working when you see new leaves unfurling within 2-3 weeks. No more yellowing edges or stunted growth—just a fuller, happier plant that rewards your effort. The process takes less than 20 minutes with basic supplies, and I’ll walk you through each step so you avoid the common mistakes that set back most beginners. This isn’t just repotting; it’s giving your money tree room to thrive for years.
📚 In This Guide
Moving your money tree doesn’t have to be stressful—follow these proven steps for a smooth transition and continued growth.
Choose a container that’s 2-3 inches wider than the current pot. Money trees prefer snug spaces, so don’t go too large—this prevents overwatering and root rot. I always use pots with drainage holes; if your decorative pot lacks them, place a plain nursery pot inside it.
Fill the new container one-third full with fresh, well-draining potting mix. I recommend a blend containing perlite or sand for aeration. Moisten the soil lightly before transplanting—it should feel damp but not soggy, like a wrung-out sponge. This helps the roots make immediate contact with moisture.
Water your money tree 24 hours before transplanting to hydrate the roots and reduce shock. When ready, turn the pot sideways and tap the edges gently to loosen the root ball. If it resists, run a clean knife around the inner rim to break any suction.
Support the base of the trunk with one hand while sliding the pot off with the other. You’ll feel the root ball release—don’t pull by the stems. Inspect the roots briefly: healthy ones appear white or tan. Dark, mushy roots signal rot, while dry, brittle ones indicate underwatering.
Place the root ball in the new pot so the top sits 1 inch below the rim. This prevents water from spilling over when you water. Add or remove soil beneath the root ball until the height is correct. The goal is to maintain the same soil level as before—burying the trunk too deep can cause rot.
Fill around the root ball with fresh soil, pressing lightly to eliminate air pockets. I use my fingers to gently firm the soil—don’t compact it tightly. Leave a ½-inch gap between the soil surface and pot rim for watering. This gap prevents soil (and potential pathogens) from splashing onto the leaves during watering.
Water thoroughly until it drains from the bottom, then let the excess drain completely. This initial watering settles the soil around the roots. Place the tree in bright, indirect light for the first week—direct sun can stress it during recovery. You’ll notice the leaves may droop slightly at first; this is normal.
Avoid fertilizing for 4-6 weeks after transplanting. The roots need time to establish in the new soil before processing nutrients. Resume your normal care routine once you see new leaf growth, which signals the tree has adjusted. This typically takes 2-3 weeks for a healthy plant.
Check the soil moisture daily for the first week—money trees prefer the top 1-2 inches to dry between waterings. Stick your finger in the soil; if it feels dry at that depth, it’s time to water. Overwatering is the most common issue after transplanting, so when in doubt, wait a day.
Watch for signs of stress: yellowing leaves often indicate overwatering, while brown edges suggest low humidity. If leaves drop, don’t panic—this is the tree’s way of conserving energy. Maintain consistent conditions, and new growth will appear. Within 4-6 weeks, your money tree should be fully established in its new home.
Transplanting can feel intimidating, but these practical insights will help your money tree thrive in its new home.
Root Preparation: The 24-hour pre-watering mentioned in Step 2 is absolutely critical. I’ve found that roots absorb moisture more effectively when the soil is evenly damp—not soggy—before the move. This hydration buffer helps prevent transplant shock, which often shows up as drooping leaves in the first few days. If your plant looks particularly stressed after moving, a light misting of the leaves can help it recover faster.
Pot Selection Wisdom: When choosing that 2-3 inch wider container in Step 1, consider the material too. Terracotta pots breathe better than plastic, helping prevent root rot, but they dry out faster. If you opt for plastic (which I often do for consistency), just be extra mindful about not overwatering during that first week when the plant is adjusting. The drainage holes are non-negotiable—no exceptions!
Soil Level Precision: That 1-inch gap below the rim in Step 3 isn’t just about preventing spills—it’s your early warning system. When you water, you want to see that space fill up before the water starts draining. This visual cue helps prevent overwatering, which is the number one killer of newly transplanted money trees. I like to mark the ideal soil level with a popsicle stick as a reminder while I’m filling in the fresh soil.
Light Transition Tip: The bright, indirect light recommendation in Step 4 is where most people go wrong. “Bright” doesn’t mean direct sun through a window—think of it as the quality of light you’d get reading a book comfortably without squinting. An east-facing window with sheer curtains is ideal. If you only have south or west exposures, pull the plant back 3-4 feet from the window during that first recovery week.
Spring or early summer is ideal —when your money tree is actively growing! Avoid winter or extreme heat, as stress can shock the plant. If repotting due to root-bound issues, act promptly regardless of season, but keep conditions stable (warm temps, indirect light).
Not recommended! Fresh, well-draining soil (like cactus/succulent mix) prevents root rot. Reusing old soil can compact and lack nutrients. If you must, loosen roots gently and add 30% new soil to refresh it. Always sterilize reused pots with bleach water (1:10 ratio).
Watch for these signs: roots circling the pot’s bottom , water draining too quickly, or stunted growth. If it’s top-heavy or leaves yellow despite proper care, it’s likely root-bound. Check every 12–18 months for smaller pots; larger trees can wait 2–3 years.
Try root pruning instead! Trim 20–30% of the root ball (use sterilized shears), then replant in the same pot with fresh soil. This reduces shock and buys time. For mild stress, top-dress with compost or adjust watering before considering a full transplant.
Transplant shock is normal—expect 1–2 weeks of droopiness. Fix it: Keep soil lightly moist (not soggy), avoid direct sun, and mist leaves daily. If wilting persists, check for overwatering or root damage. A clear plastic bag over the plant (ventilated) can boost humidity temporarily.
