
Beautiful Plants For Your Interior
Beautiful Plants For Your Interior
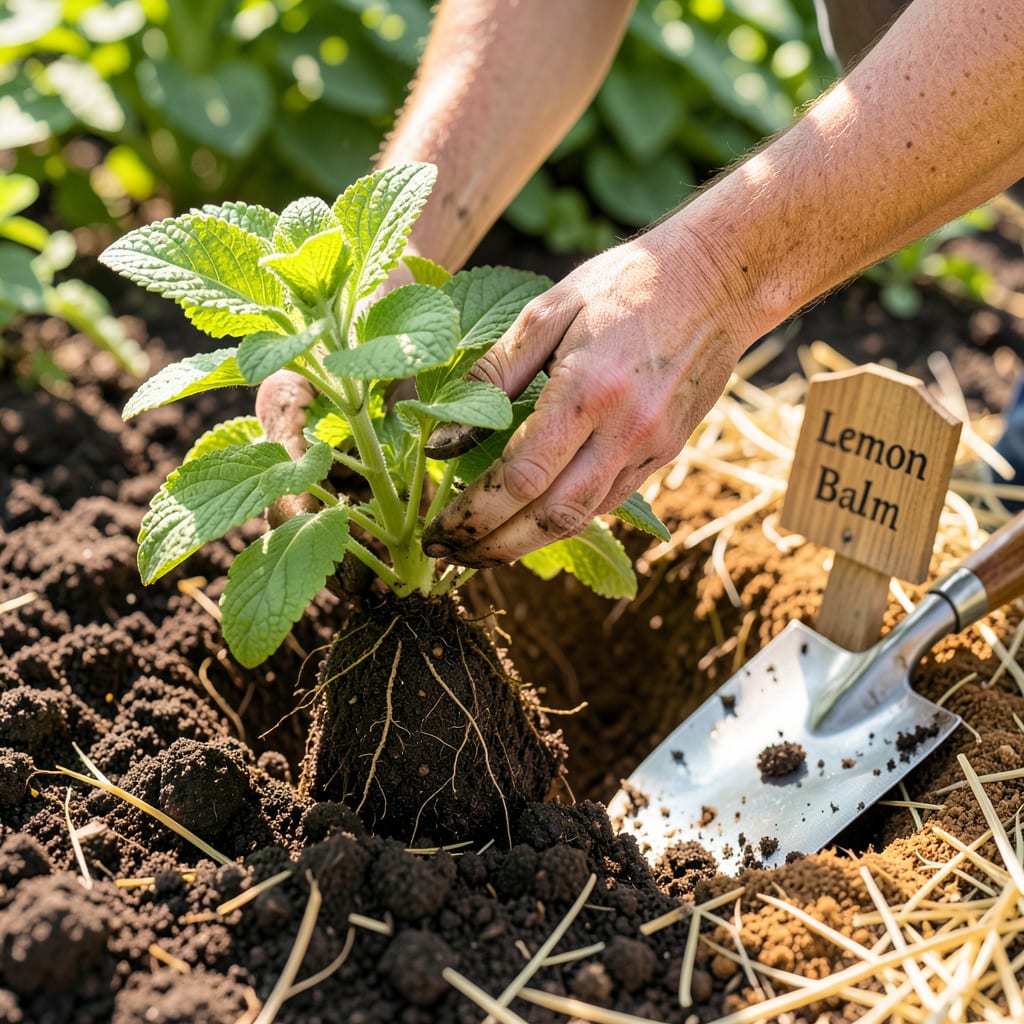
Moving lemon balm feels like giving your favorite plant a fresh start. I’ve transplanted mine three times now, and the key is timing—early spring or fall when the plant’s semi-dormant. Get this right, and you’ll avoid the wilted, shocked leaves that come from moving it during summer’s heat or winter’s chill.
What surprised me most? How quickly it bounces back when you handle the roots gently and give it well-draining soil. Within a week, new growth appears if you’ve picked the right spot—partial shade works best—and kept the soil consistently moist (but never soggy). No fancy tools needed, just a trowel, some compost, and 10 minutes of your time.
📚 In This Guide
Moving your lemon balm doesn’t have to be stressful—here’s how I do it without shocking the plants.
Transplant lemon balm in early spring or early fall when temperatures stay between 60-75°F. Avoid moving plants during summer heat or winter dormancy. The day before transplanting, water your lemon balm deeply until moisture drips from the drainage holes.
I always work in the late afternoon or on a cloudy day to minimize transplant shock. You’ll notice the leaves look perkier after that deep watering—this tells you the roots are fully hydrated and ready for the move. Gently loosen the soil around the plant’s perimeter with your fingers or a hand trowel.
Slide your trowel 4-6 inches away from the plant’s base, angling down to get under the root ball. Lemon balm has a fibrous root system, so you’re aiming to lift the entire root mass intact. If you feel resistance, work your trowel around the plant in a circle before attempting to lift.
Once free, lift the plant by grasping the soil at the base—not the stems. You should see white, healthy roots at the edges of your soil ball. If roots appear dark or mushy, trim those damaged sections with clean scissors. This is normal and actually encourages new growth.
Dig a hole in the new spot that’s twice as wide as the root ball but the same depth. Lemon balm thrives in well-draining soil, so if your garden has heavy clay, mix in some compost or sand. I like to create a small mound at the bottom of the hole for the roots to spread over.
Check that the top of the root ball will sit level with the surrounding soil—planting too deep suffocates the stem. If you’re transplanting to a container, choose one 2-3 inches larger than the current pot. The extra space gives roots room to establish without being overwhelmed.
Place the lemon balm in its new home and backfill with soil, gently pressing to eliminate air pockets. Create a shallow water basin around the plant by mounding soil in a circle 3 inches from the stem. This helps direct water to the roots during the critical first week.
Water immediately until you see moisture emerge at the soil surface. I use about 1 quart of water for each plant, then add a 2-inch layer of mulch to retain moisture. The mulch also prevents soil from crusting, which can block emerging growth. Keep the soil consistently moist (but not soggy) for the first 7-10 days.
Check your transplanted lemon balm daily for the first week. Wilting in the afternoon is normal, but if leaves stay droopy in the morning, the plant needs more water. I’ve found that a light shade cloth during the hottest part of the day reduces stress significantly.
After 2-3 weeks, you’ll see new growth—this means the transplant was successful. At this point, you can resume normal care. If you notice yellowing leaves, don’t panic; it’s just the plant redirecting energy to root development. Simply trim those leaves away to keep the plant looking tidy.
Transplanting herbs can feel intimidating, but these practical insights will help your lemon balm thrive in its new home.
Timing is Everything: The 60-75°F temperature range mentioned in Step 1 isn’t just a suggestion—it’s critical for success. I’ve learned the hard way that transplanting when nighttime temperatures dip below 50°F can cause serious shock. Use a soil thermometer if you’re unsure, and remember that late afternoon planting gives roots overnight to settle before facing morning sun.
Root Handling Technique: When you’re working through Step 2, here’s what nobody tells you: the white, healthy roots you’re looking for should be firm but flexible. If they snap when gently bent, the plant needs more water before moving. I keep a spray bottle handy to mist roots if they start drying out during the process. This small step makes a surprising difference in recovery time.
Watering Wisdom: That 1 quart of water in Step 4 isn’t arbitrary—it’s calculated to saturate the root ball without waterlogging. Here’s my trick: after watering, wait 5 minutes, then check moisture 2 inches deep. If it’s dry, add another cup. The 2-inch mulch layer isn’t just for moisture retention; it also regulates soil temperature, which is especially important during those first 7-10 days when roots are vulnerable.
Establishment Period Insight: During the 2-3 weeks mentioned in Step 5, resist the urge to fertilize. I know it’s tempting to “help” the plant, but new roots are delicate and can burn easily. Instead, focus on consistent moisture and protection from direct sun. If you notice the plant isn’t perking up overnight after that first week, don’t panic—some varieties just take longer to establish their root systems.
Spring or early fall is ideal—when temps are mild (50–70°F) and plants aren’t stressed by heat or frost. Avoid summer’s peak heat or winter dormancy. If you must move it in summer, water deeply before/after and provide shade for a week.
Watch for wilted leaves, yellowing, or drooping stems—classic transplant shock signs. Check soil moisture (dry or soggy?) and trim damaged foliage to redirect energy. Most plants bounce back in 1–2 weeks with consistent watering and partial shade.
You can do either! Moving the whole clump works for small plants, but dividing (every 2–3 years) prevents overcrowding and gives you free plants. Use a sharp spade to split the root ball into 3–4 sections, each with healthy shoots and roots.
Lemon balm thrives in well-draining, moderately rich soil (pH 6.0–7.5). Mix 60% garden soil with 40% compost or aged manure. Add perlite or sand if your soil is heavy clay. Avoid overly fertile soil—it can reduce the leaves’ signature lemony flavor!
Choose a 12″+ deep pot with drainage holes and use the same soil mix as in-ground planting. Containers dry out faster, so water when the top inch of soil feels dry. Bonus: Potted lemon balm lets you move it indoors before frost for year-round harvests!
